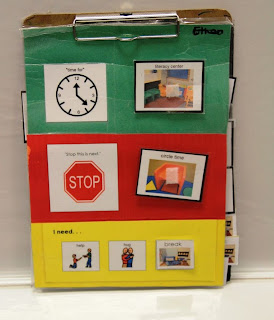
Several of our students have been successful on a very simple "First Then Visual Schedule". Because its success, I want to share the process with you. We typically use the color green as "First" to symbolize green for go and red for "Then" to symbolize red for stop and think what is next.
Often, we add a "Stop" visual near the "Then" to remind students that it's the next activity.
When we first start teaching the process, we create a schedule that begins with a non-preferred task, followed by a preferred task so the child develops a pattern to become successful. The first non-preferred task is very short and has a well-defined conclusion like completing a puzzle, doing a put-in task or putting shapes into a shape sorter.
The preferred task is a longer activity like playing outdoors, working on the iPad or playing with a favorite toy. We attach the First Then chart to a clipboard. On the wooden part of the clipboard behind the schedule, we add a piece of sticky felt. (Teacher's Tip: You can usually find sticky felt at Wal-Mart or Hobby Lobby). On the felt, we place all the icons or pictures of the child’s schedule.
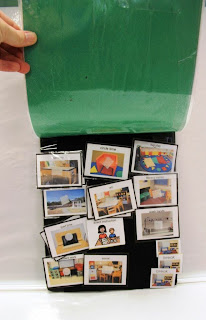
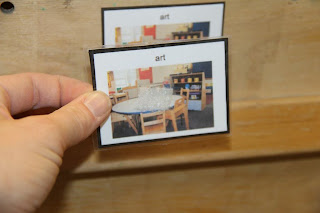
Depending on the student, the schedule may be in random or exact order. Either way gives the student a visual of how much work they must do before going home. As the students move from one activity to the next, they place their icons on a picture posted by that center or activity.
When all the day's tasks are complete & the icons are removed from the clipboard, the student knows it is time to go home. It also prepares them for highly preferred and non-preferred activities. For example, one of our little guys will ask repeatedly “Go outside? Go outside?”. By having the outside icon on his schedule under the First Then chart, we can simply pull up the chart and respond, "Yes, you will go outside later. Look it is on your schedule.".

When we first start teaching the process, we create a schedule that begins with a non-preferred task, followed by a preferred task so the child develops a pattern to become successful. The first non-preferred task is very short and has a well-defined conclusion like completing a puzzle, doing a put-in task or putting shapes into a shape sorter.
The preferred task is a longer activity like playing outdoors, working on the iPad or playing with a favorite toy. We attach the First Then chart to a clipboard. On the wooden part of the clipboard behind the schedule, we add a piece of sticky felt. (Teacher's Tip: You can usually find sticky felt at Wal-Mart or Hobby Lobby). On the felt, we place all the icons or pictures of the child’s schedule.


When all the day's tasks are complete & the icons are removed from the clipboard, the student knows it is time to go home. It also prepares them for highly preferred and non-preferred activities. For example, one of our little guys will ask repeatedly “Go outside? Go outside?”. By having the outside icon on his schedule under the First Then chart, we can simply pull up the chart and respond, "Yes, you will go outside later. Look it is on your schedule.".
You may wonder why use a First Then clipboard schedule instead of a wall schedule that represents the child’s full day. Well...for several reasons, a First Then schedule is a precursor to a wall schedule. It is for students who are just learning to get instruction from visuals. Unlike a wall schedule, the First Then clipboard can be carried by the child everywhere he or she goes. That's a nice feature for students who have a hard time with transitions and/or get distracted easily.
Two added features on this First Then schedule are an aided-language board and the request for a break icon. The aided-language board gives the students language to communicate they are upset, along with sharing their likes or dislikes.
We find by having the words on the schedule students are more likely to use words when upset with a transition rather than becoming physical. We have more or less words on the page depending on the student’s level. The words featured on the schedule at the top of this post are very simple: "I need help.", "I need a hug.", or "I need a break.".
Here’s a picture of an aided-language board used by another student who has more complex language abilities.
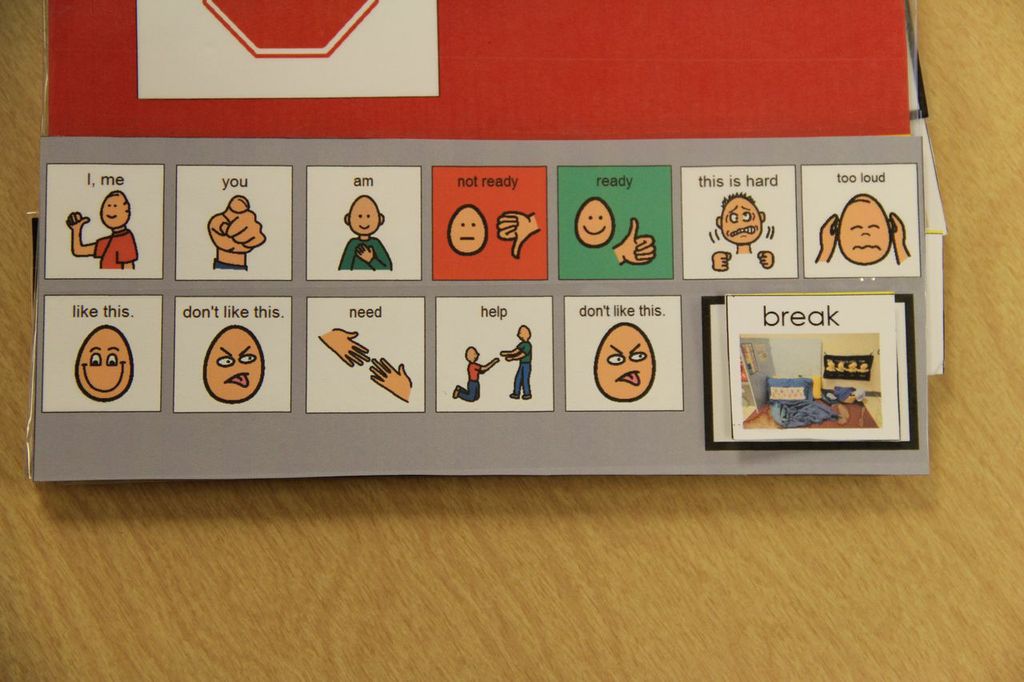
For example, he can say “I don’t like this.”, “I am not ready.” ,“It is too loud.” or even “I need a break.”
That leads me to this key feature...the "I need a break." icon. This icon is always available to the students. They can take the icon and match it to the same icon in the break area. It teaches students to request a break and supports staff in honoring the break each time it's requested.
Over time we may limit the number of breaks a student can take by only providing a certain number of break icons. In the above example, the child may only take three breaks throughout the school day.

No comments:
Post a Comment