Hello, Everyone!! Remember a few months ago when I gave you a tour of each of the activities and centers in our classroom?? Well...I'm back at it again! I apologize for my delay in sharing these with you. My recent excitement for successful large groups has kept me busy lately. :) (Don’t fear we will still have Mrs. Lisa Holt’s feature on low tech large group options coming up for a future Thumbs Up Thursday post. )
There is so much to share and so little TIME to prepare it! So let’s jump right in with a video of our pretend play center.
There is so much to share and so little TIME to prepare it! So let’s jump right in with a video of our pretend play center.
As I mentioned in the video, this was just one example of a pretend play themed center. We have also done places like a restaurant, doctor’s office, grocery store, fire station, school, and dentist office (...the possibilities are endless!). Click here to take a look at our vet clinic center as shared in a previous post. Coming soon... an inside look at our birthday and grocery store centers!!
For now, here's a closer look at a few of the features mentioned in the video. First, here are the name tag descriptions specific to "Gingerbread Bakery".
.jpg)
.jpg)
I usually make similar name tags for any pretend play center that has defined roles. They really help our kids understand how to play and contribute to their peers' play in a specific manner. When I was a Head Start teacher, this skill came naturally to most kids and was transferred by those early adopters to the students who didn’t understand the roles. I am sure all you teachers are quite familiar with this!
One little girl or group of girls assign themselves as the mommy/mommies. Then they assign the daddy, the big sister, the baby, etc. You can find the Gingerbread Bakery name tags as well as the Bakery Aided Language Menu on Boardmaker Share. Teacher's Tip: One quick suggestion for getting more language and functional pretend baking skills is to use the Melissa and Doug Cookie Set. It's perfect for a bakery center!
Here are the felt placemats and velcro place settings used to structure setting up the table.
.jpg)
Prior to this modification, so many of our students would dump the container of plates and cups on the floor with no purpose other than to make a mess or spin the plates in a stimming fashion.
Instructor's Insight: The thing that makes this system most successful is that I only have the correct number of plates, cups, forks, spoons and knives needed to set the table. Remember less is more! If you have extras available, the students will not know what to do. Later in the year, I could potentially add more and help the kids learn to make decisions like what colors they want to set the table with.
Instructor's Insight: The thing that makes this system most successful is that I only have the correct number of plates, cups, forks, spoons and knives needed to set the table. Remember less is more! If you have extras available, the students will not know what to do. Later in the year, I could potentially add more and help the kids learn to make decisions like what colors they want to set the table with.
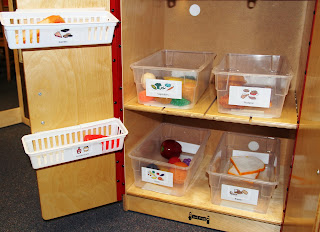
This is our record player unit repurposed to be a refrigerator. It's complete with a functional food group sorting.
.jpg)
.jpg)
Notice I labeled each container with pictures of food from that food group as most preschoolers do not know the difference between a fruit and a vegetable or what foods are protein or dairy, etc. The visuals and sorting of this activity can help with that knowledge! You can access these labels at my teacher pay teachers store.
Also food for thought (no pun intended), you may consider removing the wheels on the furniture in your pretend play center. Most preschool furniture comes with wheels so staff can move it easily. But in our classroom, we have removed all wheels as they simply invite the children to push furniture when they become upset.
Next, we have our dress up clothing drawers. They are a great way for kids to work on gender sorting and understanding. These can also be found in the set on my teachers pay teacher store.
.jpg)
You may have noticed in the video that the drawers were empty. Again, remember LESS is MORE! If we are doing a unit that does not include dress ups, we make sure the drawers are empty so the kids can focus on the center-specific activities set up for them.
Teacher's Tip: I also use packing tape to close our pretend play washer & dryer doors most of the year unless the kids are doing typical house play. If the doors are open, the kids open and close them in a stimming fashion or simply stuff materials in them in a nonfunctional manner.
Teacher's Tip: I also use packing tape to close our pretend play washer & dryer doors most of the year unless the kids are doing typical house play. If the doors are open, the kids open and close them in a stimming fashion or simply stuff materials in them in a nonfunctional manner.
One more thing...the latest & greatest feature of the pretend play center are functional work tasks related to the center for lower-level students. These were inspired by a Facetime consultation I had with the ladies at Jackson Public School in Missouri. They put pretend play worktasks in their house center. Brilliant...I love/stole it! Thanks for the idea, Ladies.
Here is a look at our functional house-related pretend play worktasks. They are all stored in this container.

Here is a look at our functional house-related pretend play worktasks. They are all stored in this container.

Notice it says "Ask a teacher to use." on the outside. This helps us set limits. We can use the worktasks with students at our discretion to reassure systematic usage and learning. If we gave the students free reign of these materials, they may or may not use them functionally.
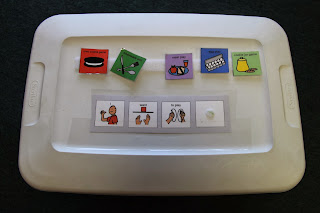
On the lid of the container, there's a communication system for students to pick what they want to play with.
.jpg)
.jpg)
And now for a closer look at each activity...
Here is theFisher-Price Oreo Game.

My husband cut a slit in the lid of this game so it can be used as a simple put in task for lower-level kids. Higher kids can find the shape matches and then put them in. The slit really helps organize the kids play because they have a specific place for matches and do not spin, throw, or stim on them.

My husband cut a slit in the lid of this game so it can be used as a simple put in task for lower-level kids. Higher kids can find the shape matches and then put them in. The slit really helps organize the kids play because they have a specific place for matches and do not spin, throw, or stim on them.
Here is the Egg Shape Game.

I got my set from US TOYS. If you don’t have a set and don’t want to spend the money, you could make a color matching egg task with plastic Easter eggs and a egg carton instead.

I got my set from US TOYS. If you don’t have a set and don’t want to spend the money, you could make a color matching egg task with plastic Easter eggs and a egg carton instead.
Here is our Silverware Sort. If you are worried about having real utensils in your pretend play center, you could use pretend ones. That may reduce noise as well!! :)


Here is our Number Cookie Jar. I purchased it from Discount School Supply several years ago. Back then, I just superglued magnets on the back of the cookies and programmed them to match the numbers on stove covers.

Money-Saving Thought: Stove covers are 2 or 4 for a dollar at Dollar Tree. They are great for all sorts of magnet games!
Also note, I did not purchase any of these items specific for our pretend play worktasks. I just looked around at what I had and made tasks out of that. Please don’t feel you need to make ones just like mine. Look around see what you have and make something from what you already have! Get creative.
Here is our last one...a Food Making Task. It is my favorite!

I simply took pretend food and superglued velcro to it to structure making a hamburger, hot dog, bologna sandwich and PB&J. Then I made a social story system for the assembly of each one.


You can access this story on Boardmaker Online or an updated version as well as a dress up story in my teachers pay teachers store . The kids love it!
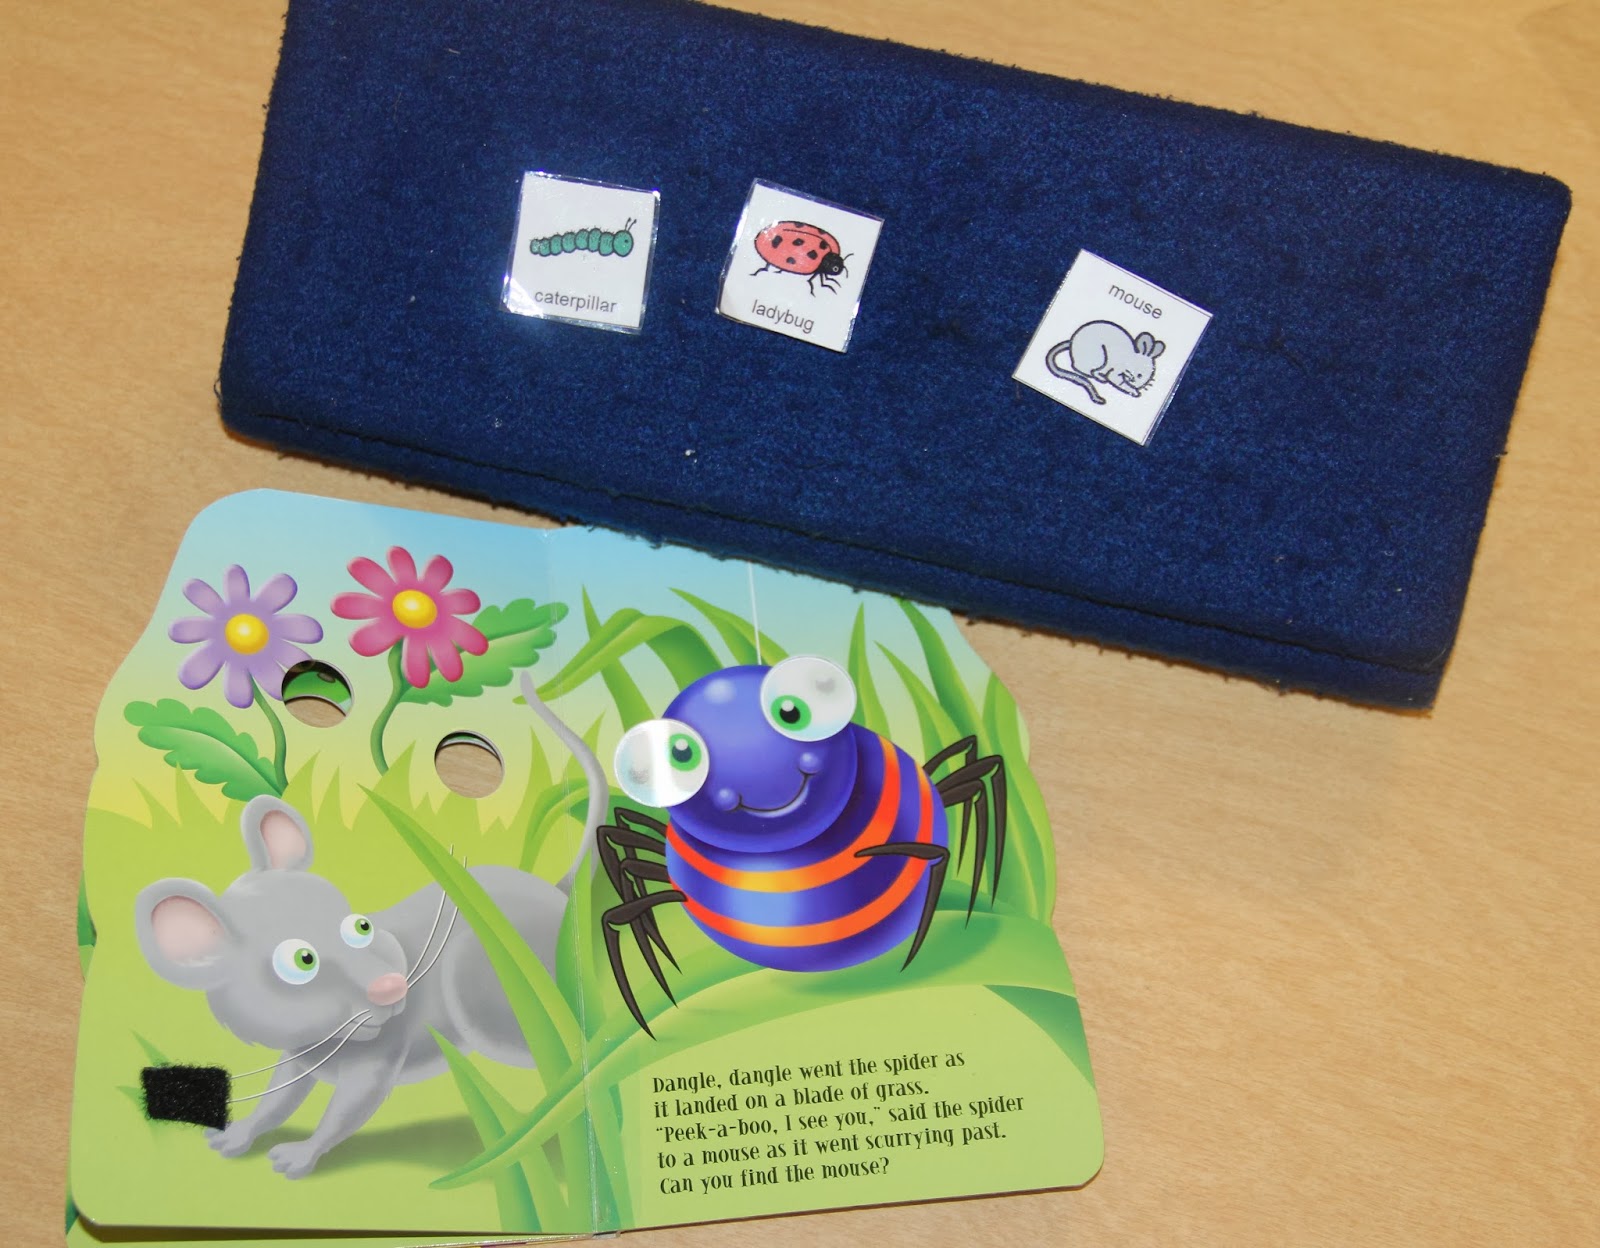
You can also access the baby doll social story on Boardmaker Online. Here is a closer look at that task.

It is stored inside the baby drawer for use and practice at the pretend play center regardless of what our pretend theme is. The repetition of it is really helpful for our little ones who just started playing pretend!

It is stored inside the baby drawer for use and practice at the pretend play center regardless of what our pretend theme is. The repetition of it is really helpful for our little ones who just started playing pretend!
One last tip before I sign off...something we added last year that has really added structure and defined space is the door below.

I simply used butcher paper to make a pretend door. Then, I added a cabinet handle, a welcome sign from Dollar Tree, and a "Yes We’re Open/Sorry, We’re Closed sign. With the pretend play center being such a fun one, it really helps our kids to have the door so they know when it is off limits.
This year we also added this visual.

It reminds our students to not take pretend play stuff out of the center. That is a tough skill for one particular student as she likes to roam around the classroom with dress up clothes or baby dolls.
That is it for now. Until next time, think about how you can unleash your students' imaginations. Your pretend play center is an excellent place to start!! :)
.jpg&description=Building%20Functional%20Pretend%20Play%20Centers)


