As previously promised, today I am sharing how the Direct Instruction area works in our classroom. The Direct Instruction area is where I work one-on-one with a student to achieve the individual goals for that child. I created this area in my classroom after attending a training on "Structured Teaching" several years ago.
Structured Teaching derives from the TEACCH (Treatment and Education of Autistic and other related Handicapped Children) out of North Carolina. The program was developed to support children with Autism in becoming more productive and independent. However, I have seen phenomenal benefits in using the program with all of my students.
Here is a video that demonstrates how Direct Instruction is organized in my classroom.
As mentioned in the video, I use a chart with the students' names and the task numbers each student needs to work on as the lesson plan that drives instruction. I have created an example using my sons. Here is a picture of what their chart looks like.


I use packing tape to adhere the chart to the table. Then, use a pencil to write what each student is work on. This allows me to simply erase and write new task boxes as needed. Click here to access a printable copy of the chart.
The next video shows Payton, my youngest son, using task boxes to promote his individual skills. In full mommy disclosure, the intention of this video is partly "Parent Pride", but mostly to share the success of organized one-on-one teacher time (or in this case mommy time)!!
Payton is 2 years-old. He has never experienced any of these tasks or the system before. The simple organization of tasks made him successful on the first try. Now given, he is a ‘typically’ developing two year-old and some of the students that use the system do not have his ability or attention span. In those cases, I must work harder to keep the child's attention and support his/her success. Task boxes are a relatively simple solution to develop the skills and attention it requires to be successful at a particular task.
Payton is 2 years-old. He has never experienced any of these tasks or the system before. The simple organization of tasks made him successful on the first try. Now given, he is a ‘typically’ developing two year-old and some of the students that use the system do not have his ability or attention span. In those cases, I must work harder to keep the child's attention and support his/her success. Task boxes are a relatively simple solution to develop the skills and attention it requires to be successful at a particular task.
With our lower level learners, the focus of Direct Instruction is to teach each child the skills needed to learn. We focus on things like sitting quietly, attending to the task at hand, complying with teacher directives, imitating and using waiting hands. As modeled in the video, task boxes are a great way to start working on these skills as well as other early learning concepts.
As you may recall from previous blogs, I store my task boxes by topic in clear plastic shoe boxes. Teacher's Tip: Reading Kimberly Henry’s book, How do I Teach this Kid?, and other task books by Task Galore, will help you build your task box library.
Now moving on to a video clip of EJ, my older son, and I modeling direct instruction using higher level tasks and an individual binder.
As you can tell from the video, EJ was able to perform and attend to more work. He was able to work on paper and pencil tasks that share his knowledge of skills and prepare him for kindergarten curriculum.
Here is a closer look at my master binder of worksheets.

There are five copies of each worksheet. All contained in a page protector. As you saw in the video, I simply pull out a copy of the desired worksheet and have it readily accessible.
Several of the worksheets in the binder come from three early learning concepts books I bought through our Scholastic book order points several years back. The other worksheets included in the binder were my own personal creations. They are leveled worksheets that work on color matching and sorting, among other skills. The importance of making them leveled is to present them to each child in an errorless fashion. For example on the first level of "Circle Yellow, all the objects on the page are yellow.


As the student gains an understanding of the color yellow, I move on to circle yellow where not all the items on the page are yellow.

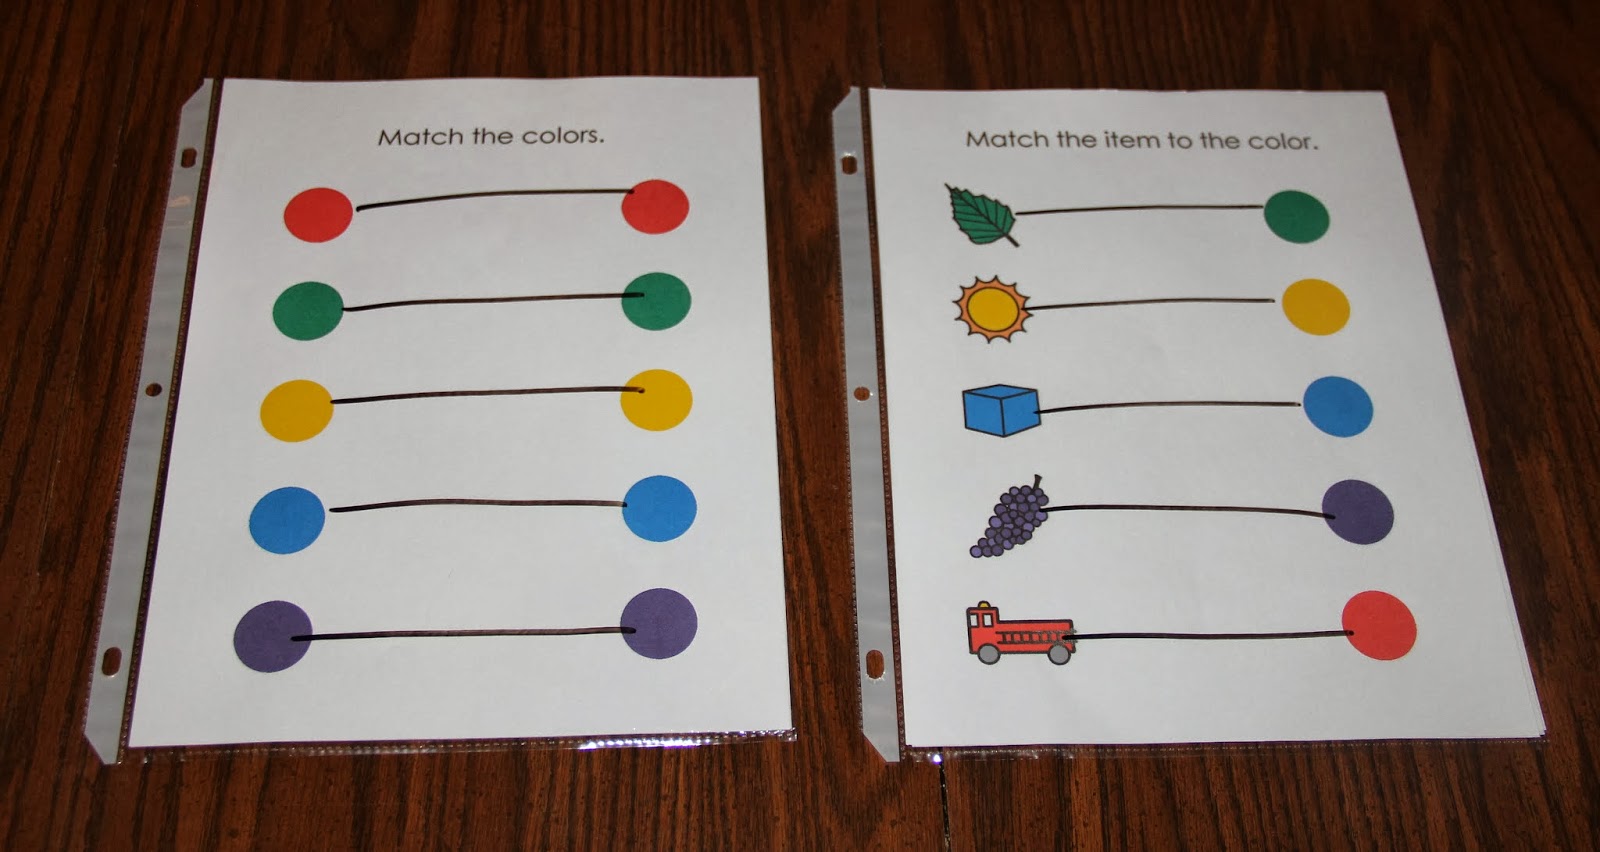
Here is another example of a leveled worksheet. This one is matching colors where the corresponding color is across from the item. The higher level concept requires the student to make a diagonal line to the correct match. To receive copies of my errorless learning level worksheets, email me or find me on Boardmaker Share.


They continue to be a work in progress as I create more when I see specific needs for specific students. For instance, just last week I noticed a student having trouble differentiating between happy and sad. As a result, I developed this set of worksheets. Here, the student is to circle happy with all the photos on the page being images of happy children. Then at a higher level version, the student is to find the happy faces amongst the mixture of happy & sad images.


Please note that in order to do worksheets at Direct Instruction, the student needs basic writing skills. Often times, I start my worksheet system by simply teaching my students how to make lines and circles so they can advance and use those skills to share what they know about other early learning concepts.

Regardless of the child’s level, each one participates in Direct Instruction whether it be doing 6 put-in tasks, 6 concept worksheets, or a combination of worksheets and task boxes. Sometimes, it simply takes us as teachers to think outside the box and find tasks that motivate and speak to each individual child!!
Best wishes in your endeavors to grow and organize your Direct Instruction area. And remember, I'm always here if you get stuck! Tune in next week to see how I transition mastered tasks and worksheets to our independent work area.

Thanks for sharing your great ideas.
ReplyDeleteI saw this video the children were making the sketch and that is very amazing it give them some students who are also course takers online to cover some courses while staying from the home.
DeleteI wanted to know. Are you able to work with all students everyday? I have 10 students now and working with all of them within the 1 hour of rotations is very difficult especially when they are easily distracted by one another. Also, i dont remember if i read this or not so this is why i ask but i read about your rotations and was wondering in the 20 minutes do you stay only at teacher or do you rotate the students as soon as they finish work to a different center? Thank you. Just trying to figure out how to best do rotations and it seems you have a great setup.
ReplyDeleteBe watching for tomorrow's post it will help you understand a little bit more about how it all works!
DeleteThe writer of this blog is really very professional. Every single line of this article is well written. New use of vocabulary is a great effort. At the same time tense, indirect speech was also sued in good manner.เรียน ielts
ReplyDeleteThanks for sharing your thoughts with us. It is a nice impressive content. Great post. I surely will share this post. Now its time to avail Best 10 seat minibus hire in Dartford for more information.
ReplyDelete