When our afternoon students came back from Thanksgiving break, we quickly realized we needed some back up to reinforce and support good behavior to survive until Christmas break. Not only were they feeling the Christmas spirit but they were also "outside time" deprived as we hit a patch of bitterly cold weather. Sadly, there was no outside insight!
So as I frantically searched my toolbox of ideas, I remembered the class treasure box intervention we did last spring. It worked like a charm then so I began tweaking it for this group of kids’ needs. I decide this group of children needed something more individualized. Hopefully by this spring we will be able to work toward a class goal but at this point we are just not ready for that. We needed something that made every student accountable for their actions and aware of what they needed to work on and do to be a good friend, listener, and participant in the school setting.
I used each child’s IEP goals and my own observations of their behaviors to decide what each child would be working on: listening to the teacher, waiting hands, following directions, etc. I took the top two or three needs for each student and made visuals for them that would then be added to their individual schedules. I then added reindeer to each child’s schedule. With the idea being that each child needed to earn 12 reindeer in order to get Santa’s surprise at the end of the day.
The students could earn reindeer at the end of every activity. There are actually 14 activities each day. This helps the kids know they still have a chance to earn Santa surprise even if they don’t earn a reindeer or two. Kids make mistakes (just like adults). After all, we are only human! :) We don’t want a student to lose their first reindeer of the day and then give up for the rest of the day. What we do want is for the student to be aware and accountable for their mistakes so they can learn from them.
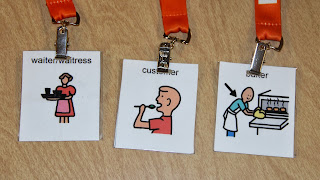
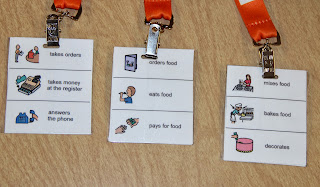
Here is a look at each individual system. The individualization of each system at every child’s own level is what makes Santa’s Surprise successful for the whole classroom. System one is a name tag system that simply shows the students where they need to go and in what order.
 |
| Front |
 |
| Back |
Beside each activity there is a reindeer. If it is earned, staff circle the reindeer with a visavis marker at the end of each activity. If they did not earn their reindeer, staff write an X over the reindeer and then show the student what skill they struggled with at the bottom of their schedule. This helps students become aware and learn from their behavior. This system is the easiest to manage and is used by most of our students. We use a name tag for this schedule as it helps the students be responsible for themselves. They attach the name tag to their shirts and are accountable for its use the whole day.
Over the years, I have realized that if I have students on a schedule that makes sense and means something to them, they will take responsibility for it and become completely independent with it because it becomes important to them.
Teacher's Tip: Our name tag schedules are in Ziploc name tag covers. I found these at our local office supply store and I love them! They are a little more durable than typical name tags and they can be sealed shut so the kids don’t get water on them while washing their hands or playing at the sand table. I keep a few extra schedules on hand so if I have a change in schedule or a kid is out sick I can adjust the students' schedules to be with different children or do activities in a different order.
This schedule was designed for one of my little guys whom really needs movement, especially with limited outside time during colder weather. We tried the name tag schedule for him but he took it off and chewed on it or threw it so we needed to adapt the concept. Therefore, we mounted a velcro wall schedule with a library pocket for tickets. Each time he is presented a ticket, he knows he must walk to his schedule, put the ticket in and pull of the next icon on his schedule.
At first this took a little extra training as he envisioned the icon schedule as a choice board and he would try to take the icons for the activities he enjoys first. But with a few gestures and prompts to redirect him, he figured it out and got the movement he needed by going to and from his wall schedule between activities. Note that the tickets he puts in his library pocket are ‘reindeer’ tickets. At the end of the day, he counts his reindeer tickets to see if he gets Santa’s surprise.
At first this took a little extra training as he envisioned the icon schedule as a choice board and he would try to take the icons for the activities he enjoys first. But with a few gestures and prompts to redirect him, he figured it out and got the movement he needed by going to and from his wall schedule between activities. Note that the tickets he puts in his library pocket are ‘reindeer’ tickets. At the end of the day, he counts his reindeer tickets to see if he gets Santa’s surprise.
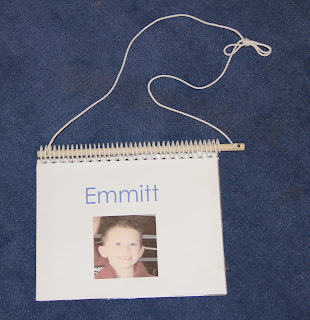
This next schedule was designed way before Santa’s Surprise was created. It is a flip schedule that really speaks to another student. Remember I said I know I have the right schedule if the child takes responsibility for the schedule. Well, this is definitely the case for another little guy. He carries his flip schedule around like it is his most prized possession. He is a student who is always seeking power and control so originally the schedule had a small key velcroed to the last page. If the student made it through all his activities for the day, he was able to open a locked box with small surprises in it for himself and his class at the end of the day. This really spoke to him as he felt he had control. It was also very reinforcing because if he didn’t complete all his activities for the day the key was removed and his peers would get the surprise in the box (fruit snacks, goldfish, stickers, etc) and he would not.
When Santa’s Surprise began we simply added Velcro to each flip page in this schedule. On the velcro, we put mini reindeer. As the student completed each activity, he would move the reindeer to the last page of his schedule to be counted at the end of the day.
In theory this worked beautifully...but in reality, this student had his own plan and would move the reindeer back and forth from page to page, not really understanding the concept of "earning" reindeer. So instead we taped reindeer to each page and vis-à-vis marked each one he earned rather than moving them to the last page. In the end, the system worked and the student was able to participate in Santa’s surprise. :)
Finally, I have saved the best, or in this case most complicated, for last! This student uses a DVD case schedule. As all of you know working in special education, not one technique works for every child and no two students are alike. That's what makes our jobs challenging, exciting, and frustrating all at the same time!
Anyway the little guy that uses this schedule has some pretty significant needs, as well as a very short attention span. My staff and I knew reindeer tickets or a reindeer name tag was not going to cut it. He needed something more. Something where he was reinforced for good behavior on a more regular basis...say every 10 minutes! His schedule was actually also developed long before Reindeer Reinforcement and Santa's Surprises.
Anyway the little guy that uses this schedule has some pretty significant needs, as well as a very short attention span. My staff and I knew reindeer tickets or a reindeer name tag was not going to cut it. He needed something more. Something where he was reinforced for good behavior on a more regular basis...say every 10 minutes! His schedule was actually also developed long before Reindeer Reinforcement and Santa's Surprises.
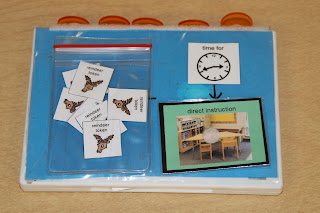
The front of his schedule was simply a "time for" icon and then a Velcro spot to add an icon for his next activity. When we started the Reindeer Reinforcement, I simply moved the "time for" icon over and added a Ziploc pouch for the student to earn reindeer each time he transitioned to a new activity.
This particular student has the most difficult time with transitions that is why one of his goals is to ‘walk to where I need to be’. He actually earns his reindeer for transitioning to each activity successfully. Then while at each activity he works for one of 5 preferred choices. He chooses between playing on the iPad, getting five mini m&m's, playing a mini basketball game, playing live angry birds (where he tries to knock down cardboard blocks with a stuffed animal angry bird), or playing a soccer game on my iPhone.
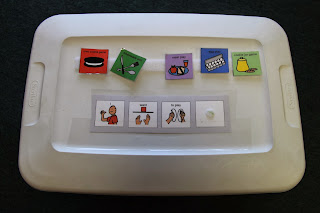
On the back of his schedule is a place to put an icon representing what he wants to work for, the rules he needs to follow to earn it and then five token spots he must earn to receive his preferred item.
The beauty of this schedule is that all his preferred items are in one small area in the classroom. Each time he earns one, he is asked to match the icon to the preferred items in that area. Then, he can play with the preferred item.
When his time with the preferred item is over (usually 1 to 2 minutes later), he makes his next choice of what to work for and puts it on the reinforcement side of his schedule. Staff then flips the schedule over and asks him to go to the next activity. In turn making him practice the skill of transitioning twice as much as his peers by transitioning to and from activities and to and from his preferred choice area.
It works like a charm most of the time and puts him in a movement pattern of successful transitions and errorless movement. Are you a bit perplexed? Click on to this video of my son and I reenacting the use of this schedule and reinforcement system. In practice it is actually quite simple and very effective!
All of his schedule icons and reindeer reinforcers are velcroed inside his DVD case schedule.
THANK YOU to DIXIE TEETER for the great idea of using a DVD case as a reinforcement system!
This particular student has the most difficult time with transitions that is why one of his goals is to ‘walk to where I need to be’. He actually earns his reindeer for transitioning to each activity successfully. Then while at each activity he works for one of 5 preferred choices. He chooses between playing on the iPad, getting five mini m&m's, playing a mini basketball game, playing live angry birds (where he tries to knock down cardboard blocks with a stuffed animal angry bird), or playing a soccer game on my iPhone.
On the back of his schedule is a place to put an icon representing what he wants to work for, the rules he needs to follow to earn it and then five token spots he must earn to receive his preferred item.
The beauty of this schedule is that all his preferred items are in one small area in the classroom. Each time he earns one, he is asked to match the icon to the preferred items in that area. Then, he can play with the preferred item.
When his time with the preferred item is over (usually 1 to 2 minutes later), he makes his next choice of what to work for and puts it on the reinforcement side of his schedule. Staff then flips the schedule over and asks him to go to the next activity. In turn making him practice the skill of transitioning twice as much as his peers by transitioning to and from activities and to and from his preferred choice area.
It works like a charm most of the time and puts him in a movement pattern of successful transitions and errorless movement. Are you a bit perplexed? Click on to this video of my son and I reenacting the use of this schedule and reinforcement system. In practice it is actually quite simple and very effective!
THANK YOU to DIXIE TEETER for the great idea of using a DVD case as a reinforcement system!
Putting It all Together
Okay, now that you have seen an inside look at each schedule and Reindeer Reinforcement System, I want to share a little bit about the end of our school day and how the kids earn Santa’s Surprise. During our last circle time of the day, all the students bring their systems with them. Staff members then help the students count up how many reindeer they earned and circle that amount on their Santa ticket.
The students need twelve reindeer to be circled in order to get Santa’s Surprise. Remember there is actually the possibility of earning 14. If all twelve reindeer are circled on the ticket, then they circle "yes" I get Santa’s Surprise.
Instructor's Insight: My students’ parents know about our Reindeer Reinforcement and Santa Surprise so each day the kids take their ticket home to show their parents, which makes both parents and students more accountable. I write an extra note on the ticket if needed to tell parents about the day. Sometimes these notes are to describe good things that happened and sometimes it is tell them why their child didn’t get Santa’s Surprise that day. Interestingly enough, no student has not earned Santa’s surprise two days in a row! I like to think this is because they are becoming accountable for their actions and learning what they need to do to earn it.
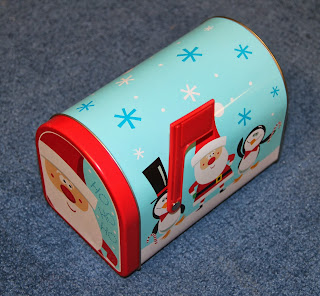
Santa’s Surprise is usually hidden in Santa’s mailbox or if it is too big to fit in his mailbox there is a note that says were Santa’s Surprise is hidden.
Sometimes it is a choice of Christmas candy or stickers, other times it is the choice of trying out one of two toys from Santa’s workshop (AKA: Toys from my sons' toy box at home-a toy firetruck, helicopter, or other interactive fun toys).
Santa’s Surprise is always a mystery. If the students know what they are working for and don’t like it, they will stop trying. The motivation is in the mystery!! I also always have two options for the students to pick from or play with as Santa’s Surprise making it even more effective because we all like choices! What would happen if Santa’s Surprise was one thing and not something a student liked? Well, he/she may not try for it the following day. There is motivation in the mystery and choice of the surprise.
With that, I wish you all a very Merry Christmas!! May your Holiday be filled with your very own Santa Surprises! Make the most of your time off and spend some well-deserved time with family and friends.


.jpg)

.jpg)

.jpg)


.jpg)
.jpg)
.jpg)
.jpg)
.jpg)
.jpg)

.jpg)


.jpg)


