Showing posts with label ECSE Curriculum. Show all posts

Tuesday, January 6, 2015

Ringing in the New Year with Effective Classroom Strategies

Happy New Year, Everyone! 

As I support and help others, I find myself referring to these posts time and time again, so I figured what better way to start a new year, then to share them in one collaborative post to support effective learning and teaching in 2015!

First up, A VIRTUAL TOUR OF MY CLASSROOM:  


Physical structure is the foundation of an effective classroom.  A functional learning environment lends itself to smooth transitions, independence and efficient traffic patterns in turn creating optimal learning and teaching time for students and teachers.  

But physical structure does not stand alone, in the world of Early Childhood Education and Special Education we have a lot of stuff.  Stuff that needs to be organized in a systematic manner that provides easy access to teachers and staff but limited access to students, so with that I give you organizational tips from one of my favorite posts: THE NIGHTMARE THAT IS CLASSROOM ORGANIZATION


Next up,  positive and specific CLASSROOM RULES:


Classroom rules help staff be specific and consistent about teaching appropriate classroom behaviors.  But along with them we must develop classroom expectations.  I like to think of classroom expectations as a way for us to systematically teach our students how the classroom rules apply to a variety of centers, activities, routines and situations.  Click CLASSROOM EXPECTATIONS for more details. 


Which leads me to the next stop on our tour of effective classroom strategies, a systematic classroom schedule.  As stated by Kathleen Lane, "The best behavior plan is a good lesson plan." The more planned our routines and schedule are, the more learning we can embedded throughout the day, in turn limiting wait time and increasing quality teach time.  It is definitely a involved process so below you will find links to a series of six posts related to classroom schedules and routines. . .


And finally before I sign off I must, hop on my soapbox, no significant learning can happen without the ability to communicate.  All students must have a means to communicate what they know, as well as their opinion and what they want and need.  In the world of special education and early childhood education this can be a challenging feat as children come to us with the inability to communicate verbally.  It is our responsibility to find them a way to express themselves in whatever means possible.  Visual communication boards are often just the ticket for this, so without further ado I give you, IMPROVING COMMUNICATION THROUGH AIDED LANGUAGE BOARDS and one final favorite, to remind you of all the possibilities:  PERSONALIZING COMMUNICATION FOR INDIVIDUAL SUCCESS.


Best wishes in 2015, as always let me know if you have questions or if I can help in anyway.  The world of Early Childhood Special Education can be a lonely one but together we can make a big difference for our littlest learners!

Happy New Year, Lindy

Wednesday, November 5, 2014

Creating an ECSE Art Center That Puts the "Fun" in Functional

Finally...a detailed look at our Art Center!!


Over the years the art center has evolved based on student needs and staff growth.  Nope not the size of staff members or an increase in the number of staff, but rather us getting better...thinking smarter not harder! 

Like all the other centers, the students rotate through the art area for 10 to 15 minutes (depending on each student or group of students’ interests and abilities).  See specifics about center rotations by clicking here.

When the students come to art, they always have work to do from Drawer #1 of a three drawer Sterilite system followed by art choices in Drawer #2. 


(Drawer #3 houses specific items for snack as snack is also done at the art table later in the day. The little book bag icon on drawer one is a velcro prompt to remind students to put their finished art work in their book bag.) 

Originally, the idea was work first; then make an art choice.  However over time we recognized, that theory was not always doable. For some of the small groups, all the kids in the group needed one-on-one support to complete the day's art project. Instead we moved to a model in which one student started on the art project of the day, while others did art choices first then the art project of the day.   

As we got going with this technique, Miss Penny, our fabulously talented para whom ran art, became very skilled in knowing which students needed to do the art project first so not to lose their attention and which students needed to have some choice time first and then do their art project.  In some cases, this gave students a chance to see other students doing the art project of the day before it was their turn. In other cases, it reinforced students in working hard on the art project of the day to get to preferred art activities like painting and watercolor.  

If needed she would use our trusty sand timers from watchtimepass.com to prep and prime students for when it was time to change activities!

So let’s dive in with an example of how all this works! With Christmas just around the corner, I decided to take last year’s Christmas art projects as the example.  It is quite the detailed process so stay with me as I share. In the end, I think you will find it very helpful.

First, at the beginning of each thematic unit, we explore thematic art choices. For instance, during our Christmas unit we used holiday cookie cutters, cookie sheets and spatulas to play with play-doh.  


And then holiday stamps, stickers and red and green construction paper as another option to make Christmas cards for friends, teachers and family members. 

Thifty Teacher's Tip: I often pick up crafty holiday items after each holiday at 50% off or more. 

We also try to be creative with art choices for other thematic units. For example, during our dental unit, we used pink play dough and lima beans to make pretend mouths as a counting and fine motor activities.  


(Please use your imagination with this photo as it was taken at home 
and my boys rarely use pink play dough! :) )  

As a second choice, we laminated a large tooth and had the kids draw pretend food on it based on the pretend food they ate on the flash cards and then wiped it clean with a toothbrush.  This idea was adapted from the great work of Tracie Betz. Thanks Tracie!


Thematic choices are provided as well as other constant art materials like colored pencils, markers, watercolors, glue sticks and scissors.  Students can use an aided language board to ask for specific art choices.  


Notice we can mark off materials that are not a choice for the day or we can simply slide in the theme-based choices over the top of our traditional art choices.  


We have found it helpful to have a few constants and then change it up with a few new options related to the theme.  The new options are always introduced and taught on the first day of a new theme.  That day the art choices are housed in Drawer #1 and there are not any choices in Drawer #2.  This is helpful so Miss Penny can model how to play with the choices and expand on creating and making. 

After day one, the art choices move to Drawer #2 and we dive right into art projects for the day.  As I share the art projects we did each day during our three week Christmas unit, I will also share a picture of the prep for each activity. 

I try to be a theme or two ahead so the prep supplies can be in the "to do bucket" for staff.  


Staff then cuts and prepares the art projects for each activity when they have a down moment whether it be an absent student, a student or two receiving speech, occupational, or physical therapy at the same time, or even between classes.  Note: I write exactly how many of each item I need and any other notes on the items for prep and then paperclip them or put them in a Ziploc bag with a sample of the project so staff knows exactly what we need by going to the to do tub and don’t need further instructions while I am working with students. 

Also note it seems like a lot of work, however art projects from year to year are stored in the theme boxes so as I prep for themes I have a lot of examples to pull from.  


It is a process! Over the years I collect more and more ideas for each theme.  We try not to do very many art projects two years in a row as we often have returning students but some of our favorites get used each year and thanks to Pinterest there is always room for improvements and updates.  

Art Project Day 1 - Snowman Count Down: (adapted from a wood project I found on Pinterest)


Snowman Countdown Prep:


Note:  The students’ art projects are not about being the same.  We always have a model for students to look at but we focus on the process rather than the end product. 


We want the students to have a finished project they are proud of but each finished product should have it’s own personality with the student's name on the back.  The beauty being that each student gets practice writing his/her name in a purposeful way almost every day!


I try to plan the art activities so that the ones that can be hung in the hall will be done at the beginning of the theme unit so they can be up for most of the season or theme.  

Art Project for Day 2- Christmas Tree Project:


Note:  This one includes math concepts as the students have to roll a color di to see which color painted lights to put on. 

Christmas Tree Prep:  


Art Project for Day 3 and 4- Santa Claus Project:


Santa Claus Prep:


Depending on the amount of steps in a project, sometimes we divide the project into two days.  For example for the Santa project, on day one the kids cut strips for Santa beard and then clip them together with a clothespin that has their name on it.  Day two they pick out their clothespin of beard strips and glue the Santa project together.


We try to model and support students in using appropriate amounts of glue with these supports as it is a life skill to only use what you need and gain impulse control!  For students who need it, we will use Elmer’s glue stick that goes on purple and dries clear.  Before student use, we will support them in where to put the glue by marking lines or dots with a purple marker to match to.


For students who need help with liquid Elmer’s glue, we will either put some on a paper plate and have them dip the product into the glue or for paper gluing we will use gluebrushes from Discount School Supply or tap and glue caps from Classroom Direct.  


Art Project for Day 5-  Ornament Wreath Project:


This project had the student’s school picture in the middle and was hung on our school Christmas tree in the office.  It is a tradition to have an ornament made by each student to be put on the tree. 

Ornament Wreath Prep: 


Art Project for Day 6- Staff Christmas Cards:

The front:


The inside:  


Note: Staff and students sign one master copy. Then we make 20 to 30 copies to deliver with Christmas cheer (and sometimes Christmas carols) to service providers, other special ed teachers, office staff, cafeteria staff, janitor staff, school nurse, paras, subs, and bus drivers and monitors. 

Staff Christmas Card Prep:


Art Project for Day 7- Wreath Project:


A great one for fine motor as the students put mini red sticker dots on the black dot spots.

Wreath Prep: 


Art Project for Day 8-  Family Christmas Card: (another great Pinterest find by Jill Dubien).


Only prep is to copy the template on card stock and then fold in half.

Art Project for Day 9-  Our Gift to Families, A Traditional Handprinted Glass Ornament:


** It was a class tradition to paint a different glass ornament each year.  You can see past years here. 

Art Project for Day 10 -  Wrapping Paper for the Glass Ornaments:


NOTE: Last year we did patterning with smelly markers. Some years we paint our paper, stamp it or add stickers to it.  Tip: We always precut the paper so it is already to go for the kids at the art center.  Usually, it's butcher paper or old wrapping paper turned inside out.  

Art Project for Day 11 - Wrap Gift  


Instructor's Insight: To help with the wrapping of family gifts, we often use the wrist tape bracelet by Scotch tape.  The staff person wears it and the students pull off each piece of tape.  Not only a great fine motor activity, but it also makes wrapping the gift more independent!

Art Project for Day 12 - Candy Cane Project:


Candy Cane Prep:


And there you have three weeks of Christmas crafts at our first-then art center!  Remember we were a four day per week program with Fridays being a day for consulting with families and daycare centers, as well as IEP meetings and a little planning time. 

I know it seems like a lot but by planning and prepping ahead the kids can be so successful and learn so much.  Just think of all the skills that were taught in this little ten to fifteen minute time of the day: writing their name, counting, matching color, following directions, cutting, coloring, painting among many other fine motor experiences!  Not to mention the opportunity to request.  

For several of the art projects, we will slip the materials needed in these I want bags so the students can point to "I want" and then touch the item in the bag.  


(Note:  In some situations we should change the "I Want" bags to "I need" bags.)

We also use PODD books or our mini language books to support requesting specific colors of materials and writing tools.  


That is it for now!  Until next time happy gluing, cutting, writing, coloring, drawing, and creating!  Get Creative! :)

Best Wishes, 
Lindy
Tuesday, September 16, 2014

Our ECSE Classroom Schedule: Part Six - Closing Large Group (10:45am - 11:00am)

Hello, Everyone!  It is time to say goodbye to our classroom schedule series.  As the children come in from outside time, they all find their spot in large group. We then close our day with a daily recap and goodbyes.  

This is done a few different ways depending on the needs of the students.  It changes throughout the year to support novelty and progress.  Just think how many behaviors of disengagement would occur if we used the same goodbye process all year.  That being said, we do have to have balance.  We need to stick with the same goodbye routine long enough for students to understand the pattern and gain skills, but we don’t want it to become predictable and lose student interest. 

Therefore, today I will share a few variations on goodbye time.  I apologize as they are acted out at our home instead of the classroom but I think you will still get the idea. 

Our first version of goodbyes was this goodbye book that encourage waving.  


We use construction paper hands attached with a brad to visually show children the waving process.  On each page the teacher moves the construction paper hand from side to demonstrate waving.  


Followed by the Goodbye Ritual song from Conscious Discipline’s I Love Ritual CD-Volume 2 .  Note: I paired the Goodbye Ritual Song up with a powerpoint and social narrative of my son and his friend doing the actions to the song so that our students that had difficulty imitating gross motor movements would have a still life visual. 


Originally, we had one large yellow book to share the gross motor movements for each animal in the song.  But as certain students struggled with the imitation activity and attending to task, we added a few blue mini-books for those kids to follow along with.  


After the Goodbye Ritual Song, each student is called up one at a time to pick the goodbye of his/her choice from the goodbye apron below.  


The icons on the apron were ironed after I printed them on t-shirt transfer paper

Following each student's choice, he/she is dismissed to get his/her coat and book bag, and then line up to go home.  Note: In all of my goodbye examples, I have the students strategically dismissing after they do something in the front of the group so that their dismissal is staggered and the cubby area does not get to crowded.  

I say "strategically" because I call kids that have the ability to wait in line longer first while kids whom are better at waiting in their spots get called later.  One para waits at the cubbies to help kids get their things to go home and the other sits near the kids at group whom have the hardest time waiting.  

Here is a video example of Goodbye Ritual #1.  Again, use your imagination as the videos in this post are done in my home with my boys and my husband as the videographer since I no longer have a classroom of my own. :(  That being said, I think with a little imagination you will totally get the idea!!


The second version was created last year when we were working on teaching students to notice each other and say goodbye.  Each student had a copy of this book. 


Note:  The children were working on a variety of skills.  First, they were learning book handling and literacy skills as they each had their own book to follow along with.  Secondly, each page had a colored tape tab to reinforce color recognition and support fine motor skills in turning the pages.  Third, they were working on social skills as they found their friends and teachers, and used eye contact, waves, and verbal skills to say goodbye.


One of our students, who struggled with large group activities and looking at books, used this put-in tub with all the students and teachers photographs as her strength and interest was in put-in tasks.  It kept her engaged and focused during large group.


Following the book activity, we sang the following goodbye song to each student as the staff modeled saying goodbye and the students learned how to do so.  Note the song also works on calling friends and teachers by name and using the appropriate pronoun with names- he/she and his/her. 
It's time to say goodbye to Timmy, 
It is time to say goodbye to Timmy, 
How was his day? How was his day? 
He had a ____ day today!

The students then checked out by putting their photo in the tin can that represent how they felt about their day.  Did they feel happy, sad, okay, or angry about their day?  


Note: We used tin cans for this activity as several of our students enjoyed and were very good at put in tasks.  I purchased the tin cans at our local hardware store for $0.99.  They are empty paint tins!  You can get them in pint and gallon size.  We also use them for magnetic games.  
  
Click below to see a video example of Goodbye Ritual #2.


The third version is one I created a few years back based on the literacy work of Patti King-Debaun and Creative Communicating.  At that time, our external doorway was magnetic so I posted these magnetic icons on the door.  They are Boardmaker files that were printed on magnetic paper.   


After the students lined up to go home we would sing these words to the tune of "She'll Be Coming Around the Mountain" using early literacy and problem solving skills to add the correct pronouns and people into the song for each child.  

When the students got used to this version, we then changed it up a little to discuss what type of vehicle the students would be going home in using the magnetic icon below.


Click below to see an video example how Goodbye Ritual #3 works.  


Note: A modification you could use if you do not have a magnet door is printing these icons smaller and using a cookie sheet.  If you would like either version, send me a message. :)


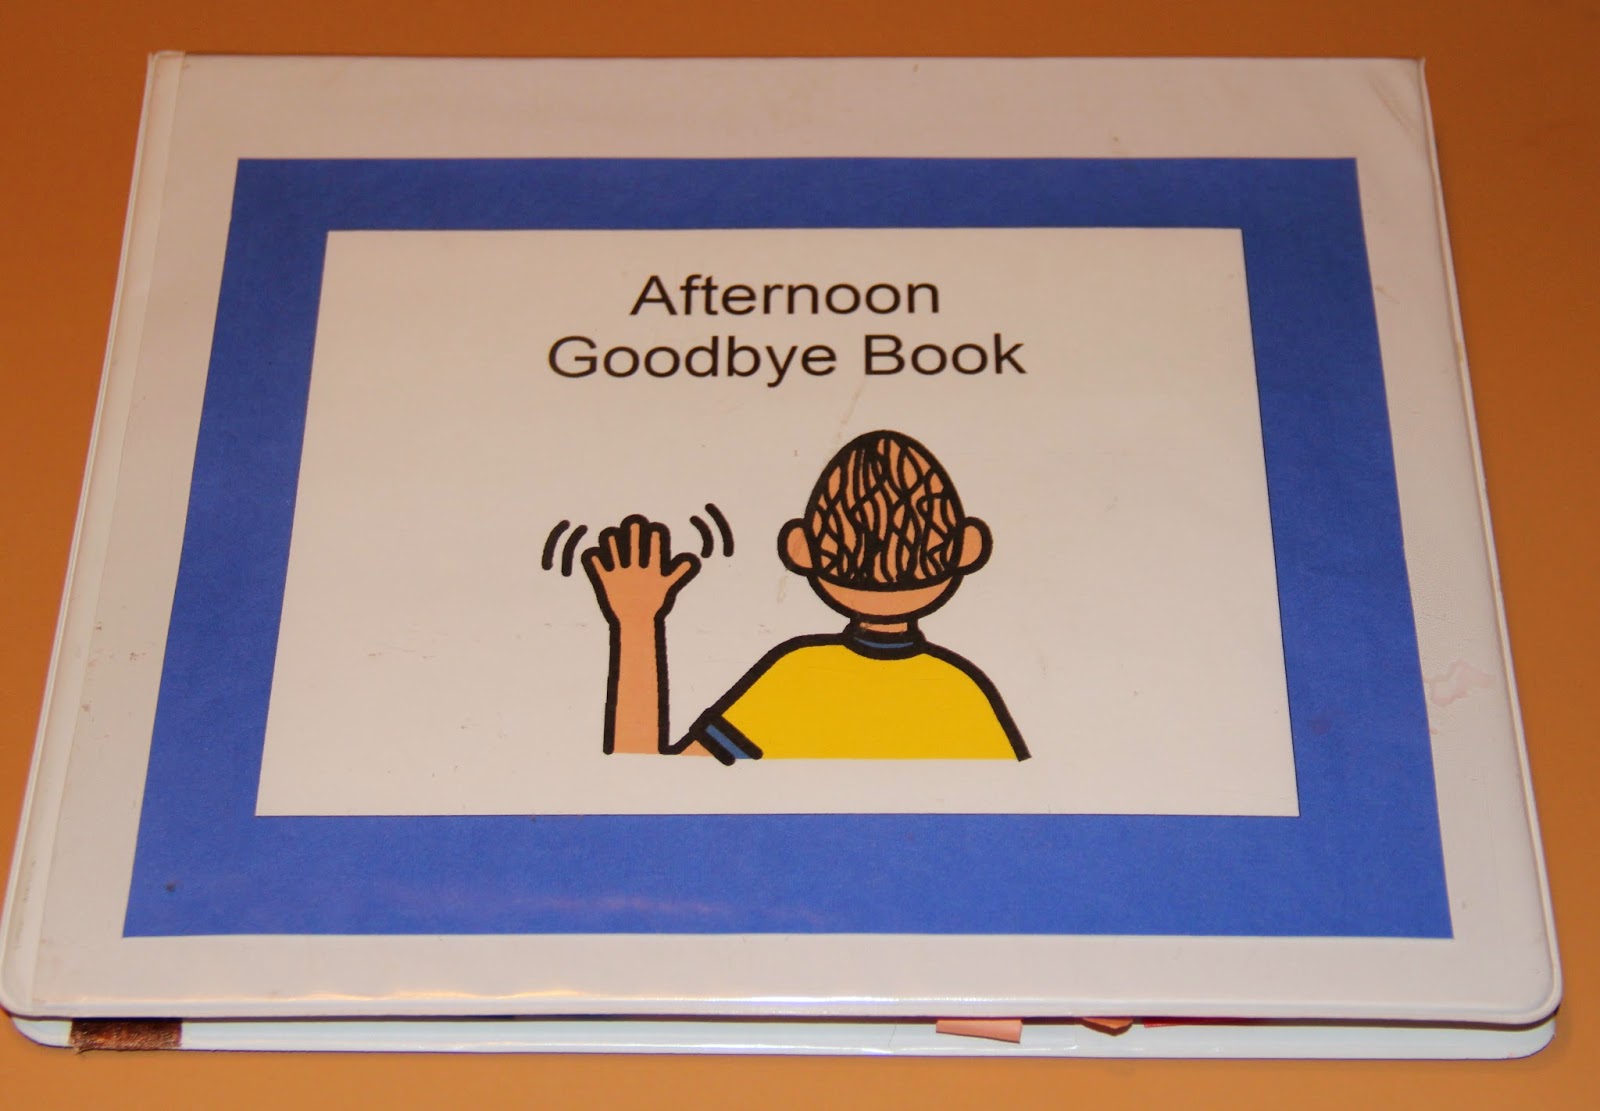
The fourth version I'll share was created for my afternoon students who were returning from the previous year and needed something a little higher level than the goodbye book.  In this example, the students worked on spelling their first or last names depending on their level.  


You can access the board for this activity on Boardmaker Achieve or by emailing me. The song is sung to the tune of "She'll Be Coming Around the Mountain".

To make for easy storage, I placed this goodbye version in a binder using page protectors. The other side of the binder had the morning classes goodbye waving book.  


The morning goodbye book was on the front of the binder going vertically and the afternoon goodbye book was on the back going horizontally.  

Following singing about each student, each student would come up one at a time and check out on an adapted version of a 5 Point Scale by Kari Dunn Buron based on the ideas of Conscious Discipline and the Feeling Buddies.


Click below to see an example of Goodbye Ritual #4.  


As the afternoon class matured and made progress, we moved on to other versions of checking out.  One was where the students worked throughout the day to earn gold tokens as a class and we then counted the tokens to see if we earned what was in the treasure box at the end of the day.  You can see more details about this version by clicking here.  

Following the token count, each student signed out at their level using this chart.  Some kids wrote the letters of their first name, some put the letters of their name in order, some did a combination of the two and others simply matched letters by color.   If they were past working with their first name, we moved them on to their middle and last name. 


 If you would like a copy of my sign out chart to revamp for your students, let me know!


And last but not least, here is a way I choose to have a K-5 classroom of students say goodbye at a week-long summer school program provided by TASN-ATBS.  Throughout the day, the students worked collectively to earn frog tokens.  Then at the end of the day, we put them all together and counted them as a class.  After seeing how many we earned, each child was responsible for reporting how many they earned using these leveled activities.  

Activity 1:  (the simplest level) Putting the frog tokens 
the class collected in the frog collection jar.  


Activity 2: The student reports how he/she feels about getting or not 
getting all the tokens using a modified five point scale.  


Activity 3: The student practices reading sight words to say if the class
 reached or did not reach their goal.  (Their goal was to earn 30 tokens.)


Activity 4: The student reports the exact number of tokens the class earned 
by circle the numbers on the chart and then filling then in the box. 


   Activity 5: The student finds the number the class earned on the 100s chart. 
Note that numbers 1 through 29 are red to show the class did not earn 
the amount needed for a prize and numbers 30 though 100 are green for go 

meaning the students get to open the frog pool with mystery prizes inside.  


Activity Six: The student graphs how many tokens were earned on a bar graph 
to compare the week's results. 


As I mentioned above if the class earned more than 30, they were able to open the frog pool and pick a prize.  Usually a choice between two items (bubble gum, fruit snacks, and small candies or party favors).  Note: the students do not know what is in the pool each day as there is motivation in the mystery of not knowing what the prize will be for the day!!

Each student comes up to report using their leveled activity and then gets to hang it on the chart below and pick their prize for the day (if the tokens were earned for the day).  After reporting and picking their prize, they get their belongs and line up for dismissal.  


You can see a video of this goodbye on the TASN-ATBS website under trainings on demand:  Leveling Large Group.  

That is it for now... See you later alligator! Until next time, make your goodbyes fun and functional for your students!!  Use the time to connect with your students as connecting always pays off.  CONNECTION=COOPERATION!  As shared by Dr. Becky Bailey, connections on the outside build connections on the inside!  Just what we want:)  


Goodbye For Real Now! Best Wishes,

Lindy