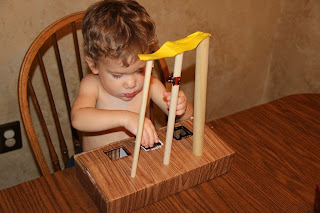
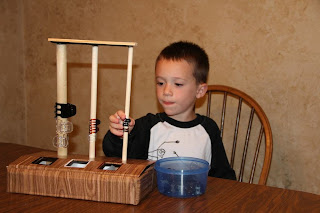
Building from last week's post that detailed our Direct Instruction area, this week we are going to look at our Independent Work area. Students transition to the Independent Work area directly following their time at the Direct Instruction center.
Independent Work is another area in the classroom that was created after I attended a Structure Teaching training based on the TEACCH concept. The goal of the Independent Work area is to individually teach each child how to sit and attend to activities at his/her level. This video demonstrates how the Independent Work area is set up in our classroom.
Please ignore my less than professional, soccer mom attire! The only time I could schedule the video this week was right after Saturday morning soccer ... said this working mom! :).
In the video, I shared that each student has a drawer and contained in his/her drawer there is a task or activity specific to that child's development. To promote true independent work, the activity in each child’s drawer requires skills already mastered at either Direct Instruction or elsewhere. The work in each drawer always has a clear beginning and end as we want the student to know how much work must be completed and when he/she will be finished. Some students have work as simple as putting items into a container. Others have sorting, matching or writing activities. As the school year advances, the student's work increases based on his/her individual progress.
Here is a peek into every child’s drawer for next week. I am sharing them in order of lowest to highest skill level.
Drawer One: A simple errorless put-in activity where the student puts the pegs into the same color container and then closes the container by placing on its lid.
 |
| Drawer One |
 |
| Drawer Two |
 |
| Drawer Three |
Drawer Four: Another errorless sorting task where the student has to sort circle and square blocks by putting them in the correct holes.
 |
| Drawer Four |
Drawer Five: A sorting task where the student has to put the bears in the correctly colored bucket. Notice: I hot glued foam to the top of the buckets so that the items would not fall out when the student puts them in "All Done".
 |
| Drawer Five |
Drawer Six: Another sorting task where the student puts the pom-poms in the slit in the middle and sorts the pipe cleaners by the correct color around the outside of the slit. This task is from Second Story Window.
 |
| Drawer Six |
Drawer Seven: Is a silverware sorting task provided by Kimberly A Henry’s "How Do I Teach this Kid?"
 |
| Drawer Seven |
Drawer Eight: The student must use the mini tongs and fine-motor control to place the pom-poms into the ice cube tray.
 |
| Drawer Eight |
Drawer Nine: A task from Christine Reeve and Susan S. Kabot’s book "Building Independence: How to Create and Use Structured Work Systems." (If you are struggling with the concept of how to build independence, take a look at this book. It is a phenomenal resource!) In the task, the student has to simply put a colored eraser top on the correspondingly colored pencil and put them in the "All Done" portion of the pencil box.
 |
| Drawer Nine |
Drawer Ten: A size sorting task where the student matches the circles to the correct circles on the Velcro board.
 |
| Drawer Ten |
Drawer Eleven: This is a task that takes a little more time and effort. The student has to put the correctly colored beads into the approriately marked canister. You can read more about this one by clicking here as it was featured in my Top 10 Task Box Countdown last winter.
 |
| Drawer Eleven |
Drawer Twelve: A task that came from my errorless learning worksheets that were shared in last week’s Direct Instruction post. The task I simply filling each bug in with color.
 |
| Drawer Twelve |
Note: Each drawer is assigned to a morning and afternoon student. Between classes, my staff undoes all the tasks and puts them back into the drawer for the next class. Which leads me to a really good point....NEVER EVER undo a child’s task in front of the student!! As promoted by the TEACCH model, undoing a task in front of the child leaves an impression that his/her work does not matter. It would be like your administrator coming into your classroom and deleting an IEP you just completed because your work was not meaningful. (Maddening thought...but it really drives home the point, huh?)
On the note, I'll share my "Dos & Don’ts for the Independent Work" area. We have this list posted along-side the center to help staff remember how to support students.
The most important tip is to prompt from behind and use as few cues as possible especially verbal cues as they are hardest to fade. These tips were given to me by a colleague of mine, Peggy Lawrence. Thanks Peggy!!
The most important tip is to prompt from behind and use as few cues as possible especially verbal cues as they are hardest to fade. These tips were given to me by a colleague of mine, Peggy Lawrence. Thanks Peggy!!
Also as we do at all centers, I have a list of rules for the students to follow at independent work.
Beside the rules, I also have a Velcro strip that shows which students work at that desk as we have a two work areas. Here to see a video model of my sons using the Independent Work area. NOTE: In the video, I am the camera lady and the teacher so it is little different but I think you will get the idea.
This video clip was shared with my students last week to show them how the process should look as some of them were struggling to figure out how to use their time wisely after the task was completed.
As you noticed in the video, my boys did their work and then sat and did one of the choices for two minutes. The two minutes was noted by a large sand timer. We have a 10, 5, and 2 minute large sand timers. They are a favorite in our classroom!! We use them for a variety of things. I honestly don’t know what we would do without them! You can purchase them from Watch Time Pass.
After the two minutes were up, the boys transitioned to the iPad table. The iPad table and independent work area are a joint center. Together, they run 10 minutes for my morning students who have shorter attention spans and 15 minutes for my afternoon students.
From Direct Instruction, some students transition to the iPad, followed by the Independent Work while other students transition from Direct Instruction to the Independent Work then to the iPads. I know this sounds a little confusing but with all students using an individual schedule, everyone knows where & when they need to be. I promise to show you how individual schedules work in my classroom in a future post.
Finally, I did want to share a little "extra credit" with you. On occasion I will have a student who can’t attend all of large group but is very successful with independent work. In these cases, I will have a set of three drawers that that student transitions to in the middle of large group. The student will then get some much needed downtime from large group by completing the three independent tasks. When the child is finished, they come back to group with the rest of the class. This helps to give the student a functional, engaging break from group in a while offering the rest of the class the opportunity to attend to group in a much more relaxed, calm environment. Here is a pic of what the drawers look like for this process.
I know this post may seem like a lot of "Independent Work" for the teacher but I promise the success you will see in your students makes it well worth it! You don't have to do it "independently", feel free to reach out for support or guidance. It may take some time, but I eventually respond to all your emails. (In fact, it makes my day to hear from y'all!)
Wishing you lots of success with your own Independent Work areas!
Wishing you lots of success with your own Independent Work areas!


