Showing posts with label November Activity. Show all posts

Sunday, October 26, 2014

Seasonal Handprint Painting Ideas for Pre-K Children

Hello Everyone!

I am in the process of putting together a post about our classroom art center. Well, ladies and gentlemen, you will have to wait at least one more week for that post.  In the meantime, I want to share this seasonal hand painting book idea before I miss the next three holidays!

The kids painted one page of this book every week from mid-October to Christmas break a few years ago.  It was a fun counting, art and sensory project as the kids had their little hands painted with a brush to make the following designs.


So without further ado...I give you "Look What My Fingers Can Do!"


The Cover:  Look What My Fingers Can Do!  
By:______________

Page 1: One finger makes a pumpkin, 

Page 2: Two fingers make a candy cane, 
(on 3 by 4 inch construction paper)

Page 3: Three fingers make a ghost, 
(on 3 by 4 inch black construction paper)

Page 4:  Four fingers make Santa, 
(on 4 by 4 inch green construction paper)

Five fingers make a turkey,  

Six fingers make a tree, 

Seven fingers make two Native American Indians,  


Eight fingers make a spider,


Nine fingers make a Christmas tree,


and ten fingers make a reindeer!

There you have it...what 10 little fingers can make!  

To download the pages of the book click here.  A few housekeeping tips for making this ongoing project:

1. Store the finished pages in a file folder system by the art center.  I got mine at Wal-mart a few years back.  It has been a lifesaver.  Label a hanging folder for each student.  Then, as the students finish each page, you can file them in their folder for easy book making at the end of the project.

2.  At the end of project, have the book making scheduled in your lesson plan as an art activity so you or a staff person do not have to take extra time to put it together.  The students will love helping and it adds a numeracy and literacy activity to their day, making them have more ownership of the book they made so they will go home with excitement to read it to their families!  

3.  Have a plan for what students will do when they are not painting their page.  For example in our classroom, the staff person who is doing art will set all the kids (in her small group) up with open ended art activities from the art shelf such as markers, watercolors, bingo daubers, or play dough and then have each student paint their page one at a time.  This eliminates down time by giving the students something to work on while they wait.    


It also offers them choices by allowing them to choose an art activity either verbally or with an aided language board.  

Tip:  If you put the aided language page in a plastic frame you can use 
a dry erase marker to mark off art materials that are not a choice for the day.  

Choices make the world of special education a much better place.  By offering two choices you are okay with, the students feel they have some power and we are not giving up too much power.  For our reluctant painters, just saying, "Do you want to paint first or do (play dough) first?" Helps their anxiety toward painting go down as they have a choice!!  

We will get into this more at a later date.  For now I am going to sign off to work on the BIG Art Center Post that will be coming out SOON!  

Until then, happy painting!  -Lindy  


Thursday, November 15, 2012

Thanksgiving Trail Mix Feast

Every Thanksgiving we have a feast to celebrate the holiday and practice skills the children will need for their own family gatherings.  We work on using good table manners, requesting items politely, waiting our turn, and making appropriate social conversation at the table.  

Many of my student's families express concerns and fears about their children with Autism and other social delays participating in social events.  This activity is one way we can practice skills in a calm friendly environment. Hopefully, the practice carries over into each family's holiday celebration. 

One week prior to our feast, I send home with each student a quart or gallon-sized bag (dependent on our classroom size).   Each student is asked to bring his/her bag back to school filled with a nonperishable food item that will serve in our class trail mix.   (Here is the note I send home to each family.)  

Examples of food items the children may bring are: cheese crackers, cheerios, chocolate chips, marshmallows, pretzels, banana chips, etc.  Teacher's Tip: I always ask that they bring their bags back the day before the party so I have time to gather snacks for anyone who forgets.  Before the feast, I put each food item in a serving bowl.

On the day of our feast, the children decorate a small paper sack with Thanksgiving stamps, stickers, or smelly markers.   Next, we sit in a circle and read our Thanksgiving social story.


SOCIAL STORY:  Our Thanksgiving Trail Mix Feast

Would you like some. . . (with a picture of what the child brought)
"Yes, please" or "No, thank you"
Would you like a big amount or a little amount?

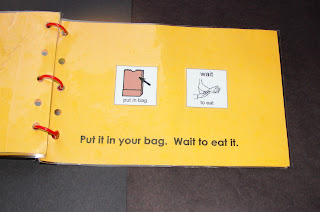
Put it in your bag.  Wait to eat.
Thank You. You're welcome.
The students then create their own personal trail mix.  Each student uses visuals from the social story to request the snacks they would like to put in their paper sack.  

Each student goes around and asks his/her peers if they would like the some of his/her snack.  The children must respond with “Yes, please” or “No, thank you”.  If the answer is "Yes, please", the child serving the snack says “Would you like a small scoop or large scoop?”. The child receiving the snack uses their best manners to respond.

The activity is a perfect way for kids to practice manners and wait their turn.  The thing I like the most about the activity is the repetition allows students to get several turns of serving and requesting the snacks.  

Instructor's Insight:  Several of my students have sensory food issues meaning they don’t like the taste, or texture of various foods. This activity gives them the opportunity to politely say "No, thank you" and/or experience new foods.  I am always surprised by what each child decides to add to his/her individual mix.

To the make the event even more special, we invite parents to join us and the children get to choose to wear their pilgrim hat/bonnet or Native American headband.  We turn our cube chairs over and turn them into a table. The kids then gather around the makeshift table just like the first Thanksgiving.
  

Tuesday, November 13, 2012

Playdough Activity Promoting Fine Motor Skill Development

Provide your students with white playdough and metal pie pans.  Ask them to make a pie crust!! A pretend pie crust is a great fine motor skill development activity. 


My boys exercising their fine motor skills.

The kids love this activity especially if you incorporate it into your pretend play center or use it as an extension after reading I Know an Old Lady Who Swallowed a Pie.  

Instructor's Insight: It can also be a great cooperative play if you partner up and have children work together to use their fine motor skills to spread the crust. 

Teacher's Tip:  You can use mini pie pans for younger students or students with less fine motor strength.  That way they get to participate and be successful at the same activity.  You can also do it with foil disposable pie pans for an extra challenge as they are more flimsy and need more motor control to complete the task. 

Another fun playdough activity for kids during the Thanksgiving holiday is to add various cooking utensils.  Over the years, I have collected several types of  potato mashers. The kids love to push playdough down with them to make different types of prints.  

E.J. putting my kitchen utensils to good use.

Thursday, November 8, 2012

Native American Headband: A November Art & Math Small Group Project

Like many classrooms, our students make Native American headbands.  Although in my classroom this activity serves as a small group art, social, language and math activity.  

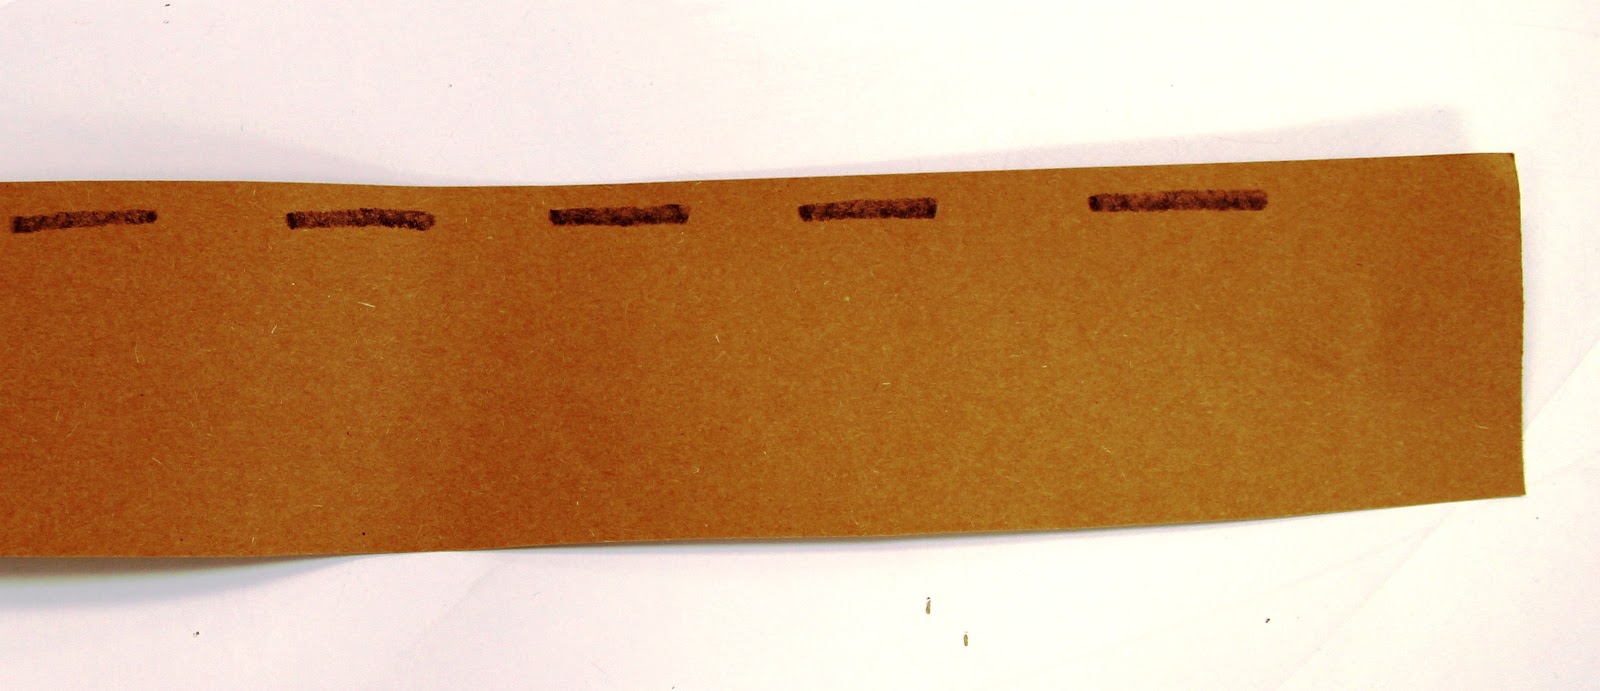
In advance, I cut out red, blue, yellow, orange, green, and purple feathers. I also cut out the brown strips of paper to make the headband. I draw 3 to 8 purple lines on the headband to serve as visual marks for the students to know where to apply glue.  We use purple glue sticks from Elmer's so the children can use the match-to-match philosophy by putting purple glue on top of the purple marker lines. This tells the student how much glue they need to use and how much work they have to do to complete the activity. 


This headband will require five feathers.
Instructor's Insight:  For children with shorter attention spans, add fewer lines!

The students start by writing their name in the middle of the brown strip of paper.  Then, we turn the paper over and begin playing the game.  The children take turns rolling a color die.  (You make one with free printable dice from http://www.toolsforeducators.com/ or you can purchase a colored die at any teacher supply store in the early childhood section.)  


My son adding feathers to his headband.

After rolling, they request that color feather from the teacher leading the small group.  If the student is nonverbal or do not yet know color words, he/she can do this by pointing to the corresponding color on an Aided-Language Board.   They then glue the feather on their headband while the next player rolls the dice to make his/her feather selection. 


An Aided-Language  Board

Aided Language Boards are similar to Picture Exchange Systems without the added velcro and pull off component.  You can read more about Aided Language Stimulation and work by Linda Burkhardt.  
This is one of my favorite Thanksgiving activities because it serves so many purposes--- color naming, turn-taking, gluing, and requesting.  You can even incorporate counting, and concepts like more and less.    

Tuesday, November 6, 2012

Multi-Purpose Seasonal Sorting Activity

Check out this fun way to review concepts such as colors, shapes, letters, numbers or even Thanksgiving vocabulary.  

All you need is a disposable pie pan, glue gun and one piece of off-white felt.  
  1. Cut your felt into a circle the size of your pie pan. 
  2. Fold it in half and cut three slits in the middle.  
  3. Glue it to the edge of the pie pan.

Here's a photo of the completed "pie".

You then have a "pie" to draw cards or objects out of.  Put small items or flash cards inside the slit of the pie. Students take turns pulling out various cards or items after you sing:  "What’s in the pie?" to the tune of “Are you Sleeping?”  

What’s in the pie? What’s in the pie? Stick your hand in and find out. Stick your hand in and find out.  What’s in the pie? What’s in the pie?  
Lesson Plan Note:  I use this activity as an extension to one of my favorite Thanksgiving books by Alison Jackson, "I Know an Old Lady Who Swallowed a Pie". 

Instructor's Insight: Put the same number of items in the pie as students who are playing the game. This gives the students a visual cue of how long the activity will last.  When the pie is empty, we are all done.  


Here we are using the activity to practice Thanksgiving vocabulary,
as well as sorting the items by color. 

Teacher's Tip:  Get the most out of this activity by adding other concepts to the game. For example, if you have three different colored items in the pie then have three sorting bowls beside the pie for the kids to sort the items by color. Or if you have numbers in the pie, have a Velcro paint stick outside the pie and put Velcro on the back of the numbers so that students can put the numbers in order as they pull them out of the pie.  

Extra Credit: It is always good to have a structured place for kids to put game pieces so they are not fiddling with them and can attend to the task at hand.


Thursday, November 1, 2012

Thanksgiving Pretend Play

Here's a creative pretend play idea for Thanksgiving. During the month of November, we transform our dramatic play center into a Thanksgiving Feast.  We remove all pretend food from the center except those that would be found at the first Thanksgiving like vegetables, breads, and turkey. 

I also replace our regular dress up clothing with homemade pilgrim and Native American costumes.  The costumes are made from bath towels.  To make the pilgrim costumes, I purchase black bath towels and white hand towels. I fold the towels in half and hot glue the white towel to the middle of the black towel.  I cut a half circle on the crease of the fold so that when you open the towels they have a circular opening for the children’s head.  The students wear them like a poncho.  

My son, EJ, playing a happy pilgrim.
To make the Native American costumes, I purchase tan bath towels. Fold them in half and cut a triangle on the fold to make a diamond opening for the children’s head to go through. Then, I paint Native American designs on them with fabric paint.  

 EJ portraying a Native American boy
who is fed up with his mother!  

Each year the children make Pilgrim hats and bonnets, as well as Native American headbands during art small groups to use in the dramatic play Thanksgiving center and then double as their hats for our Thanksgiving feast.  

Payton, my youngest son, demoing the Native American headband. 

To encourage purposeful play in the dramatic play Thanksgiving Feast Center, I share books like “Thanksgiving Day” by Anne Rockwell so the students can see images of the first Thanksgiving.  

Instructor's Insight:  Some years, my students do not have the skills to pretend play on their own. On those occasions, I create a video model of how to play at the play center. My son and a friend come in after school to play in the center naturally. I record their play on my iPad and narrate what they are doing so my students can understand how to play pretend. 

(For more research on video modeling, check out this site:  http://www.socialskillbuilder.com/articles/video-modeling-research.html)