Showing posts with label Organization. Show all posts

Friday, June 23, 2017

Classroom Tour Part 2

Time to take a look at room two of our kindergarten through fifth grade life skills classroom.  Click below for the video tour!


This room is more small group and center based.  Our kindergarten through first grade students work through a rotation of teacher led and student led activities twice a day in this space.


This took three adults, and significant planning, zoning, scheduling and structuring for our little guys, however by the end of the year they rolled through it like rock stars!  Each working at their own individual level on everything from following one step directives and attending to teacher instruction to reading sight words and adding and subtracting with objects.


The best part of the whole thing is that students learn how to manage their time safely and independently at the technology center (iPads and laptops), independent work area, and self-directed choice area between teacher led times.


I will get into the logistics of that later but I wanted to draw attention to it because so often I hear "I don't have enough staff to teach at each student's individual level."  By training students to work independently, we are able to maximize quality teaching time! Each student can work one on one with a teacher or in a 2 to 1 ratio depending on their needs and what they are working on.  If they need to work on turn taking, waiting or social skills we pair them up with a friend with the ultimate goal of getting them out into the inclusion setting as they gain skills.   If they are at the early stages of learning, and need to work on following teacher directives, in seat behavior, communicating appropriate, etc then their time at the teacher rotations is on a more one on one basis.

Until Next Time, Best Wishes!
Lindy

Wednesday, June 21, 2017

Classroom Tour Part 1

Howdy, I am finally back and I proud to say. . . I survived my first year teaching elementary students!  The learning curve was steep coming from the world of early childhood but absolutely AMAZING!  I can't wait to share everything my staff and I created throughout year one.   

I started the year with 11 students and 5 paraprofessionals and end the year with 14 students and 6 paraprofessionals.  All 14 students, have a variety of needs and abilities, ranging from a cognitive level of 12 months to 8 years.  Each student has their own programming, schedule, and range of inclusion time, I will get into the specifics of those at a later date.

I want to start my re-entry back into the world blogging by visiting my classroom.  Click below to see part one of a two part classroom tour. . .


Today, I walked you through half of our space.  We are blessed to have two connecting classrooms.  The first as you witnessed in the video has individual student desks and services as our large group area and individual work space.


It also has free choice and social (play-based) centers in it.   Kindergarten and first grade students, who need support in play and socials skills, use the space as a center rotation when they are not in inclusion time.   Our second through fifth graders use the space to do desk work.   As they finish their desk work, they can earn play time at the various centers.   


In the afternoon some of our students who are not ready for large amounts of inclusion time and need practice with using time safely and appropriately, use the space as a free choice area in which they get to choose where they want to play and move from center to center for thirty minutes as long as the center they choose is not full and they have cleaned up their previous center.  


They use the choice board container above to request where they want to play.  Then they take the clothespin with their name or picture on it to that center, if there are two clips at the center they have to pick a different place to play so not to overload one center in particular.  

My higher students also use the round table in the corner of this room for our writing lessons.  Our district recently adopted Readers' and Writers' Workshop,  a fabulous program but one that is a little too abstract for some students. So we work from the workshop's philosophy of having a love for reading and writing but made the work more concrete for our students using a language based technique from Utah State University, called SKILL- Supporting Knowledge in Language and Literacy, which I will share more about at a later date! 

That is all for now, join me next time for part two of the classroom tour, where I will share 6 more classroom spaces!

Best Wishes, 
Lindy

Tuesday, February 25, 2014

Applying Structured Teaching Principles to Home Organization

After several hundred hours of picking up toys around our house, I have finally come up with several ways to encourage my boys to clean up after themselves.  It also helps me know where their toys are when they request them as that happens all the time! 

For their playroom, I purchased three large tubs for the barn & farm toys, fire trucks & emergency vehicles, and rockets & airplanes.  I simply labeled each tub with picture icons printed on self-adhesive shipping labels. 


The labels make it easy for the boys and their playmates to help in the clean-up process.   
After recognizing the success of these tubs, I went garage sale hunting and found a colorful drawer set that store our dress up clothes, shields and swords, and pretend construction tools.  


I also labeled other things in the playroom with self-adhesive shipping labels such as cardboard blocks, stuffed animals, and board games. 


By organizing the boys toys in this manner, I have found they are able to pick something to play with and stick with it longer.  Think about your desk at the office. How would you get anything done if you couldn’t find what you needed to work on?  Not only did the organization help improve the boy’s play skills but it also helped them practice a very important life skill of being organized and cleaning up after themselves.  Even our 2 1/2 year old has gotten the hang of ‘helping’ clean up.  

Instructor's Insight:  To help your child communicate what he/she would like to play, velcro a set of icons to the top of the shipping labels you attached to your toy tubs and bins.  Your child can then bring the icon to you when wanting to play with something specific.  This trick especially works well if the child can't open or reach the tubs or bins used to the store the toys. For more instructions on this and similar techniques, check out Teresa A. Cardon’s book entitled Initiations and Interactions: Early Intervention Techniques for Parentsof Children with Autism Spectrum Disorders.

Another solution may be to put an aided language board in the room at easy access so your child can make requests like asking for help, asking for more, asking to be all done, or make comments. 


It's similar to the of P.O.D.D (Pragmatic Organization Dynamic Display) philosophy.  For more information regarding P.O.D.D., check out the work of Gayle Porter, Linda Burkhart or my earlier post on aided language boards.  

In order to make life easier in the family room, I took the advice of my oldest son’s Parent Educator, Miss Pat. When he was 18 months, I cleaned out one of the cabinets in our kitchen island and designated it as the toy cabinet for all his upstairs toys.  It worked out so well that I cleaned out the other two cabinets in the island for me and my husband’s things. Then when Payton came along, I cleaned out my cabinet and donated it to him for all his baby toys and manipulatives.  Recently, I added names to the cabinets using scrapbook stickers.


For fear of scaring you, I did not take pictures of the cabinets' insides as the boys literally have them jam packed with toys. However, this has been the best method for holding all their toys.  Now when someone comes over we don’t have all their toys cluttering up the front room.  Best of all, when it is time for bed each night they are able to independently clean up after themselves.  This method also teaches the boys personal responsibility as the rule is the items in your cabinet are off limits to your brother.  If you choose to leave your items out, they are fair game for your brother to play with.

Moving on to some other home organization features, the boys’ bedrooms also have specific places and locations for toys.  Each of them has a nine square Closetmaid shelf that you can get at Home Depot or Target.  They truly are my favorite organization solution.  Payton’s has different colored fabric boxes in it. EJ’s has the same colored boxes with little writing labels. 


Again making the boys responsible for their belongings and making their rooms easy to manage.  


Note: One more rule in our house is that their rooms are picked up each night before they go to bed. Now, the playroom is a different story!  We don’t pick it up daily. But depending on the train wreck that is the playroom and who will be coming over to the house, it is either picked up weekly or even biweekly.  However, everything does have its space in there too. Making picking up easy and manageable when the time comes.  


Our home has really evolved as the boys grow and their interests change.  For example, in our office space right now we have a small child’s sized table with Legos beside it. It's been an extreme interest of our two year old.  This gives him a place to play while mommy or daddy are doing school work on the computer.  


The Lego box was a gift from Aunt Christie.  It is so clever. It stores Legos by size.    He is also interested in playdoh so I have several playdoh tools and kits stored behind the lounge chair in the office.  It's easy access for me and Doug to get out for him but not visually available to him.  

Our six year old is very into making projects right now with everything from duct tape, to Velcro, to markers, paints, and scissors. Therefore, in the office space I have also added a chest that stores all sorts of art supplies.  


And more recently we have added a space that holds his finished projects or projects he would like to continue working on.  My OCD would often kick in and I would throw his projects away or put them away before he was done so now I have cleaned out a drawer in our coffee table for him to store them. 

Before moving out of the office, I want to share with you a mommy space.  Under my computer desk, I have two fabric boxes one for future blog posts & presentation items and one for future classroom projects.  I also store my school bag under there so I have it at easy access when I get a chance to work.  


Now moving into the entertainment room where there are two more features to share. Under our wet bar, I have three cabinets.  One stores extra blankets and pillows while the other two hold puzzles and game boards.  Organized like a true teacher, one cabinet has lower level games like Candy Land and Memory and the other one has higher level games like Monopoly, Pay Day, and Yahtzee.   


Lastly, I would like to share an extreme interest for both boys.  They both love to watch cartoons and movies.  But they always do it in McDaniel boy fashion...they dress up like the characters they are watching whether it be Spiderman, Captain America or the bunny from HOP.  I store all their costumes in a large fabric Thomas Chest that my mom picked up at Toys R Us last year for Christmas.  


I used to have all their costumes in the playroom. But to save myself time, I put them in this tub by the TV so they can independently find what they want and clean up after themselves when they are finished.  They tend to want to dress up like the superhero or any other character they are watching on TV so this really helps!

Ohhh...I geek out when I think of all the amazing things you can do to structure your home!! Yes, I am a little anal but it saves me a lot of time and teaches the boys some great life skills along the way.  It all relates back to the theories of Structured Teaching...building independence and success for all.  

To learn more about this technique, check out the presentation I created for TASN regarding Structured Teaching in the home.  Unfortunately, I don’t have clearance to share the video footage but hopefully you will gather ideas from the text and pictures. 

Join me next week as I'll be sharing how we structured up the home of a little girl who has significant needs to make a world of difference for her, her family and her care providers.


Tuesday, February 11, 2014

Theme-Based Learning Environment in an ECSE Classroom

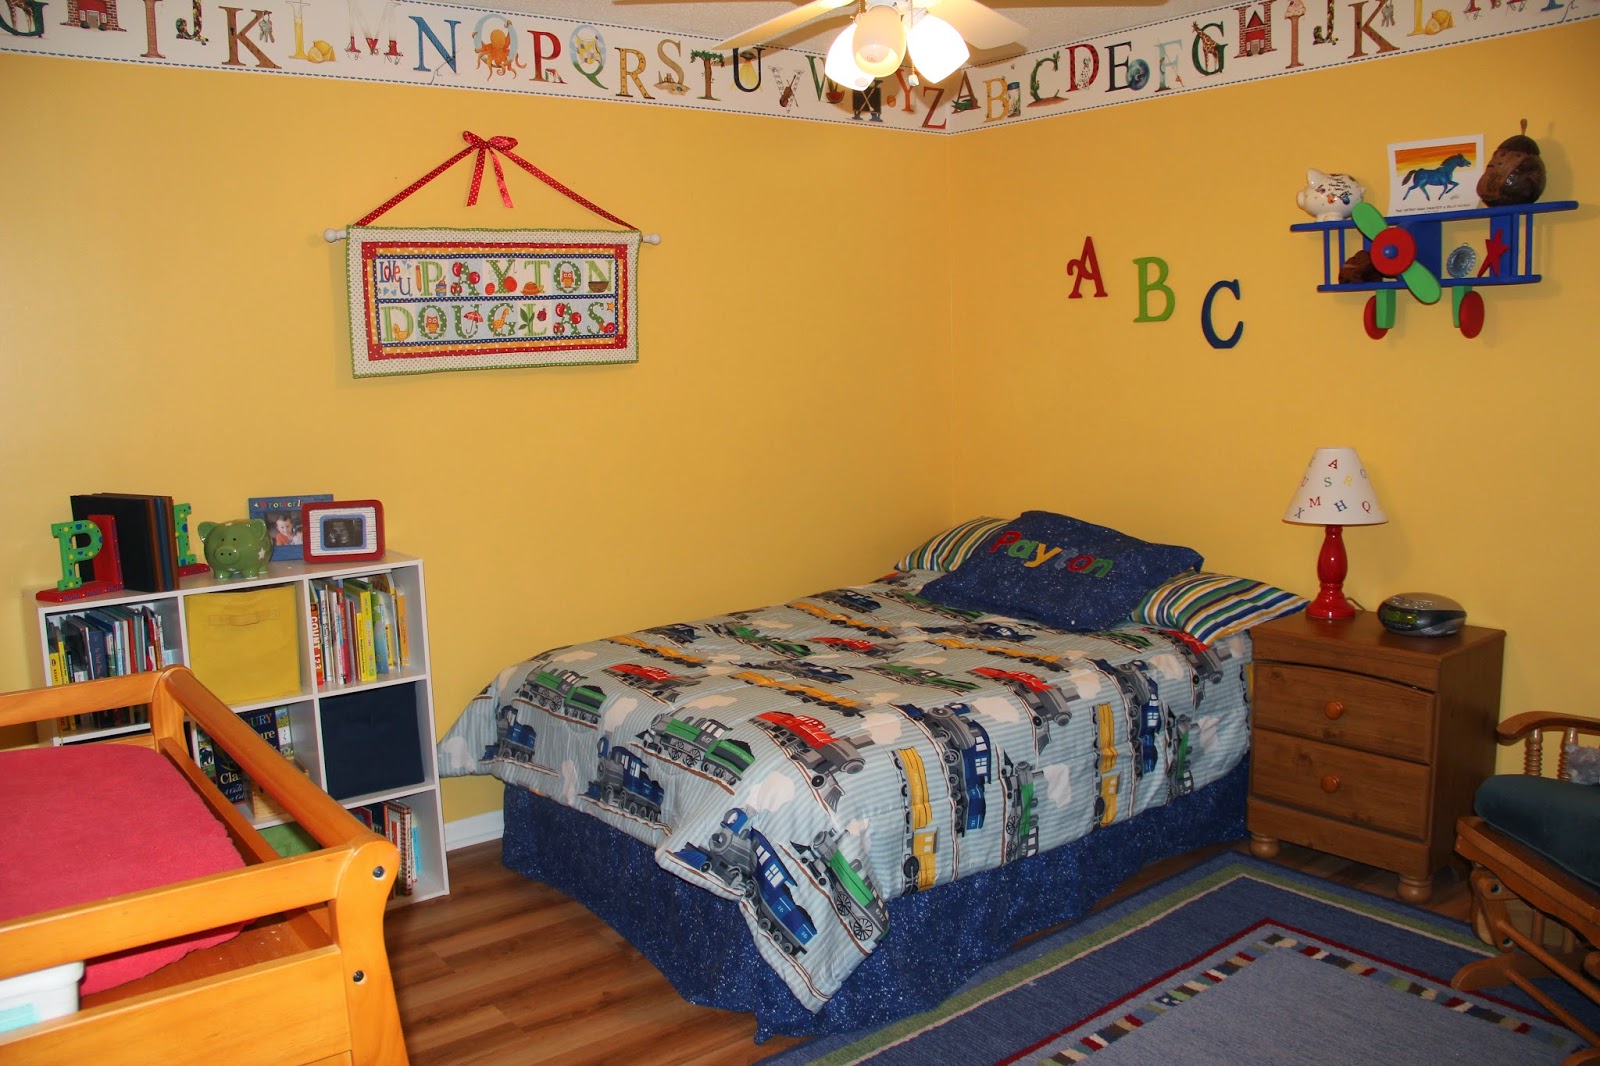
As many of you who have visited our classroom know, we are a theme-based learning environment.  I use relevant themes, seasons, and holidays as the foundation of my classroom instruction.  Each theme can run anywhere from a week to three weeks.  Most of our themes are the typical preschool themes.  

I try to teach in themes that are relevant to our students and of their interests.  I change up what themes we study from year to year depending on student, family and staff interests.  For example, one year we had a parent who worked at Pizza Hut so I created a unit about pizza.  We ended the unit with a field trip to Pizza Hut. Yet another year I had a group of boys very interested in trains so we did a train unit, complete with building and painting a cardboard train for our pretend play center.

That said, we do have certain themes, like holidays, seasons, dental health, and fire safety, that are covered every year.  So the big question is "How do I store all of this?!".  Well luckily, we have a large unfinished room in the basement of our home where my husband has graciously built heavy-duty shelving.  


It's nothing special...just heavy duty shelves from Home Depot.  On them I use large Sterlite containers from Wal-Mart to store each theme.  Some are big and some are small depending on the theme and materials I have accumulated. 

Please know this is an accumulation over 11 years.  For those of you who are just starting out, there was a time when I simply had four bins (one per season) in the top of my closet.  Since that time I have "garage saled", received donations, and inherited lots of things from one of the most amazing preschool teachers ever, Louise Younger.  (I worked at her preschool during college and attribute so much of my success to her.  She taught me so much!!)    

My mom and mother-in-law are also a big help.  When shopping for our boys, they often pick up items here and there for my students.  My mom has been known to buy things for the boys and say, "I figured when the boys out grow it you can take it to school."  I love you, Mom!  You are the most generous person I know!
   
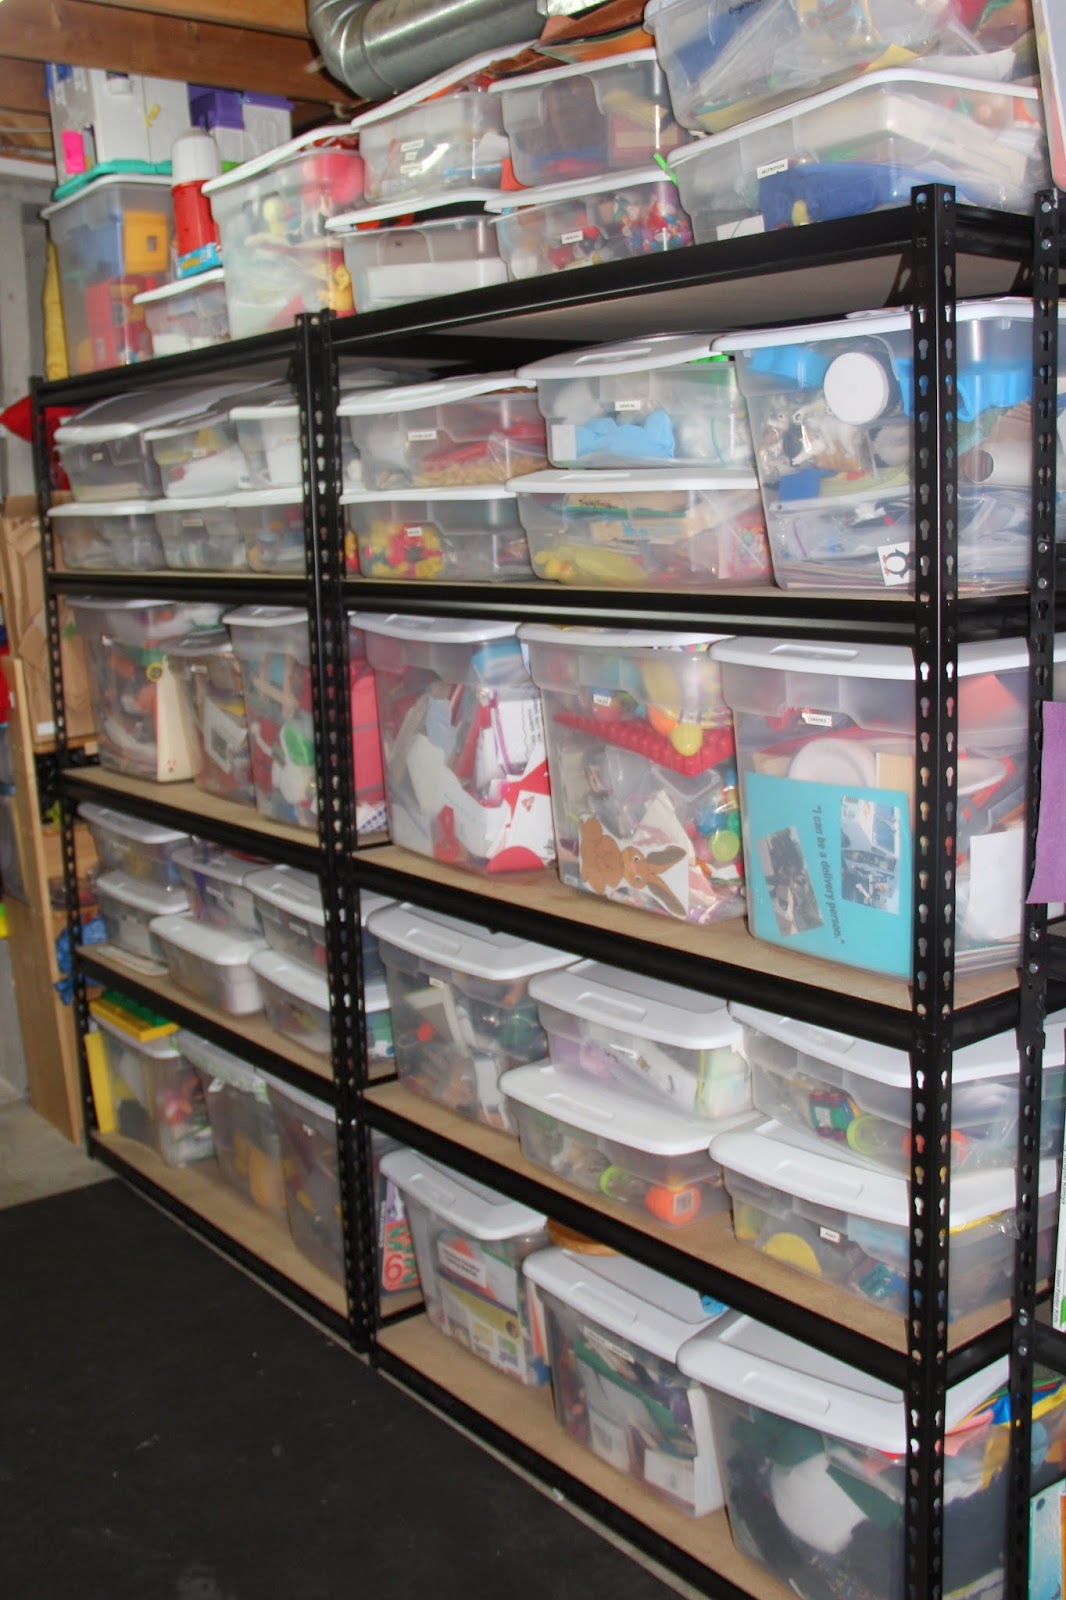
Here is a pic of all my theme tubs.
  

I store them in sequential order based on what we study throughout the year.  My current school year themes are as follows:  Bears, Zoo, Friendship, Safety, Transportation, Fire Safety, Apples, Forest, Leaves and Scarecrows, Halloween and Pumpkins, Thanksgiving, Christmas, Gingerbread, Winter and Polar Animals, Dental Health, Nutrition, Valentines, Dr. Seuss, Dinosaurs, Spring and Gardening, Farm, Bugs, Weather and Earth Day, United States and Careers and Community Helpers.  When I first started out, I got a lot of my ideas for each theme from Mailbox Magazine, Makinglearningfun.com and KidsSoup. 

Also on my shelves are tubs for random materials related to each subject area.  For example, I have a large tub full of math things, science things, and literacy things.  Ideally, these tubs would be stored in the classroom as I access them often. However due to storage limitations, they are at home.  I am always lugging things to and from school...but I guess that just comes with the job! :)  

That being said, I always have the tub for the theme we are currently studying and possibly the theme we are getting ready to study at school for easy access.  This makes it nice so as I am planning everything is at school and I am able to put it back in the tub as we finish that theme.  (Refer to my classroom organization post for more details about my classroom storage.) 

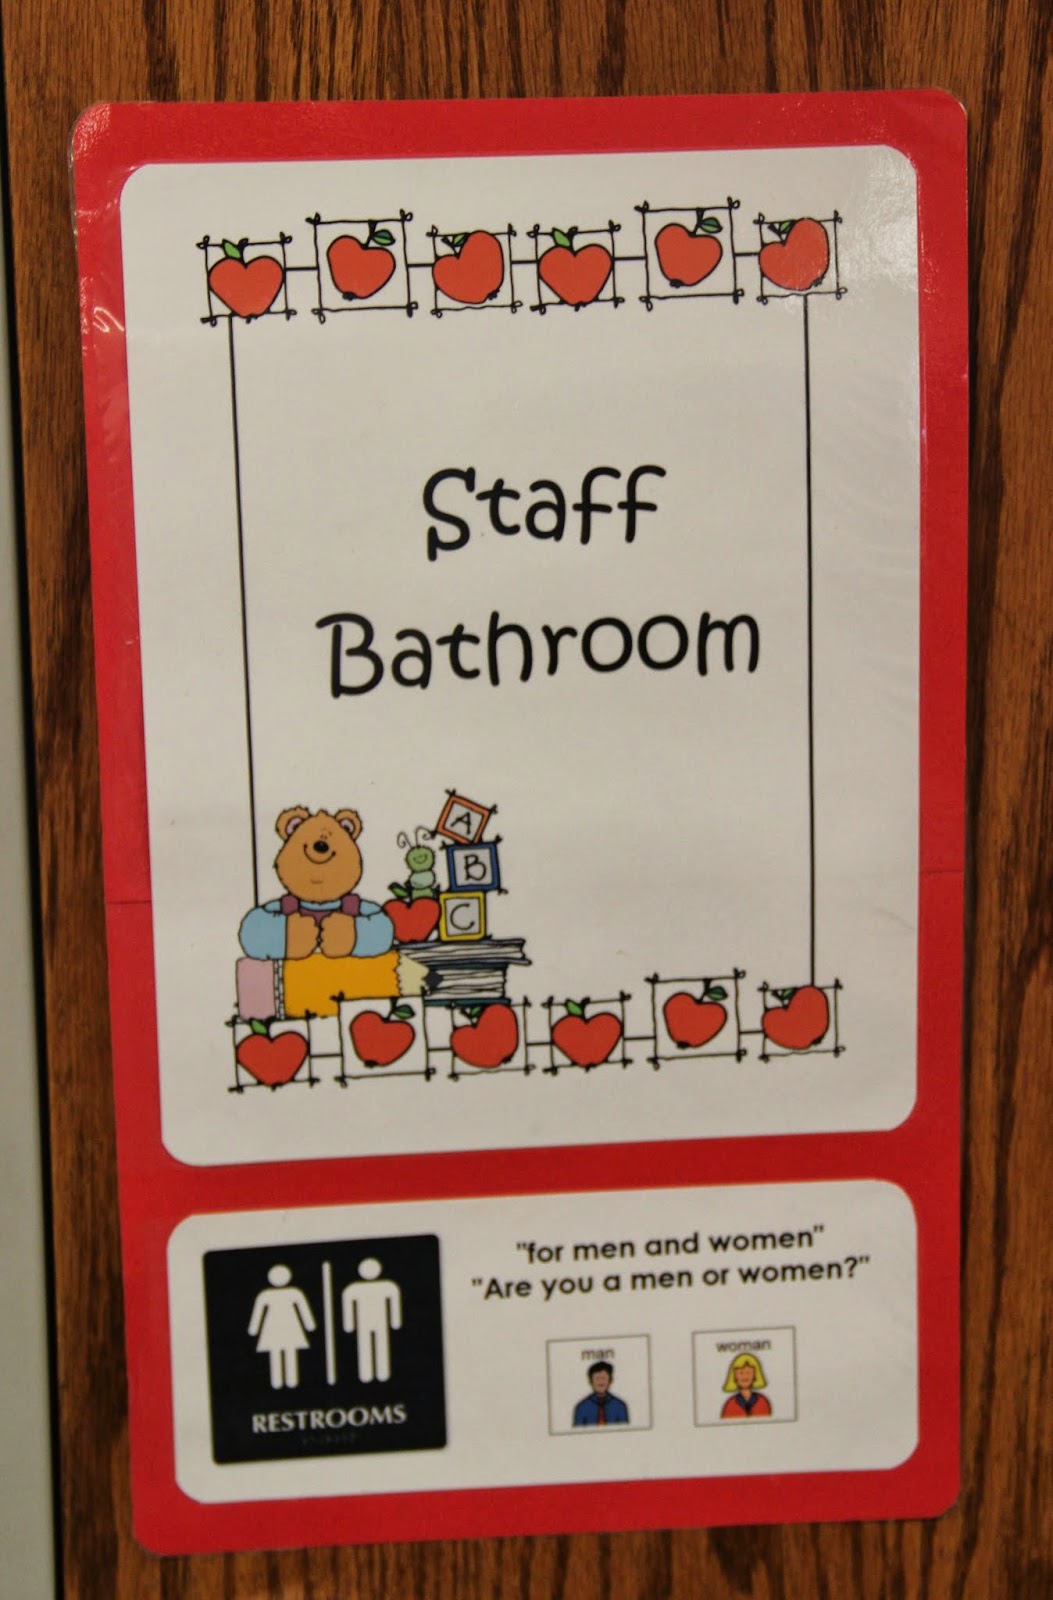
The tubs are actually stored here...


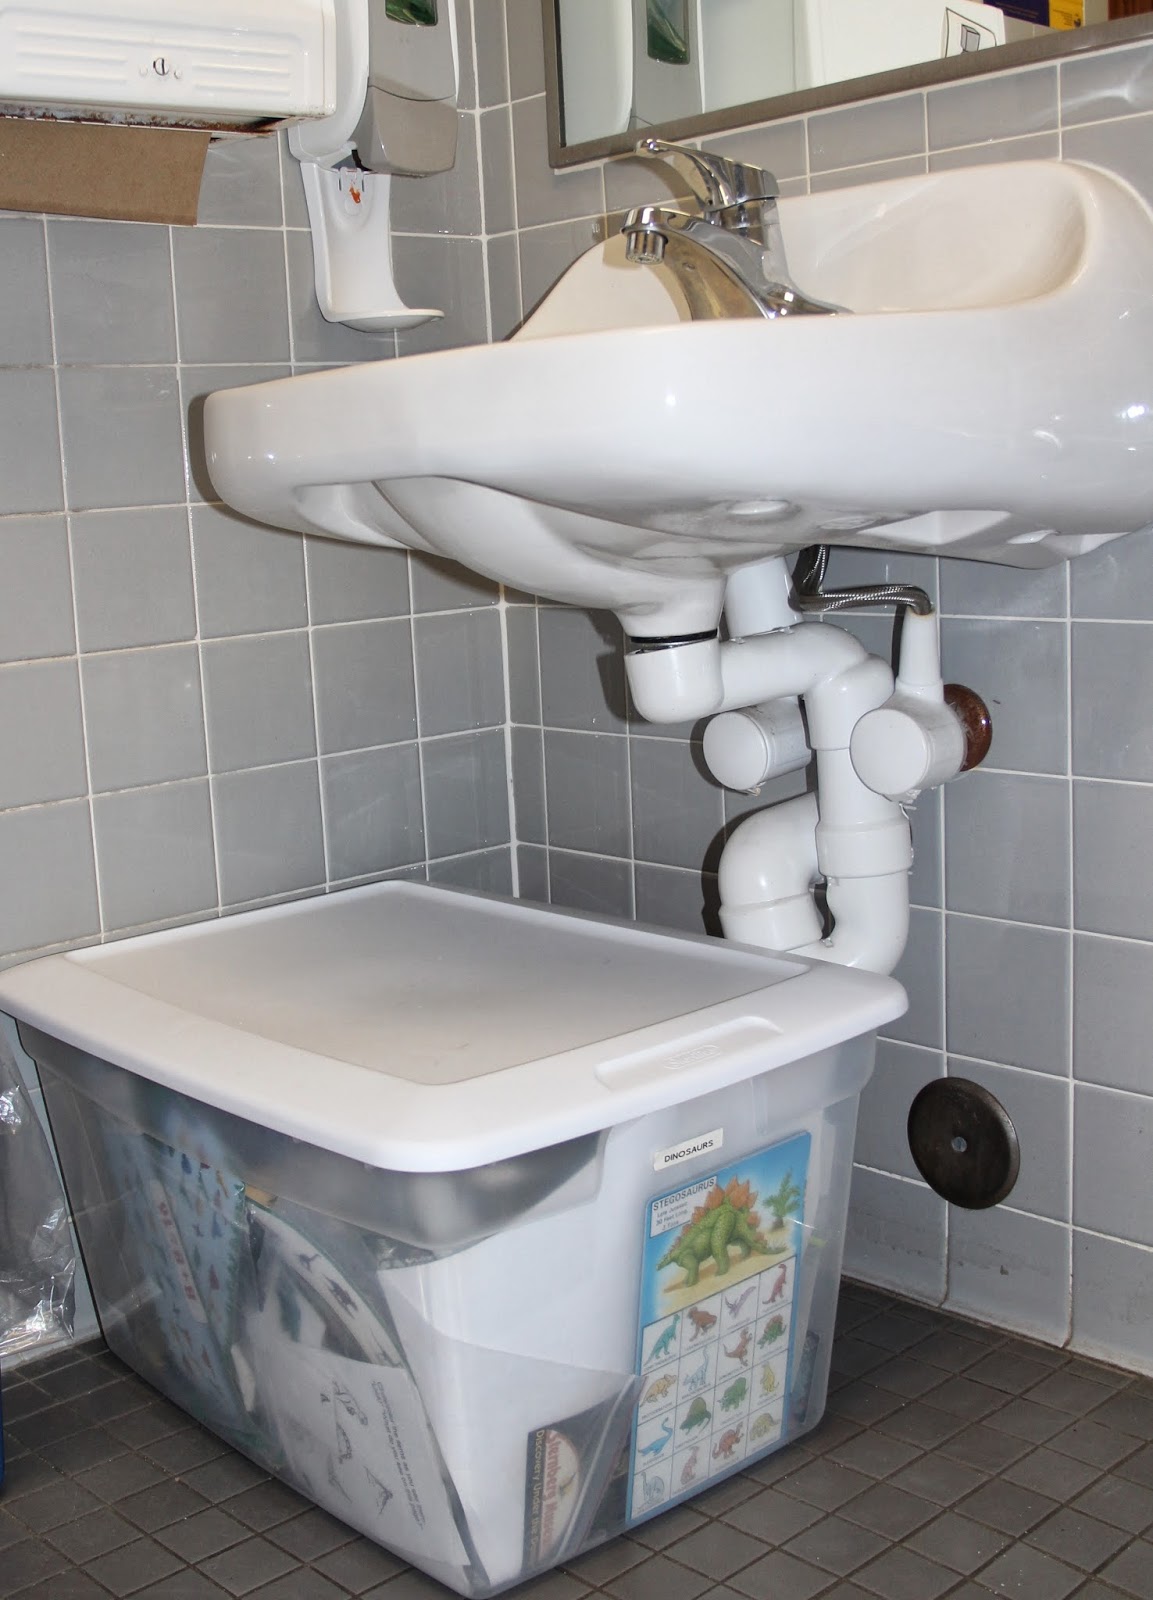
Yep, that's right...the staff bathroom!  When I moved to my new classroom two years ago, storage was definitely an issue.  We had two large handicap accessible bathrooms so I decide to use one as a staff bathroom with a little area for storage and one as a student bathroom. 


Tub Storage Under the Staff Bathroom Sink
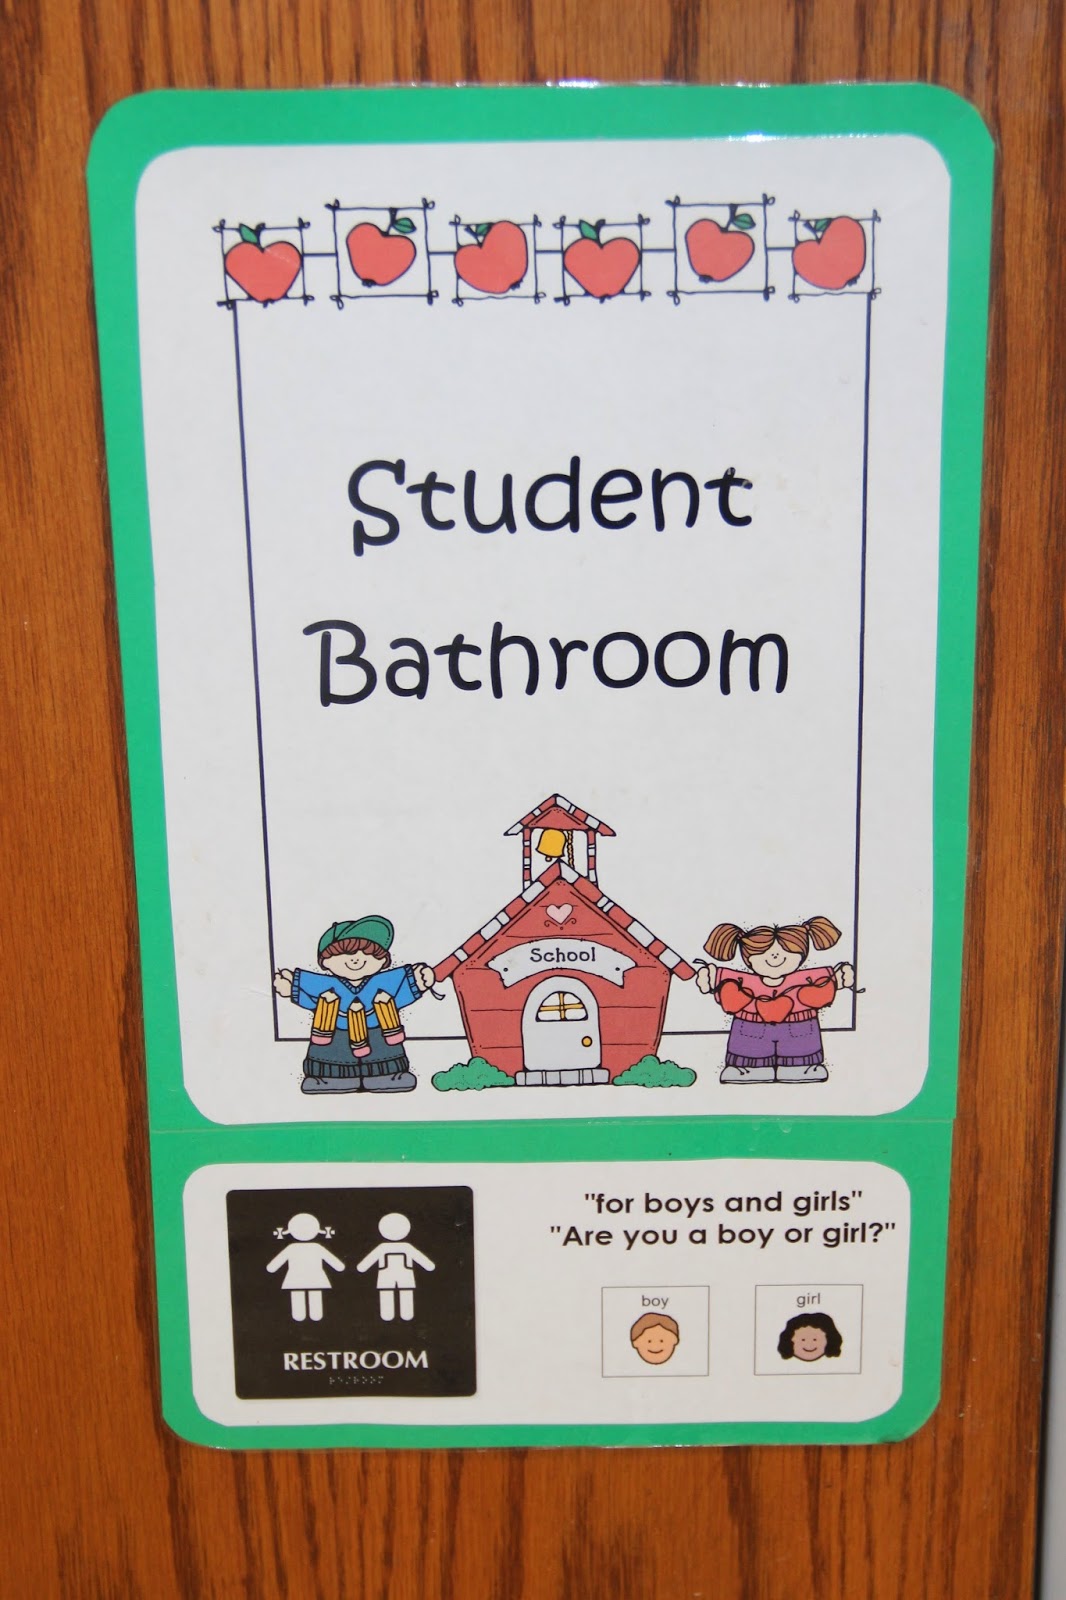
The student bathroom is also labeled.


At first I was a little nervous about this setup because I feared I may be confusing our students by not having both girl's and boy's restrooms.  But then I realized that most of our students need support with restrooming anyway and only one of the two bathrooms is equipped with a changing table and child-sized steps to reach the sink. Therefore, it made perfect sense to have a staff bathroom and student bathroom.  In hindsight, I wouldn’t want it any other way.  The staff bathroom is a nice, clean place for staff to keep their personal belongings and on occasion it has served as an area for me and our school psychologist or other personnel to meet briefly and confidentially.  A little odd I know, but we do what we have to do!  My staff often jokes that it is our ‘office’!  :)
  
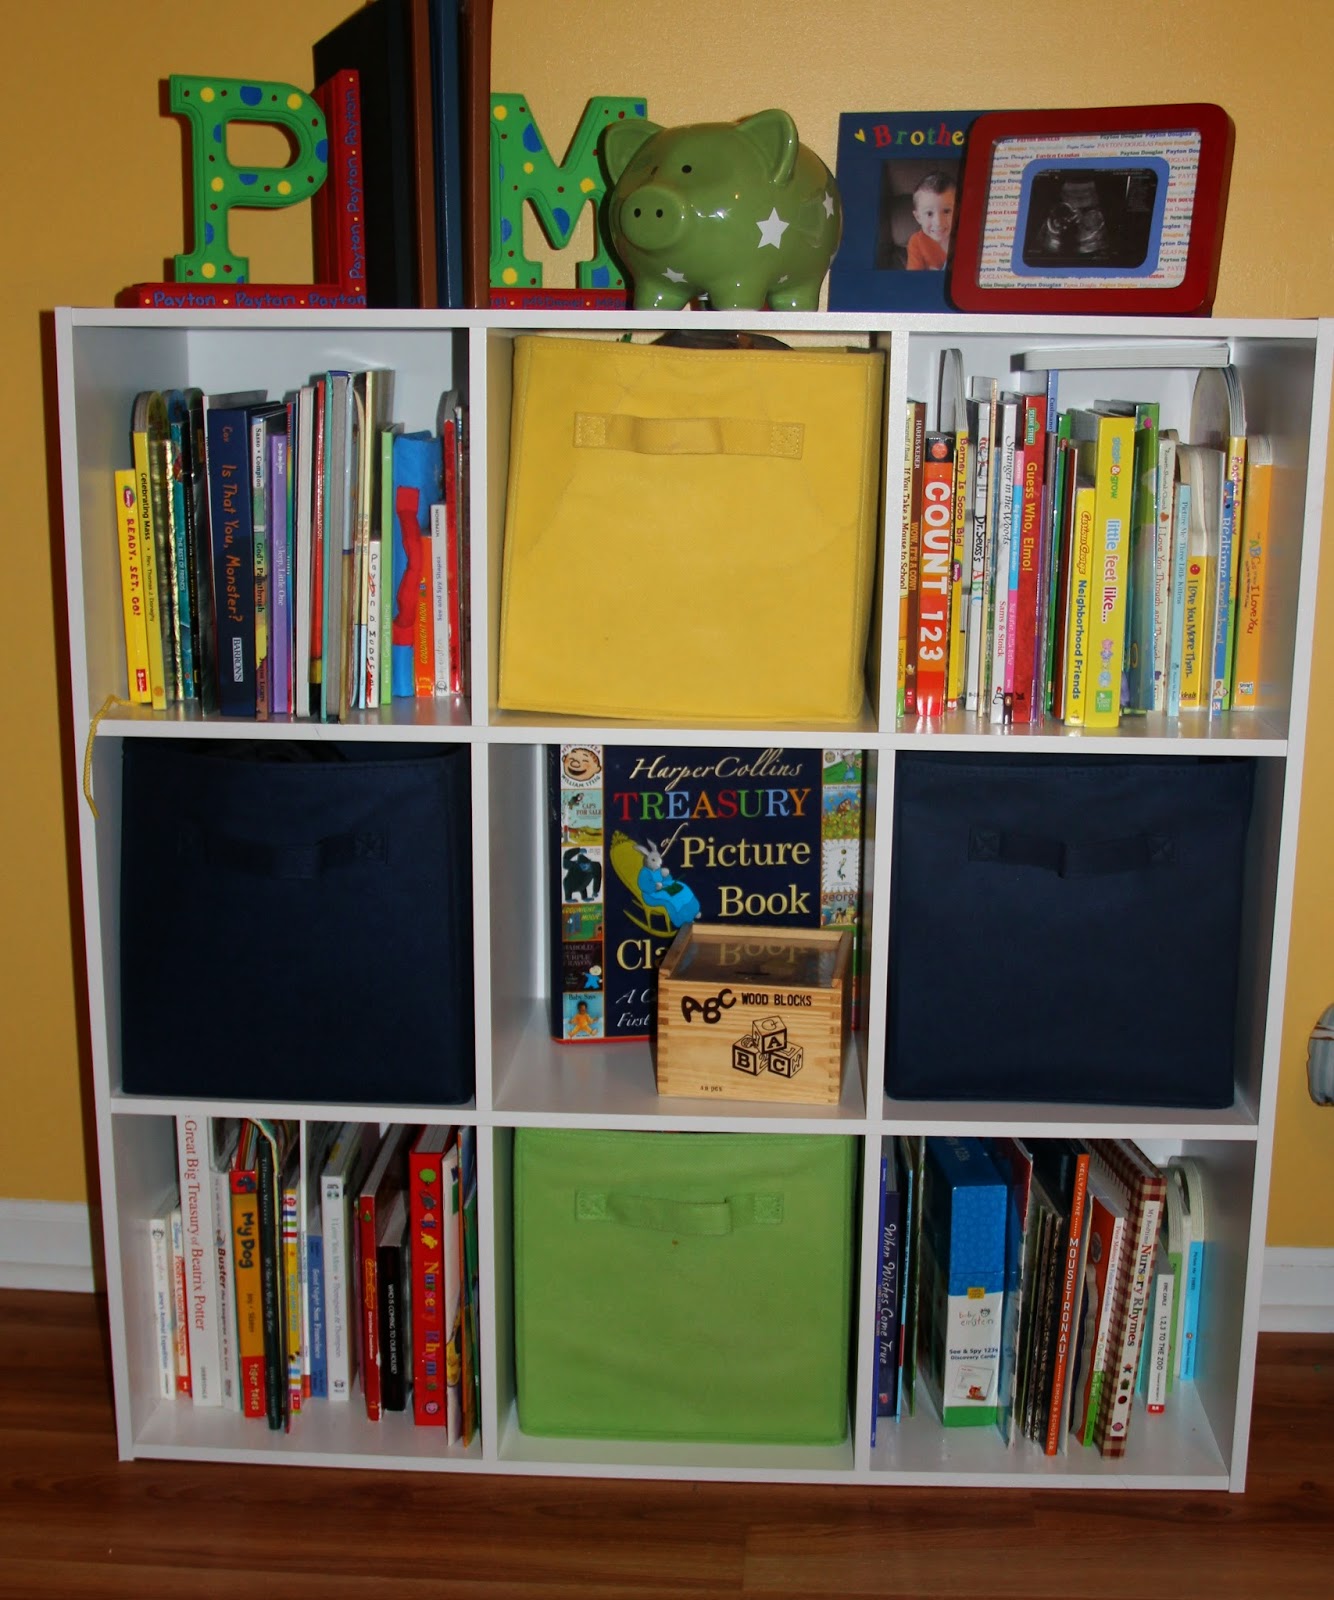
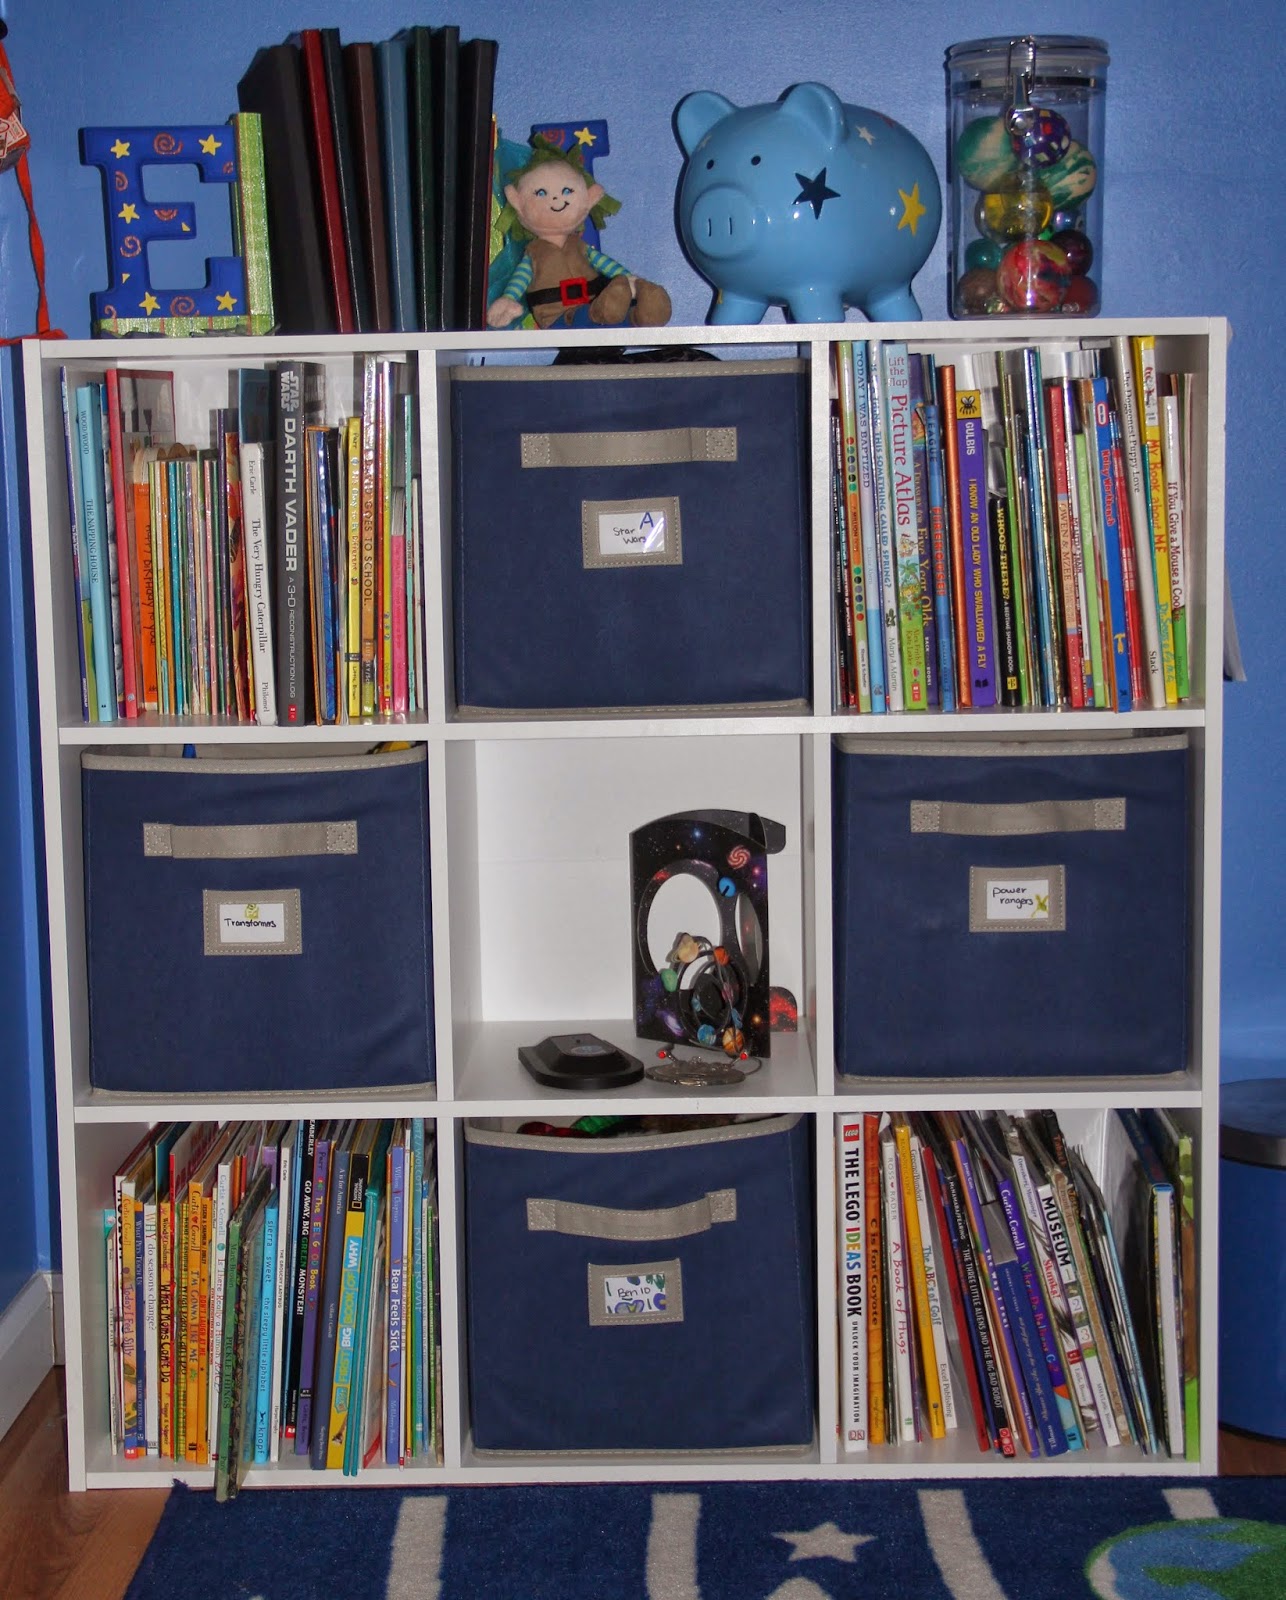
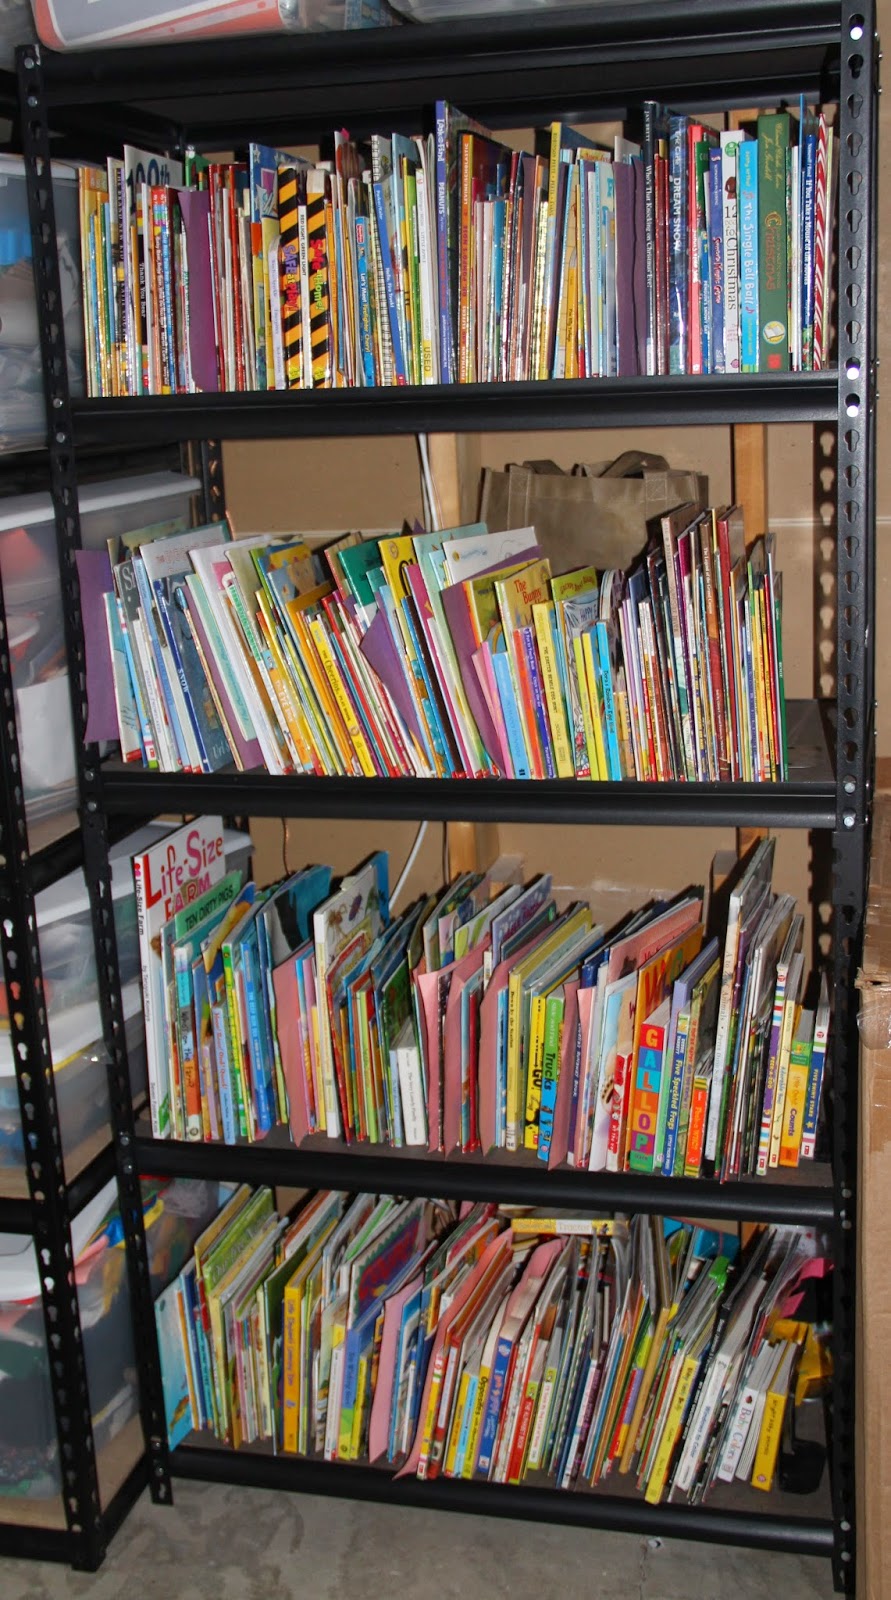
Okay enough with the little side note, now let's move back to my basement storage.  I also have a tub full of fabric and two large tubs full of Conscious Discipline materials and other materials I like to train my staff with.  Then to the right of that, I have a smaller shelf that holds all of my children’s books.  


The books are grouped by theme moving from the beginning of the year to the end with a few random themes interspersed. 

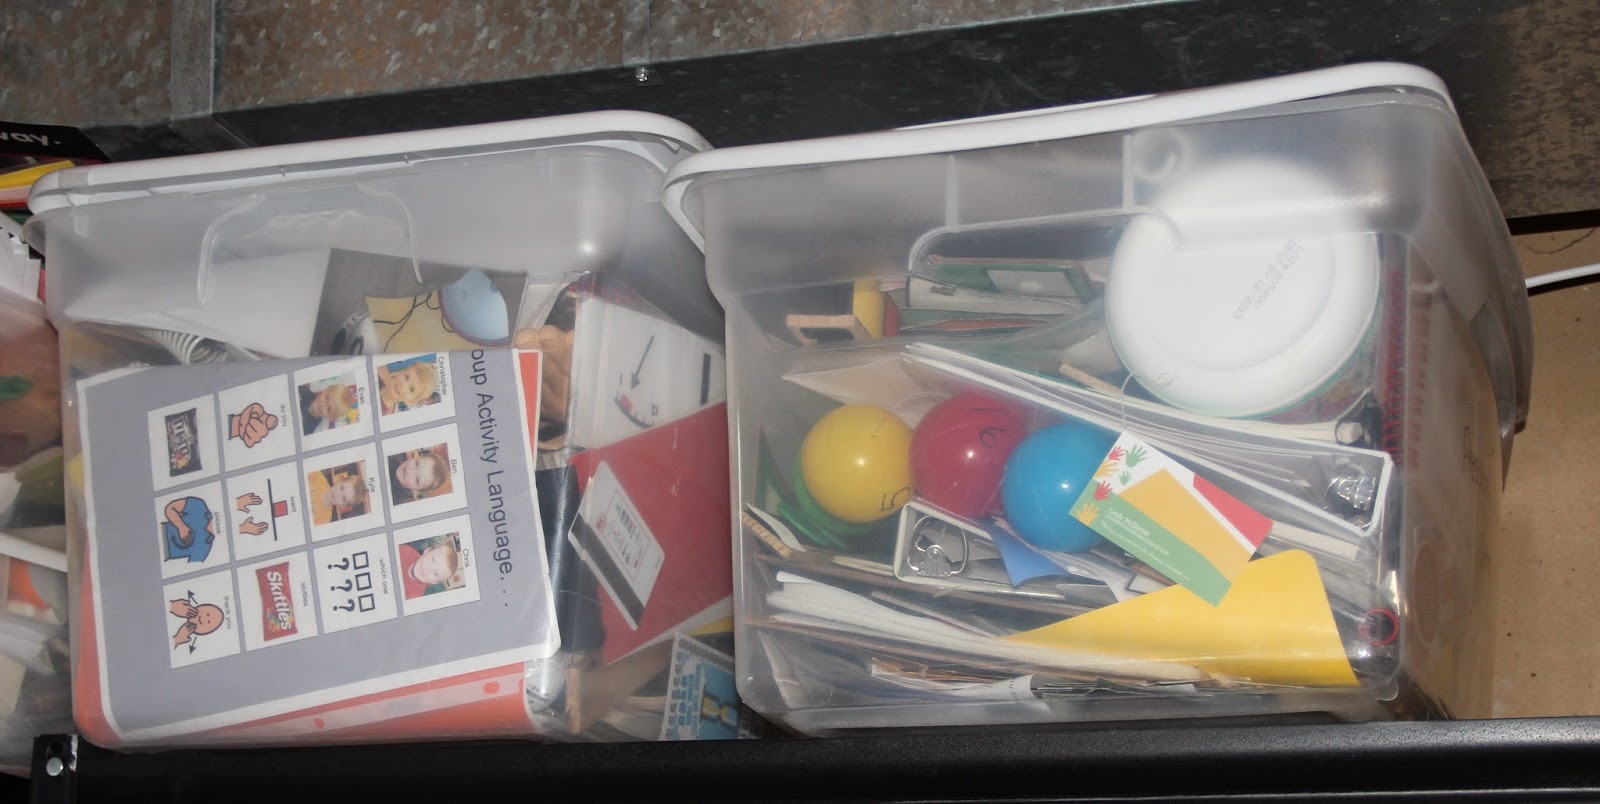
Lastly on top of my book shelf, I have recently added two tubs that store past visuals, schedules, social narratives and other items that have worked for our students. 


The purpose is easy access to share them at presentations, these posts, and to search through them when I get stumped.  Sort of like a toolbox of techniques that I can look through to reenergize my brain and come up with the best strategy for a specific student.
  

So there you have it folks...an inside look at my theme-based storage and unfinished basement.  Next week, we can look at Doug’s golf storage on the other side of the unfinished room.  Just kidding!!  Instead, I will be sharing organizational tips that make our home run smooth and help my boys, including my husband, be responsible for their belongings! :)


Tuesday, January 28, 2014

The Nightmare That Is Classroom Organization

As I was revamping & reorganizing in preparation for second semester, I came across a topic that might spark a New Year’s Resolution or two! I have been an Early Childhood teacher for eleven years and a mom for six so as you can imagine that is a lot of years of collecting toys and random junk as my husband would say.  

As an Early Childhood teacher, I have saved a huge collection of hands-on toys and materials. And being a Special Education teacher, I have felt the need to KEEP everything! I am a huge believer in using student interests to tap into individual potential & motivation. (You can read more about the principles of using special interests items through the work of Paula Kluth and her book Just Give Him the Whale).  

Who knows when I will come across a student that is infatuated with the little Sponge Bob figurines that McDonald’s had in their Happy Meals five years ago or the metal Matchbox cars my husband played with as a kid. What motivates and intrigues one kid for an hour or two may be just the ticket to keep another student in a growing and learning state all year.

That being said, there is yet another factor to what I have kept and collected over the years--it's student levels. My students come to me ranging from a developmental age of 6 months to 5 years so it is important that I have materials and manipulatives to fit all student levels. 

I remember when I first took my job as an ECSE teacher. I was a bit clueless but very thankful that my first son was 11 months old at the time. I remember coming to school with his cause and effect toys in hand almost every day. Now some of those toys are a starting point for kiddos when they first enter our program. They help teach children how to play and stay engaged in an appropriate manner. 

Unfortunately, most of these toys are large and cumbersome so we have had to purge over the years and only keep our favorites. They are stored in gray tubs above our storage cabinets. 


Note: I chose gray tubes so they simply blend in with the classroom cabinets and are not visually distracting. It is not ideal to have them up so high. However, we do always have one that is down on the floor serving as a shelf for our attendance chart most of the time.  At other times, it is pulled for lower level students to play with during rug play.  


Each one has an outside label that states what it contains. 


Okay... so my paras will tell you they aren’t always perfectly stored in the correct tubs but we always start the year with them in the correct location. (As you know, after the year gets going things kind of just happen!) But we do always keep in mind that it is important to have our classroom visually organized with everything in its place so that students are not distracted by unnecessary things laying around.  It's also important to stay organized so  staff know where everything is stored and can get to it quickly if needed.

This year I have also chosen to store things in the dramatic play wardrobe. Over the years, we have tried to use the wardrobe for what it was purchased for---a closet for pretend play-- but it never seemed to work out. It was not structured enough and inevitably we would always have a student or two who would pull all the clothing and accessories from the cabinet and then try to hide inside. As a result this year, I chose to flip the cabinet around so it doesn’t open to pretend play area but rather to the literacy center area

We don’t actually use it in literacy. It simply serves as a boundary for both literacy and pretend play.  It has a child lock on it so we can store preferred toys in it for easy access for staff but not students. 


The back side has been made functional as an area to hang a mirror for students to look in when they are playing dress up.


To learn more about other storage solutions in our classroom, check out the following posts.
Now comes the scary part showing you our closet and cabinet spaces!!!  Yikes!!! Miss Penny often refers to my closet as Monica’s closet from "Friends". The one you don’t dare go into unless you are prepared for the things that will topple out at you. Anyway, enter at your own risk... :)


The top shelf serves as storage for Mega Blocks, Little People Toys, and Gross Motor materials. 


The second shelf serves as a place for art materials. 


Recently, I moved all these items to plastic tubs with handy labels. 


This has been a lifesaver because I used to store all my art materials in one big art collage bin. What a headache! I could never find what I needed! And instead, I found myself always buying doubles of materials...and thus, adding to the original problem.  

On this shelf we store everything...rubber stamps, foam letters, foam numbers, foam shapes, pencils, stencils, crayons, stickers and miscellaneous items such as pipe cleaners, bells, and wiggly eyes.

The third shelf serves as a place for construction paper, clipboards, notebooks, and other large art items. 


You may be wondering where are your paints and other art materials?!? Well, I will proudly show where...I have strategically placed the paints in between the art easel slats. They have been stored there for years but more recently I realized I can cover the area with cardboard attached to Velcro. 


What a huge difference it made visually for my impulsive little ones whom would take paint from the shelf just because it was accessible. Underneath the art easel, I have other paints and paint brushes all labeled and stored in their place for easy adult access. However, we have curbed student interest by covering them with Velcro towels. 


One quick side note:  I like to keep counter tops as clean as possible so when I moved to my new classroom I chose to have a place to hang wet art work rather than laying it around the room to dry. You can't read it very well but the sign above the clips say Just Hanging Out to Dry! A phrase I coined from Mrs. Betz at Quinter Preschool.  Thanks, Tracie! :)


The fourth shelf in the closet serves as a place for containers and bins. 


I must say this is actually the most visited shelf in the closet. We use these recycled tubs and containers for everything from structuring independent tasks to storing materials for daily art and math activities. Ever since being trained in Structured Teaching, this has been a must have shelf!!

Then on the floor of the closet, there are four fabric bins. I used to have five of them and ideally still would if my closet was big enough to set out five. Bins 1 through 4 store activities for Monday through Thursday and then the fifth bin was for the following week’s items. But with lack of storage, they have become bins for week by week materials. So I can put out items for a month of lesson planning...that is, if  I am that well-organized and planned out!☺ 

Please note to optimize space in the "Lindy" closet, I removed a shelf and laid it on top of another shelf and then spaced my shelves out so there was no wasted space.

Now, let's move onto our games and other manipulatives. We are blessed with two double door, long length cabinets. One stores small manipulatives like board games and puzzles and the other stores large manipulatives. 


Miss Alaina, a former para and amazing person, graciously typed up a table of contents for each shelf. 


And again by the end of the year, items are not always stored in their original "beginning of the year" locations. But I try to start out each year and if I am luckysecond semester with items in their proper homes. For the large items I have also labeled the shelves with label maker tape that states "pretend play", "toys", "building toys", "fine motor", "literacy tools", and "social play".

Which leads me to one more hidden storage spot in our classroom...under the sand table! I have velcroed brown towels along the table for added storage. Originally, the towels simply served as a reminder for one of my kiddos not to go under the table. Later it became a great place to store extra dramatic play costumes, flattened cardboard blocks, and sensory table spoons, scoops, cups, and other manipulatives. You might be asking why brown towels?  Well as I shared in my virtual tour back in August, each center has a color for students to navigate more independently and review or learn their colors. 


For those of you who are new to my blog, you don’t have to be a seamstress to use the Velcro towel technique. I simply buy cheap towels and heavy duty Velcro. I attached the soft side of the Velcro to the hard surface. Then I hot glue the rough side to the towel for extra support because I have learned that the sticky back Velcro will hold up for a while but lose it’s sticky after a few months.


Okay, only two more cabinets to go! Beside our full length double door cabinets, I have two more smaller cabinets. In one we store kitchen tools and supplies as well as kleenex boxes and ziplock baggies.  In the other, we store extra teaching materials. On the top shelf I store manipulatives to review and practice pre-academic skills: numbers, colors, letters, and shapes.  Things like number dice, a color di, a how many jar, number lines and alphabet lines and so much more. 


Then on the second and third shelf, I store other materials used throughout our school day, like timers, fabric bags, paint sticks, voice activated buttons, and other materials used for social small group activities. 

Our counter space above these cabinets basically serves as a staff desk. That being said, we try to keep it as clean and clutter free as possible, so we have a space to work when the occasion arises. 


On top of the microwave, I have a to do tub. 


Inside I have materials and items for staff to work on if /when we have a few minutes. This is great for when we have a student out sick or two or more students out to ot, pt, or slp at the same time. Note: I try to write little notes on all to do items so my staff knows what to do with the items without having to interrupt direct instruction to ask me what to do. Given sometimes, they are not sure what I am asking so they typically move onto something else and then come back to that one after class when they have a chance to get more information. 

On the other side of the cabinet, I store picture icons as well as a place for extras and a before, after and between classes to do list for my paras to follow.


There are just two more hidden storage spaces to share before I sign off.  The large group materials are stored on a shelf opposite the circle rug play materials. The children know they are off limits because there is a sign that says "Stop! This is for teachers." glued to the Velcro towel on this shelf. 


Inside I have a place for large group extras: DVDs for a rainy day as well as bubbles, a parachute and other group time activities that I can pull out at a moments notice.  All good for those days that don't go according to the original plan. 


I also have teacher resource storage and other books behind the bench seat at literacy.


Wow! That was a lot.  Now, you see I am quite OCD but that is what makes it work. I truly feel the organization helps everyone involved...my staff, myself and our students. However, it is definitely a work in progress!  I'm always open to your suggestions & recommendations. What works for your classroom?

Tune in next week to see how I have managed to organize my theme-based learning tubs, books and manipulatives.