Showing posts with label Direct Instruction. Show all posts

Sunday, July 19, 2015

Adapting Books to Support Communication and Interaction

Tis' the season for excellent finds in the dollar bins at Target!  Among the many amazing school supplies, books, games, and flash cards, I found six excellent board books that I just couldn't pass up. 

First up this series of four flap books: Are These My Spots? Whose Ears are These? Who Makes that Sound,  and How Do I Move? 


I added simple aided language pages to support students in answering the questions in each story. 


Great for students who have limited verbal skills or are just starting to use complete sentences as the pages will aid them in expand their responses to phrases and shorts sentences.  Such as, "The frog makes that sound" or " A turtle has a shell."

Simply print the pages, laminate or packing tape them, and tape the edge of each page to the last page of each book.  You can then fold the page inside the back cover for storing purposes.

NOTE:  If you print on cardstock or mount to thin cardboard the aided
language pages will hold themselves up so students have access to
the words as they look at the books.

Next up, Disney Pixar's Inside Out Colorful Emotion.


I added sentence strips and a Velcro word bank for students to work on pronouns, colors, and emotions. A great set of concepts especially for a book that was only a dollar!


This time tape the cardboard to the edge of the front page so you can fold it inside for storing purposes and then tape a sentence strip on each page with words on it.


And for my last dollar bin treasure, Fisher Price's Little People Time to Count.


For this one, I simply added instructions and questions with a permanent marker. 


For example, on this page I asked the student to circle the wheels and circle how many oranges.  Like I have shared in a previous literacy workbox post all you need is dry erase crayons to make board books interactive!

That all for now!  Just a short post to make sure you didn't pass up these great finds at Target!

Happy reading and shopping, Lindy


Saturday, January 3, 2015

A Fun Freebie to Ring in the New Year!

Greetings, Considerate Classroom Friends!

I finally bit the bullet. I am on Teachers Pay Teachers.  Thanks to the encouragement of Cathy Stevens and a few friends.  I am totally in awe of what is out there.  Cathy, as well as so many others, have so many great products.  

So here goes my first Teachers Pay Teachers Product: Toot your horn to review and learn new concepts!


All you need is some party blowersvelcro coins, an empty oatmeal or peanut canister, two pieces of construction paper, scissors, ziploc baggies and this printable

Print a set of cards for each student.  In my classroom, I print concepts that each student is currently working on. For instance for a student who is at the beginning stages of learning numbers with a number recognition IEP goal, I might print numbers 1 through 5 and then print a few color cards for them as a review so they can be successful with some cards automatically.  

Next I put a velcro dot on the back of each card and put it in a baggy with a party horn that has the opposite type of velcro dot.  


Normally I put rough velcro on the card and soft on the surface to prevent kids from rubbing up on the surface of a cabinet, shelf, etc and getting scratched.  But in this case, I change it up to maximize my velcro usage.  For example, for one student's review card set I will do rough velcro on the cards and soft on the horn and then for the next student's set I will do the opposite so I don't run out of one type of velcro before the other.  

Next I put together a canister for sorting correct and incorrect answers.  Mine is an oatmeal canister but any large canister will do.  

One side says, "Yay! You did it." 
The other says, "Maybe next time."
The inside of the container has a piece of folded card stock to separate correct answers from incorrect answers for data collection and for a try again method.  


Below is a video of how to play and the method of trying again in a nonjudgemental way to support errorless learning.  The idea is to play in a fun way and help students not feel badly about their incorrect answers but rather re-answer with the correct response before finishing the activity.  


Okay, so I know what you might be thinking... I am suppose to make a set of cards for each student?!?  How do I have the time or materials I need for that?  Well, I will give you a little motivation. By having a set for each student you can send them home as a homework activity.  Speaking from a mom's perspective, it is nice to have 'fun' homework. The kids and the parents will appreciate it.  Send it home in a baggy with this note so parents know how to play the game.


Another option is to store the set for students to do during one on one direct instruction with a para or teacher.   Note: You can really review any concepts in this manner: math facts, sight words, spelling words, thematic vocabulary, the list is endless.  It could be great in a speech or ot session as well!  You can use it to review concepts and work on strengthening oral motor control.  

So there you have it a New Year's Freebie and my first Teachers Pay Teachers product.  Be on the look out for others.  Hang on tight folks, it could be a bumpy ride. Remember I have the tech skills of a preschooler.  (Okay, so maybe that is giving me too much credit! I think my three year-old son has actually surpassed my technology skills.)  
Best wishes, 
Lindy

Wednesday, October 1, 2014

Personalizing Communication Supports for Individual Success

In the past couple month, there has been a lot of interest and excitement around the mini communication book and aided language boards as featured on the blog in October of 2013.  I contribute their success to a presentation I heard from Linda Burkhardt regarding Pragmatic Organization Dynamic Display (PODD).  She made me think about language in a whole new way! 

As I began thinking about our limited language learners in a different light, it was time for me to give them the opportunity to communicate more than just requests.  They deserved the right to communicate their needs, wants, and opinions.   And thus, PODD books and aided language boards were born.  

At first, my own insecurity and inexperience limited my use of the PODD book. As much as I learned at the training, I still felt silly navigating the book and fumbling through the words.  But just as a baby or a toddler experiments with language, it was important for me to do the same with PODD books.   

I owed it to my limited language learners to get into their worlds and start communicating in a way that they could see and eventually start being a part of themselves. 

I say "eventually" because as you might remember from my October 2013 post, we speak to typically developing children for at least 12 months before they respond in a verbal fashion. It takes 12 months of modeling and speaking to them and not getting anything in return! And even when we do get something in return, it is inconsistent at first and in little one or two word chunks like "mama", "dada", and "bye-bye". 

So long story short, I was going to have to be patient with the process.  Patient with myself and my staff as we learned to communicate using the PODD books and patient with our students as they watched us model its usage and started to dabble in the communication process themselves.   

For those of you who know me, you know that patience is not my strong suit.  I want to see progress and I want to see progress quickly.  There is no time to lose!  So as my staff and I started dabbling in communicating with the PODD books, we also began carrying a core word sheet in our aprons to support our kids in communicating. 


We were much more fluent in using the sheet than the PODD book so our students were able to pick up on using it pretty quickly.  By December of our first implementation year, we noticed the kids needed more. They were acting out and behaviors were off the charts!!  

In that moment, I had to reframe the behavior.  I remembered from early trainings with TASN-ATBS that behavior is communication.  The kids were trying to communicate but they didn’t have enough words to do it so as you might remember from my earlier post, we created a 5 page mini-communication book.


Page One: Core Words

Page Two: Manners & Action Words

Page Three: Greetings & Feeling Words

Page Four: Food & Hygiene 

NOTE: Page five is not available as it is the people page 
with specific photos of staff and students.


Page Six:  Colors & Shapes

You can access the mini-language book in the Boardmaker Online Community.  NOTE: Boardmaker has recently changed it's look and features a bit to better meet the needs of educators.  Feel free to use and change this template under Boardmaker Share to meet your students' needs. You can get the coil spiral binding at Binding Depot.  If you do not have access to Boardmaker and/or you are interested in the updated version check out this product on Teachers Pay Teachers.

You may also remember that from the 5 page mini-book came a little language cuff for one of our little gals.  She was in love with the 5 page mini-book and would try to take it from our staff aprons as she jabbered and pointed.  At first this made my staff and I reluctant to keep the mini-language books in our aprons as her behavior was such a distraction for herself and others, but then as my speech path and I were talking we began to reframe her behavior.  She was trying to COMMUNICATE and we would be doing her an injustice if we took her voice away.

So we changed our perspective.  We often reminded ourselves that although she had limited verbal language, her behavior of grunting and pull on any and all language boards she could get her hands on was a bit disruptive...However, it was her way to communicate! She had soooo much social communication in her just bursting to come out!  She was and still is a little social butterfly. She just needed a way to get it out.  And lucky for you, her parents have given me permission to share her journey with aided language supports. 

It's my pleasure and pure delight to bring you...Miss Lilly!  


This video is of Lilly the first time she attempted to use her language cuff.  Notice the cuff was Prototype 1.0. It was a toilet paper tube and in hindsight not the right fit.  It was not flexible enough for her little arm and it got wet every time she washed her hands. 

After recognizing the concept of the original language cuff was good but not functional, we moved on to Prototype 2.0, a very high-tech cutoff tube sock with the words hot glued to the outside. 


This version was function for communication purposes but did not fit Miss Lilly's very fashionable style so one of my fabulously talented paras, Miss Molly, created Little Miss Lilly this very high fashion cuff.  She knitted it with a plastic pocket insert in which we could change out the words as needed.  


It was such a hit that her mom asked Miss Molly to make her two more as Christmas gifts.  What a great idea, Mom!  There is no better gift than the gift of communication! :)  

At first, the words on Lilly's language cuff were just enough.   She used it to communicate she wanted to be "all done", wanted more, needed help, or was sad, happy or mad.  But in May behaviors returned, Lilly communicated with all her being that she needed more words.  She would touch sad or just continually tab the cuff in frustration with no functional means.  Lilly wanted and needed more words!  

To make the added words functional and purposeful for Lilly, we incorporated her interests and strengths.  Lilly's has a strong interest in interaction with others.  She likes to greet people, interact socially, sing, and go on functional walks in the hallway.  So purposely, we added communication pages to her cuff that would be motivating for her to use.

We added a social page in which Lilly could greet people, ask how they were, what their name is and tell them what her name is.


And then a page in which she could communicate her need to be all done, and move onto preferred activities such as delivering tools to the janitors room, delivering mail, or singing with teachers.


These additions are pretty specific and not necessarily general enough for her cuff at home.  They were created to motivate her to use her communication device and turn pages to get what she wants. As she starts to get the hang of it, more words will be added and then eventually she will move to a full PODD book as the language cuff is set up in the same turn-the-page fashion as a PODD book.  

As you can see by looking at page one of the language cuff, it has colored tabs for turning and a "more to say" icon in the upper right corner.  


The pages are ziploc name badge holders. (I purchased mine for $0.70 a piece at a local office supply store.) Then, I punched tiny hole punch circles on the sealed side of the holder to spiral bind together that way I can slide new communication pages in and out as needed.  

Note:  That my staff and I continue to model the PODD book alongside Lilly's language cuff so when she is ready to manage more words we can move to her own PODD book.  

In the beginning, we granted any request she communicated with her cuff but as time went on we set limits using the later and time to work icons on her cuff.  For example, if she communicated that she wanted to sing during direct instruction or small group learning rotations, we would honor her communication by saying you want to sing, then we would point and say "sing later, work first."

Here's Lilly in action again the first day she was given her cuff with more pages and words. 


WOW!  Right?? She is a rock star!!  And you haven’t seen anything yet.  On the second to last day of school (last May), Lilly surprised me with this amazing play session.  


For specifics about the play kit in this video click here.  

What a great way to end the year!  And for me who moved on from the classroom over the summer it was bittersweet.  I know that her amazing family and teachers will continue to help her grow and expand her communication skills but I am totally sad that I won’t be in the frontlines to witness her greatness.  Her love and enthusiasm to communicate and be social are contagious.  I would like to thank Lilly's parents for allowing me the opportunity to share her enthusiasm with all of you!!


Take her enthusiasm and run with it in your own journey with verbal and aided-language communication!

Best, 
Lindy


Wednesday, March 5, 2014

Natalie's Story: Using Structured Learning Principles in the Home of a Child with Special Needs

With permission from her parents, this week I am sharing the progress of Natalie, a wonderful little girl with Trisomy 4p.  Trisomy 4p is a rare chromosome disorder in which some of the material in one of the body’s 46 chromosomes is duplicated.  Like most other chromosome disorders, this is associated with birth defects, developmental delays and learning difficulties.

For Natalie, the disorder’s effects are significant.  In the early years of life, she struggled with illness and many health complications.  More recently, she has gotten to a place where she is healthy enough to come to school and explore her environment.  With that exploration, there have been a few growing pains. In the beginning, it was just exciting to watch her become mobile and explore her world regardless of what she was exploring...her brother's toys, the refrigerator, pots and pans, the washer and dryer, etc.  But then came the time when limits needed to be set. 

In early December her mom texted me, “Help! Natalie is into everything and even broke the Christmas tree!”  With that text I knew it was time for a house call which turned out to be an amazing opportunity for all of us.   I had never realized how much the structure of the classroom can be adapted to a home to create success until I start working more closely with Natalie’s family and care providers.    

As I reflect back I think when Natalie started school, she realized that there was more to life.  She enjoyed the structure and challenges that school provided. But the transitions from school day to home life presented two very different environments that brought out mischievous behavior at home.  At school, we structured growth opportunities.  At home, Natalie found them on her own like trying to figure out how to open the baby gate to the basement, prying a door knob open, or tearing her brother’s library books.  She was craving structure and challenge.  She actually started to like school so much that she cried when the bus dropped her off at home.

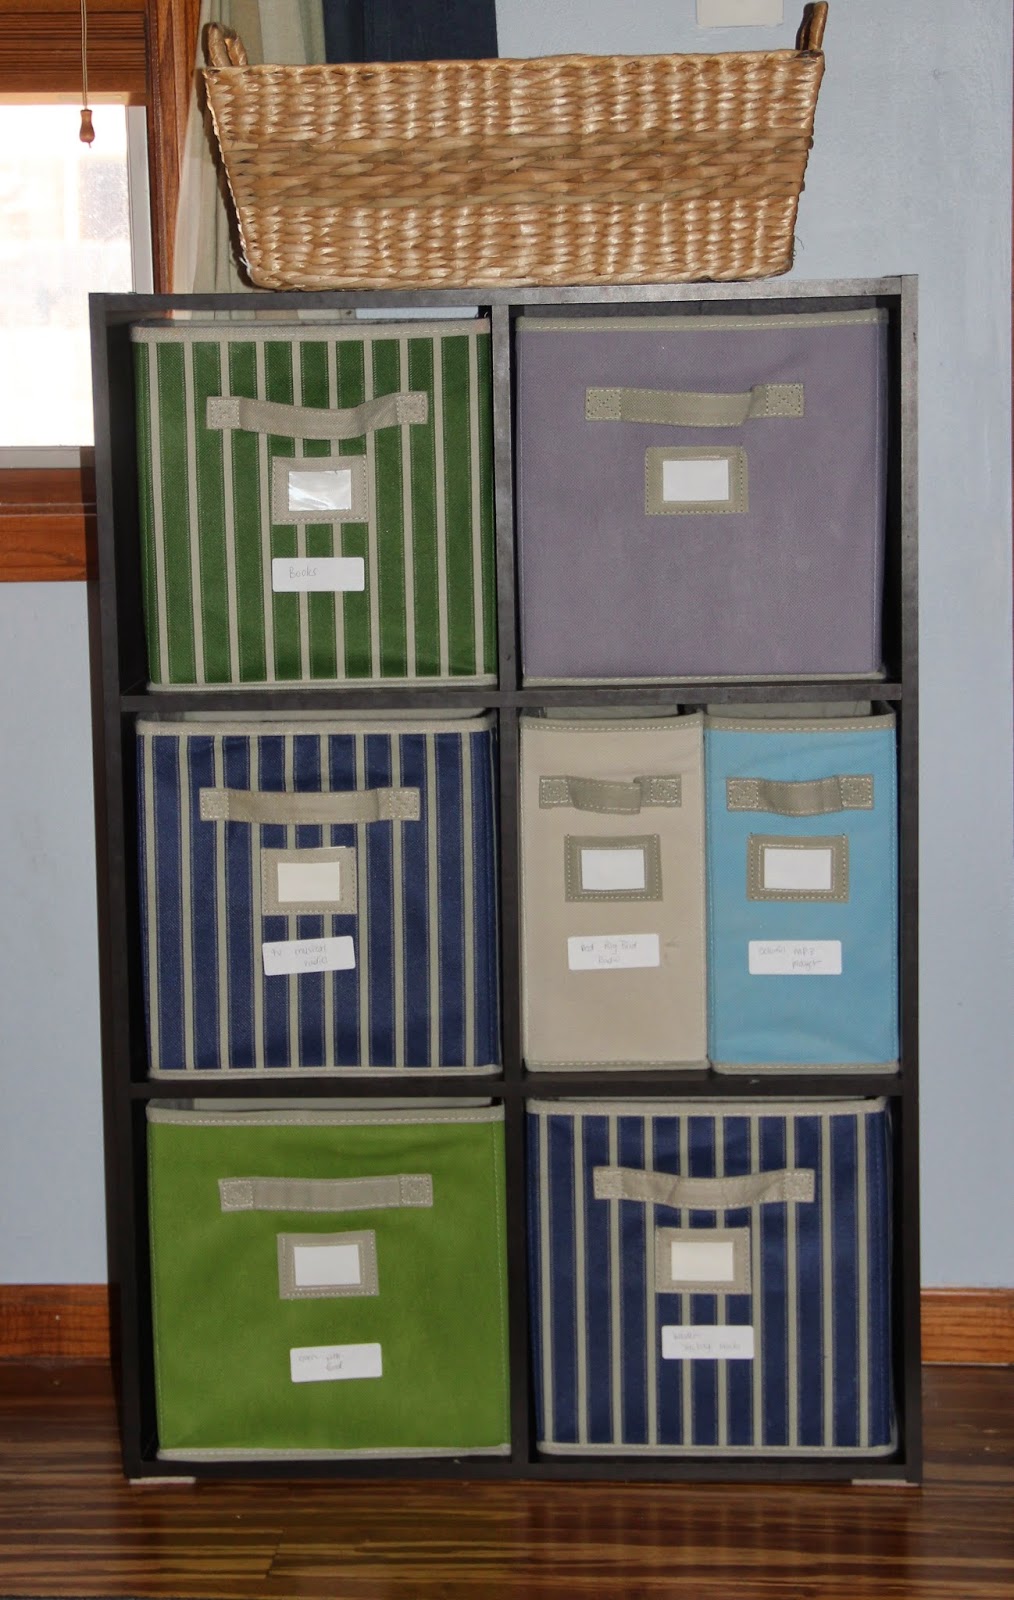
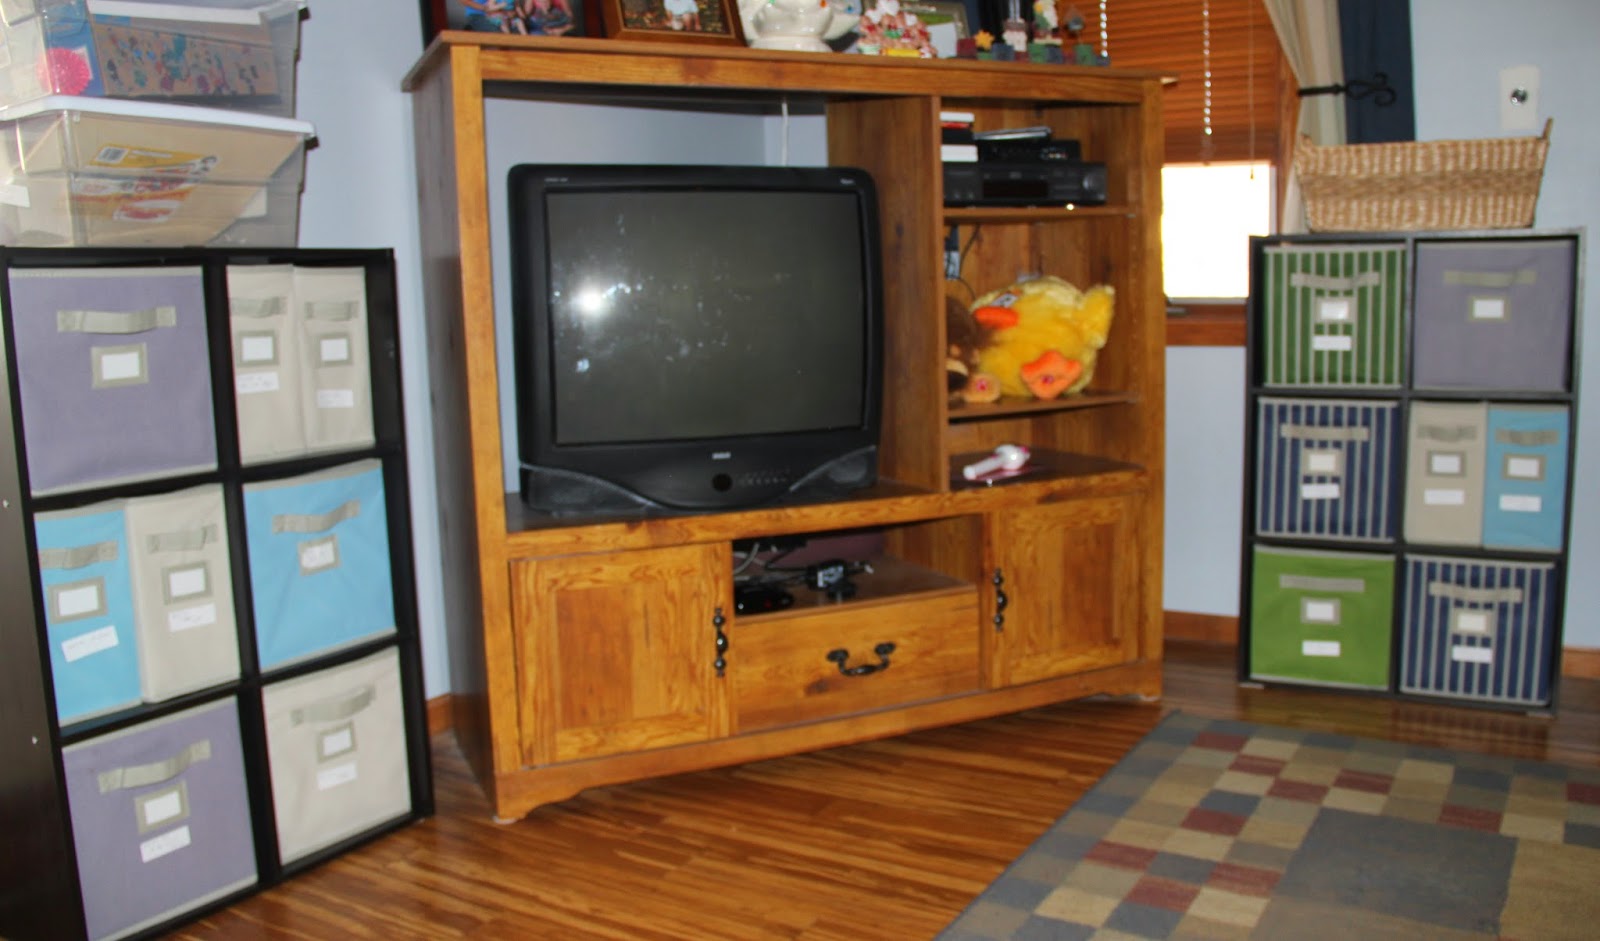
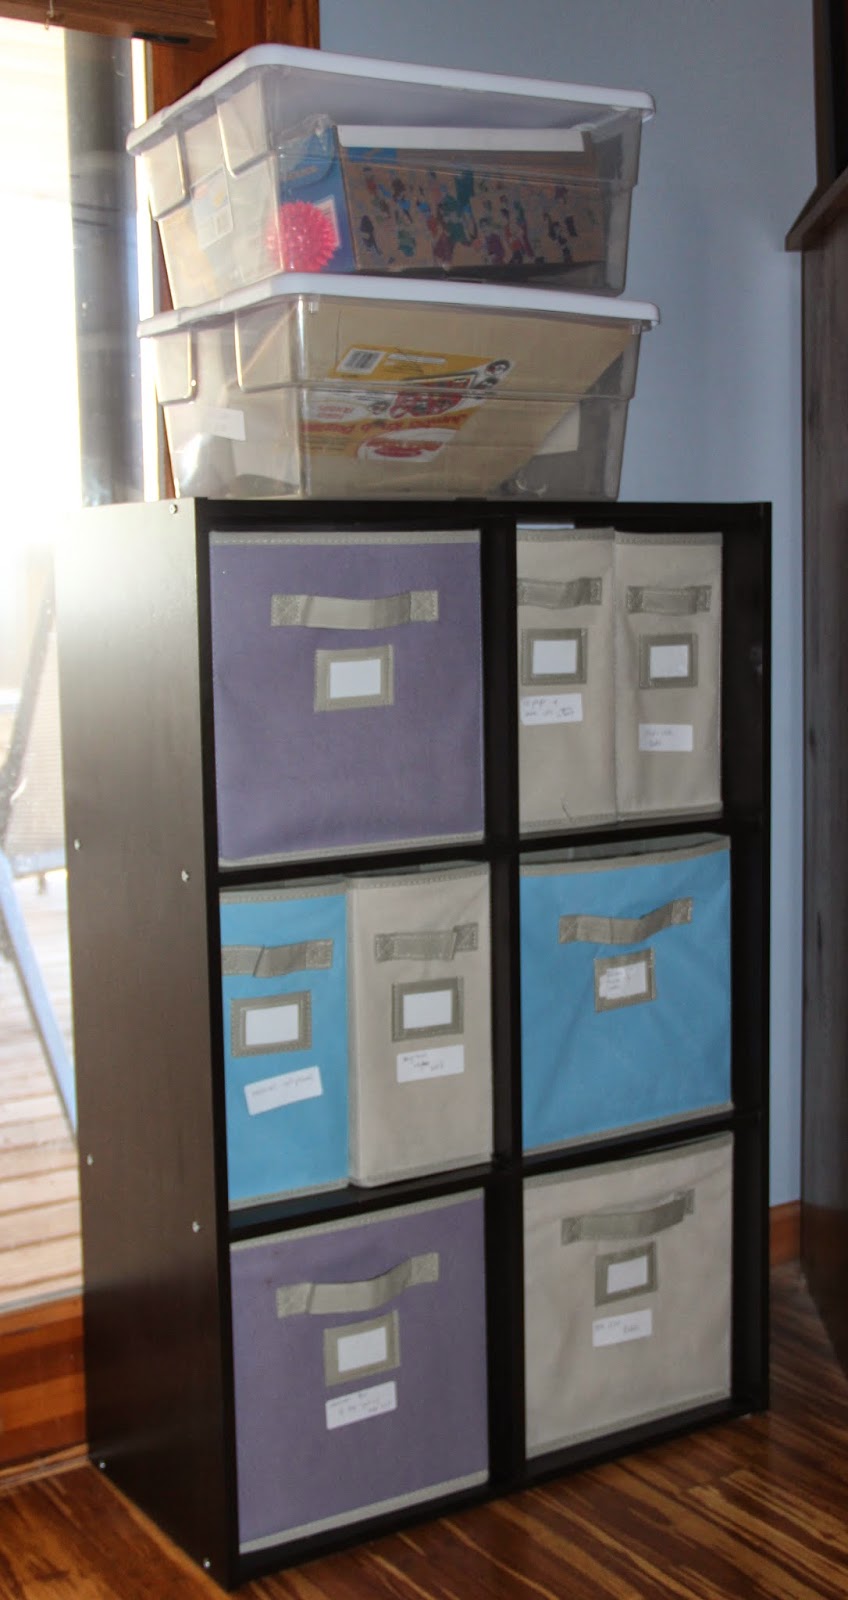
So how did we build structure into her home? Well, HUGE props to her mom, dad, and grandparents for doing just that!  I shared with them a few ideas for structuring her toys and play things.  For the most part, Natalie has never found interest in toys.  She would much rather dig in the kitchen cabinets or get into the refrigerator so we had to come up with a way to make toys interesting to her.  She loves to put in and take out. She has become very proficient at put in tasks.  So her dad simply repurposed the cube shelving that they had in the family room and her bedroom. 


NOTE: Her dad mounted the shelving units to the wall so if she pulls herself up with them they would not fall on her.  

They bought a few extra fabric boxes and then her mom went through the family toys and placed one toy or put in task in each box.  (Notice the new boxes they found at Home Depot.  They are in half sized sections. So exciting for us organization geeks!! :) I purchased some for our literacy center so we can double the amount of leveled boxes we have!)

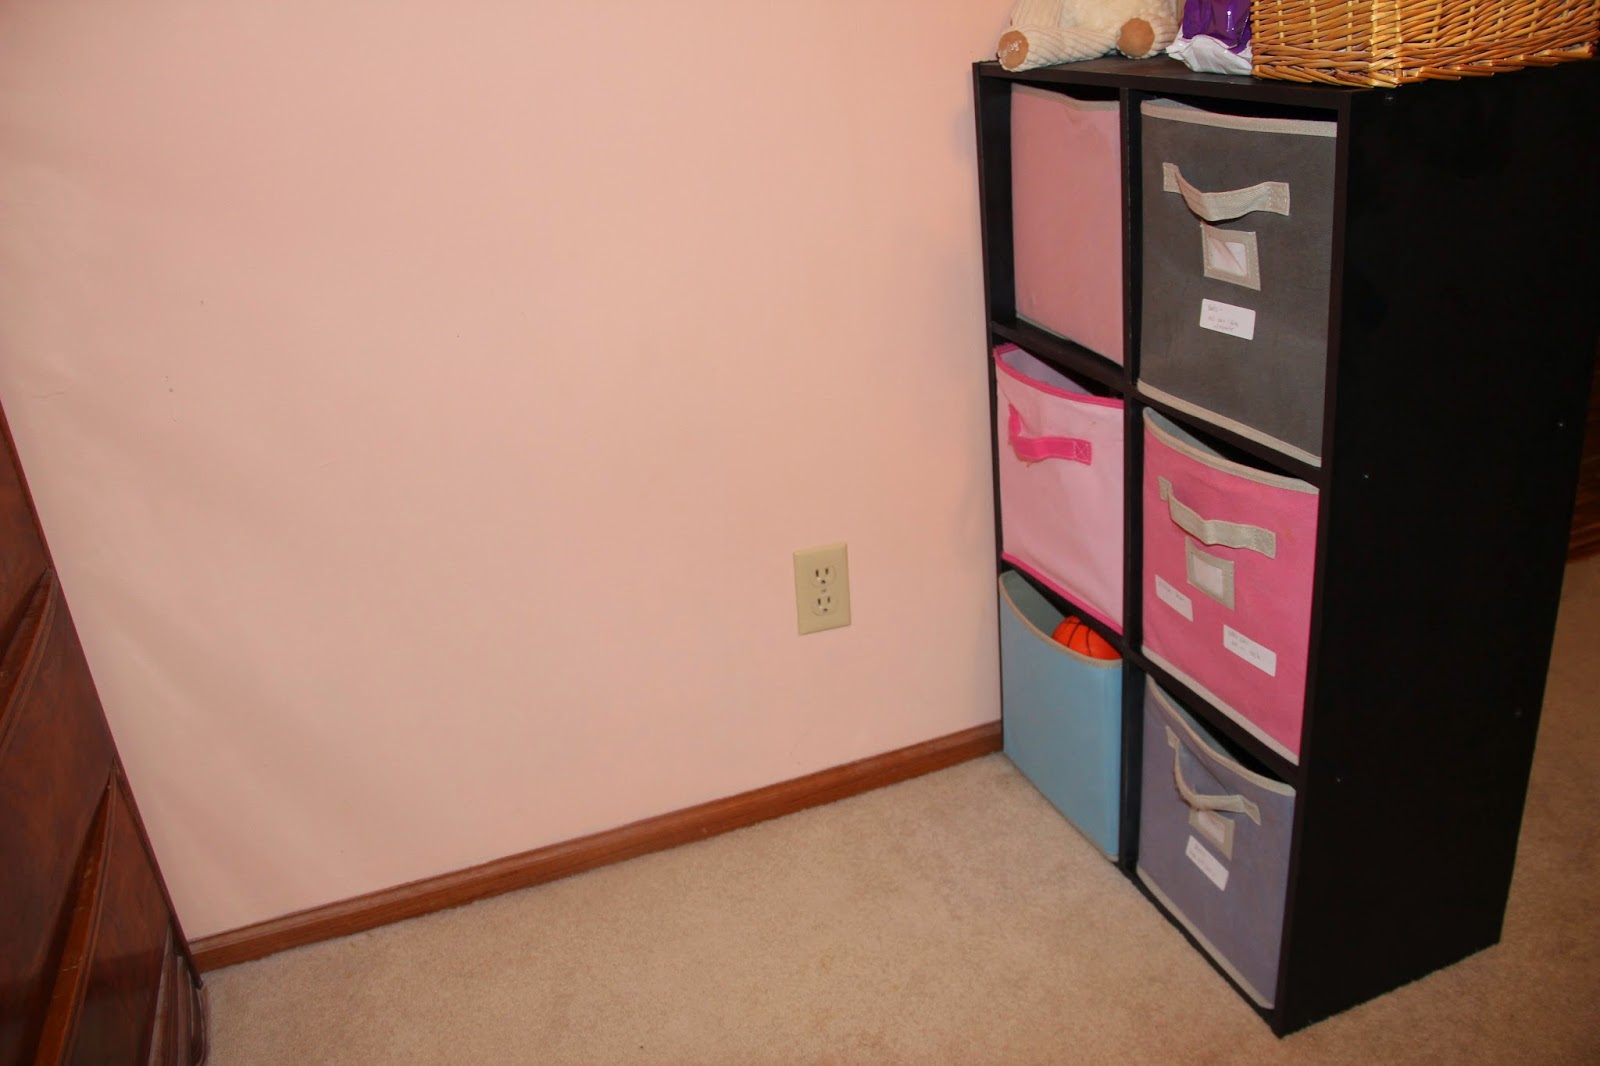
Here's what the cube boxes look like in Natalie's bedroom.  


Her dad strategically mounted the shelving going out from the wall.  This helps care providers and parents keep her in the space they would like her to play in.  She is much like a toddler in that she likes to leave and explore different rooms.  This blocks her from seeing the door.  It is much like how our social center is set up in the classroom.  (I am hoping to share that center with you soon!)

The systems work like magic!  Her mom even said, “Wow, we should have done this with her brother when he was little.”  It is just good practice for all children.  By organizing their play things, it organizes their play.  For Natalie, it also provides boundaries. When her toys were stored in a large toy box, they were overwhelming to her.  It was much more structured and fun for her to go to the kitchen cabinets and pull out the pots and pans.  Now that her toys are organized, she is more interested in putting in and taking out her toys rather than pots and pans.  Next, we will work on her ability to play and engage with toys for a longer amounts of time.  

Of course, there is some training involved.  At first, Natalie was in the habit of going to things that were off limits. I told her parents and care providers to redirect her to her spaces in the home each time she would try to explore the kitchen or other off limit spaces.  The family also added a hook and eye to the top of the door to her brother’s room and the bathroom so those areas would be off limits unless accompanied by an adult. 

So what’s in the boxes?  Some of her favorites:
The key to success is that the family switches the toys out every two or three weeks so she doesn’t get bored and start engaging in previous behaviors.  Fortunately for Natalie, her family has collected a lot of great toys over the years with the help of grandparents and garage sales.  We also supplement her toys by checking out some of our classroom toys and tasks to her and her family so she can generalize play skills and experience things in both settings. 

The family has become accustom to building put in tasks and other task boxes from things around the house with the help of my trusty resource, "How Do I Teach This Kid?" by Kimberly Henry and the great folks at Task Galore.  Natalie's favorites work on increasing her skill level.  Here are some examples.

Counting Bear Put In 


Notice that I hot glued craft foam on the top of the put in container so that students can’t put in and dump out.  They can only put in. 

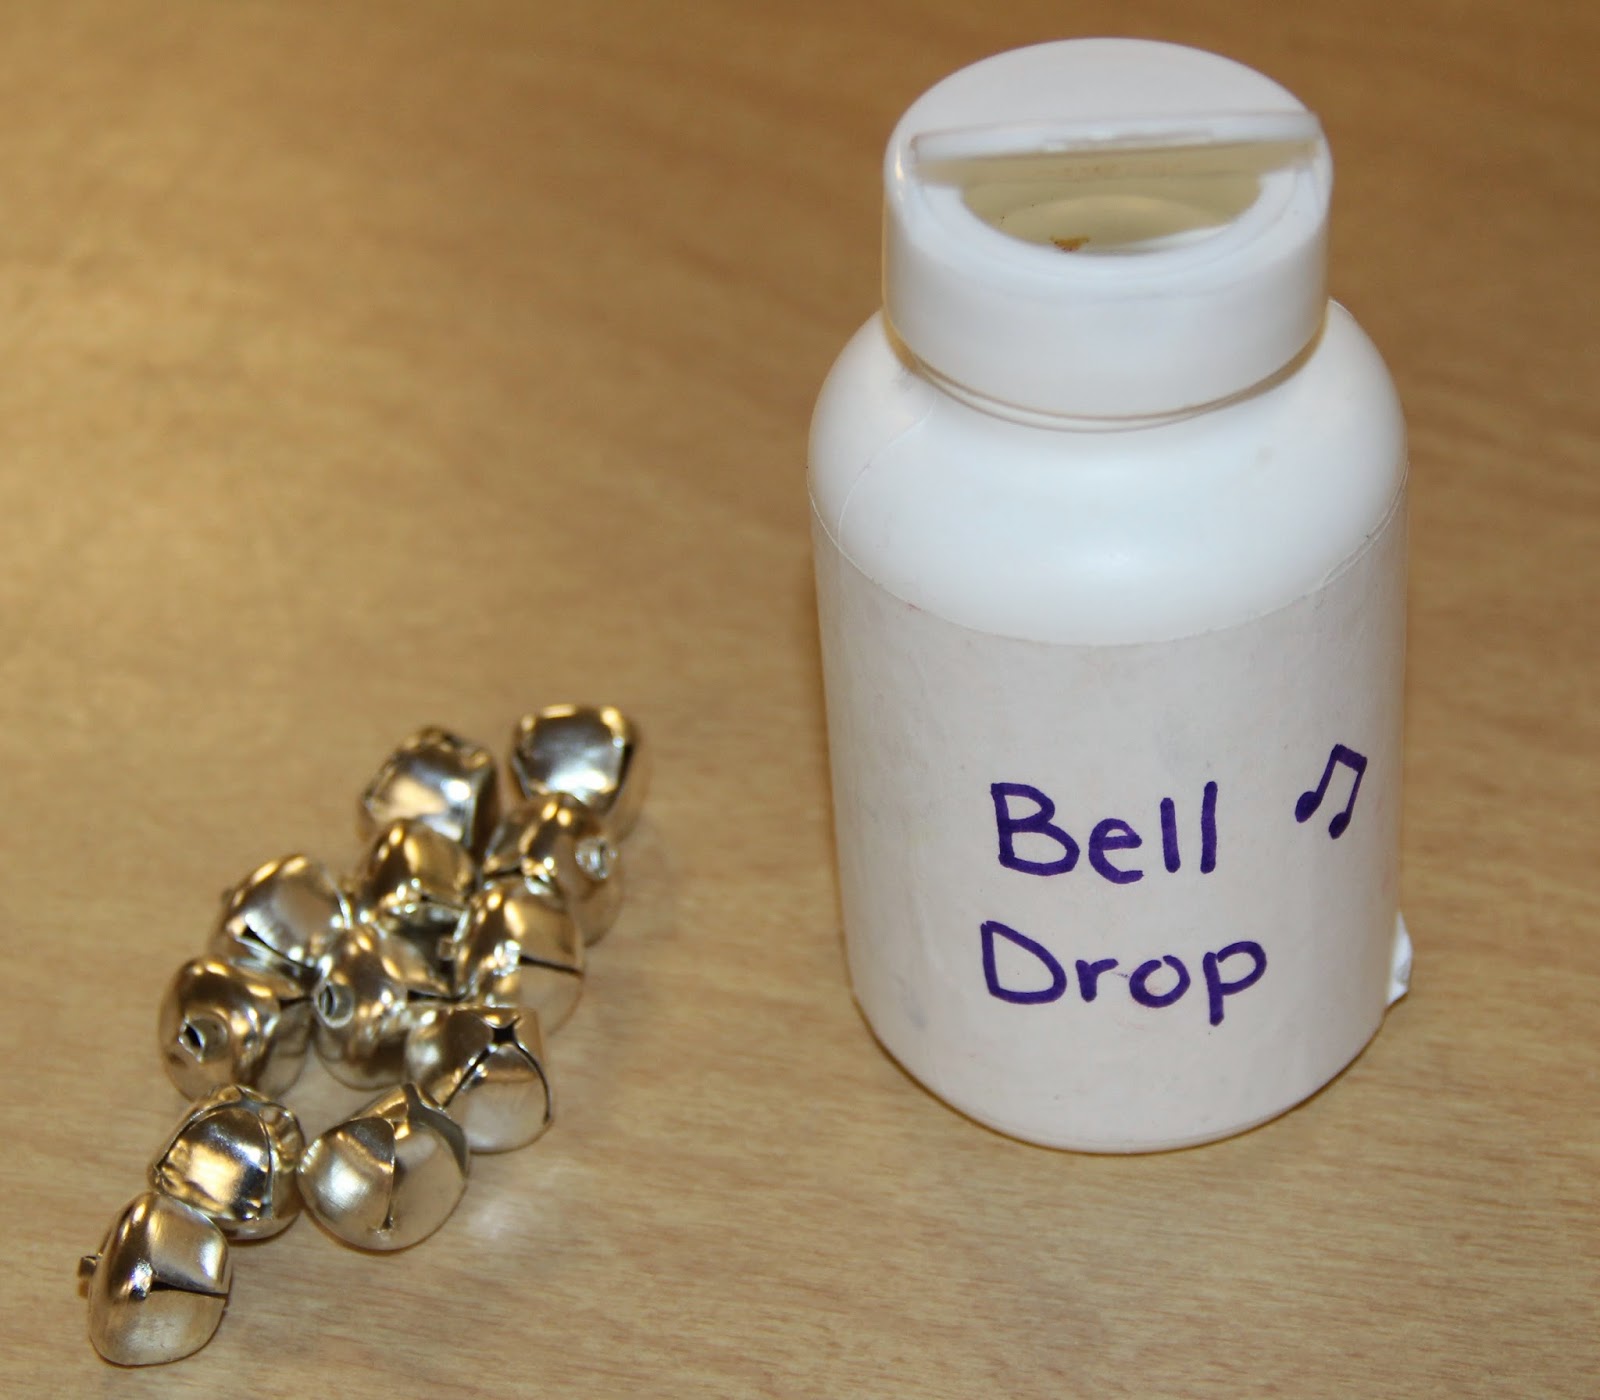
Bell Put In


This task includes its own reinforcement as Natalie loves the bells making noise as she puts them in. 

Golf Tee Push In


This task has the added element of pushing in rather than just putting in. 

CD Put On 


This task is a step up from put in as it's put on instead. 

String Bead Take Off/Put In 


This task works on two-step directions:  1. Take off and 2. Put on.

Bead Put In   


The bead put in was something we added to desensitize Natalie to putting things on.  She resists putting on bracelets, necklaces and more importantly stocking caps and her prescription glasses.  By taking an activity she likes and is successful at (Put In) and using parts of beaded necklaces as the put in materials she has become less resistant to necklaces. Now, we can work toward her putting on other things.  She now wears beaded necklaces, bracelets and stocking caps for short periods and tolerates holding her glasses.  She used to scream and bang her head each time I presented her with her glasses.  It is all a work in progress, but wow, we are proud of her progress so far!!  

Other advances we are making with Natalie is in relation to direct instruction at home and school.  You can click here to see what direct instruction looks like at school. At home, her parents created a small work space near their dining room. Here is the table she works at. 


Typically, the chair in this work space is a Rifton chair This is not to hold her in or confine her but rather to help her sit up properly and become more attentive.

To the left side of her table, her parents have repurposed a wooden chest to hold all of Natalie’s tasks. 


Inside there are a variety of task boxes organized in plastic bins. Natalie’s mom shared that the only thing they purchased for this area was the plastic shoe box containers.  The rest of it is simply stuff they have saved and accumulated from their house and her grandparents’ houses.  And such a wonderful job they have done with it!!! Way to go!!! It looks awesome and really serves as a great learning space for Natalie. It helps fill her day with appropriate learning and exploring activities.

And with that, I must share the next step for Natalie.  In the video clip below, you will see Natalie using her teaching area to learn to communicate in an appropriate manner.  Since Natalie is nonverbal, one of her biggest struggles is finding ways communicate and express herself.  Two of the main ways she communicates is by banging her head and/or screaming and crying.  Both of which, we would like to shape into more effective communication techniques.  Over time she has learned if I bang my head someone will come and help me or redirect me.  The current forms of communication provide her with the attention she is seeking.  

So as a team we have come up with an alternate plan when she bangs her head.  We do not give her verbal attention or eye contact. We simply put our hand in the space she is banging so it is a softer surface but direct our attention to something else that is going on the room so she does not get attention for the head banging.  This was a technique I learned from the training I did regarding Applied Behavior Analysis with Jill Koertner and her K-Cart team. 

Like you all know, this technique alone will not curb the behavior. We have to teach a new skill.  The skill we are teaching is for Natalie to learn to communicate her need for attention and/or help by using a come here button 


Here are the video clips showing Natalie’s speech therapist, Andrea Carmichael, and I during a home visit teaching the come here button to Natalie’s mom and home nurse.  Because they were recorded during a collaborative home visit you will hear Natalie’s team and I brainstorming how the button should work.  I am hoping the brainstorming you will here will be helpful as you watch it and not be a distraction to seeing what Natalie is learning and doing. 


It is definitely a work in progress at school and home. We have incorporated the big come here button as well as a device with four buttons that have come here, all done, and help on them.   


The fourth button is strategically left blank.  When Natalie pushes it, nothing happens helping her to realize that each button has meaning and the blank button doesn’t get her anything.  This is especially important in the teaching phase of the device so we can see if she is just pushing to push or if she is pushing for purposeful communication.

A big thank you to Natalie and her family for sharing Natalie’s progress with the Considerate Classroom Family.  As a special education teacher once shared with me, the journey is a marathon not a sprint.  As Natalie grows & matures, additions, adaptations and changes to her systems will be made to best meet her needs.  She is truly an amazing little girl. A miracle who has overcome so much!!! I see so much potential in Natalie especially with the love and dedication of her parents, brother and grandparents.  She is so blessed to have such wonderful family support and nursing care.   

And my blessing is to have the opportunity to work them.  I have learned so much from them and truly admire the love and dedication they have for each other.  Natalie has taught me so much.  Her family’s willingness to let me come into their home and strategize and plan with them has been an amazing opportunity.  I have learned to celebrate all gains...big or small.  There's no doubt that Natalie came into my life to remind me to appreciate each moment and all that I have. 

I have the utmost respect for all parents raising special needs children.  Parenting is such a hard job especially when the job is intensified by special needs.  In my experience, there are often so many questions for these parents: Where do I turn? What do I do? Who can help?. It changes your life in more ways than can be identified or counted.  My hope, as a special education teacher, is that I can be the support you need and share what I have been blessed to have learned from others.