In our classroom, the social center is used for our morning friends who are just starting to learn pre-academic skills and increase attention spans, time on tasks, and appropriate social interactions. I plan 5 to 6 social games and activities for our students to play at the social center for 10 to 12 minutes. These activities are done on the floor in a specific place in the classroom.
For math, I plan 2 to 3 activities for a 12 to 15 minute small group time that is completed at a small round table. My paras do math at a table so the students are one step closer to the in-seat desk work typical of kindergarten.
Math activities are designed for my older and higher skill-level kids in the afternoon session. Most of them will be headed to kindergarten or a more typical preschool classroom in the fall so it is important that we have a plan for increasing demands and supporting generalization of skills.
That being said, we do have a few students in our afternoon program that need more support to complete math small group activities. In those cases, the students may do a shortened math center followed by a preferred ‘then’ activity such as a reinforcement like iPad time or sensory play.
On other occasions, we may incorporate functional errands or independent tasks and layered grouping to support active engagement specific to the level of each student. I will get into examples of those at a later date. For now, I would like you to see math firsthand via another great video of my boys and me reenacting math small group. They are getting good at it if I must say so myself [. . . Okay, I am a little biased! ;)].
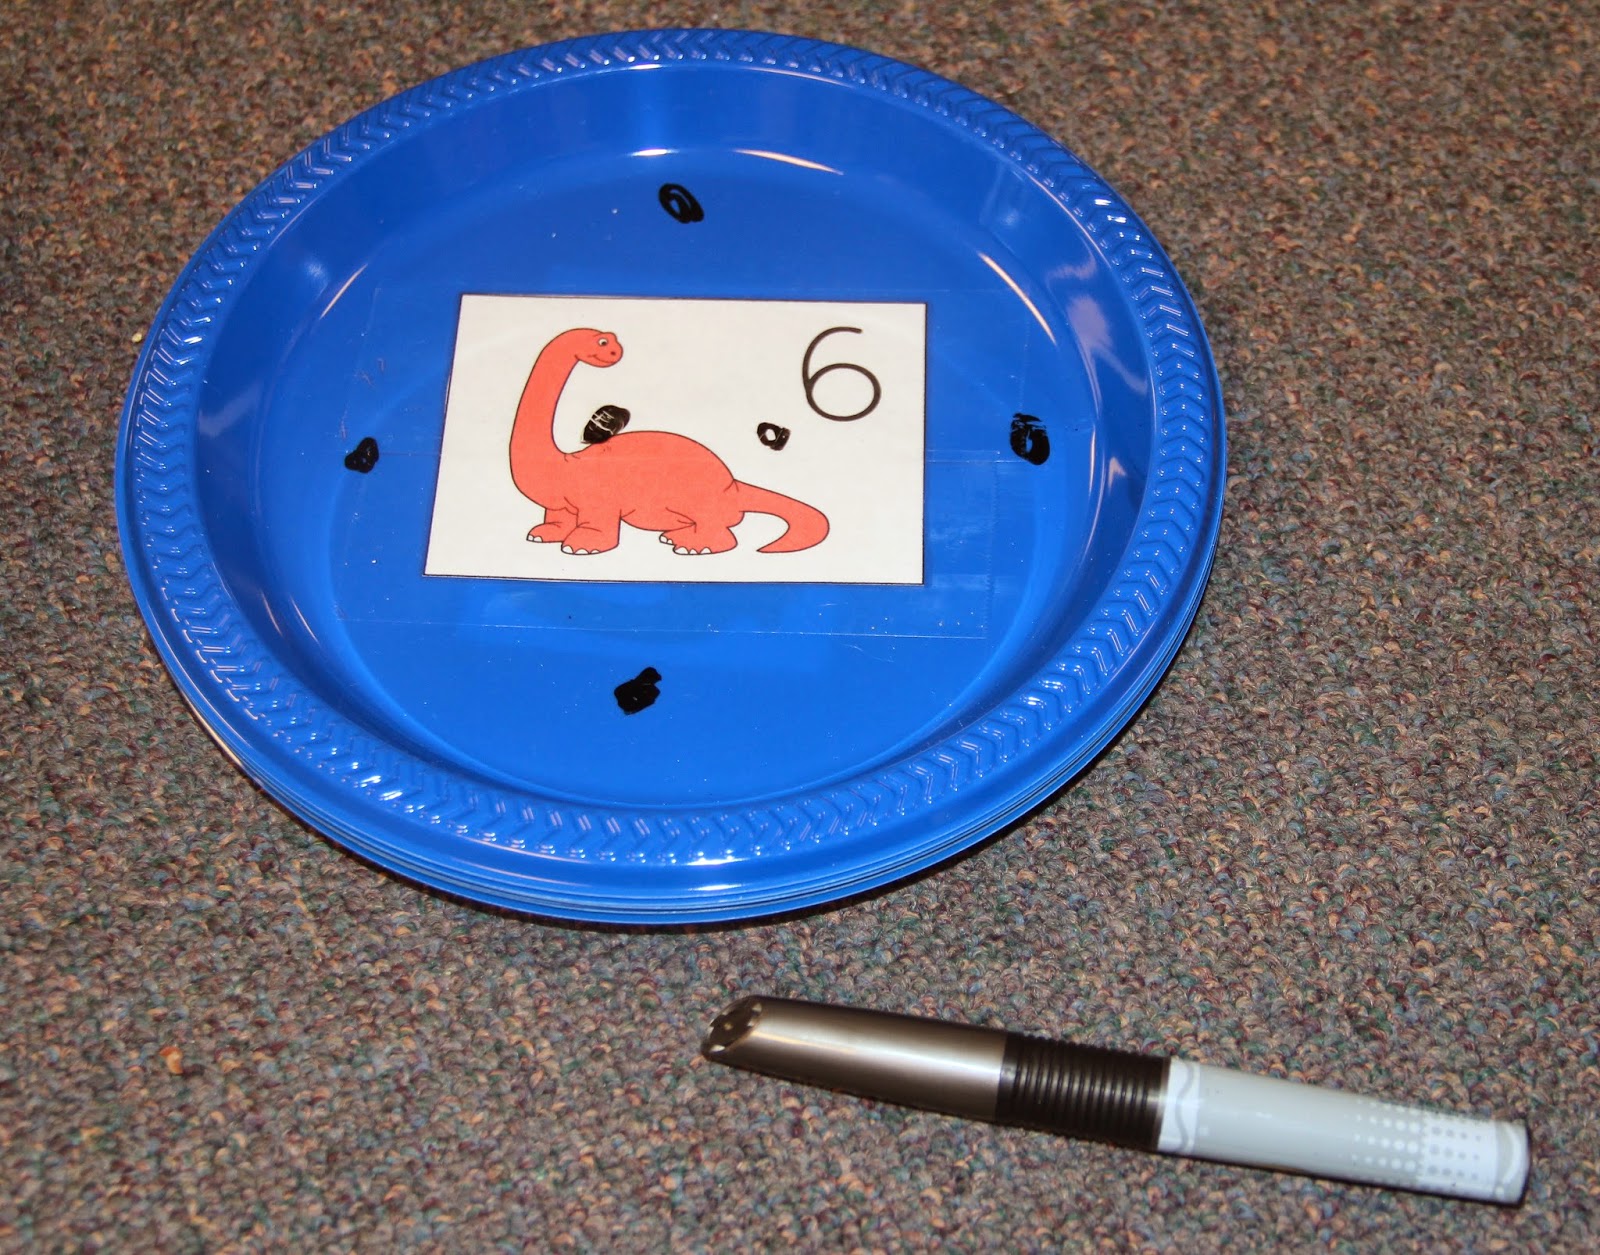
You may have noticed in the video that I incorporated differentiated instruction as my two year old and six year old are clearly not at the same level. For example in Activity #1, I attempted to have EJ read the color words on each page and had Payton simply follow along in his book. Then when it was time to color, I had EJ attempt to find the correct page number and Payton simply find the color yellow to color the dinosaur. My expectation for Payton was simply to color in the space and for EJ the demand was to color the whole dinosaur inside the lines.
Please note the difference in expectations can inhibit the boys from finishing the activity at the same time so it is important for me to plan accordingly. For instance, Payton may be asked to reread the story with me while EJ finishes or maybe he works on naming colors with the crayons in his box. Whatever the case may be, it is important to keep kids engaged and limit wait time because wait time invites students to get off task and act out.
Here is a closer look at Activity #1.
.JPG)
It is a dinosaur book printed from kidssoup.com. If you are just starting out with collecting materials and activities for students, kidsoup is a great resource! Especially if you plan to go the thematic route that our classroom has chosen! I feel like by using thematic units, I keep myself accountable. Our themes change every two to three weeks so it keeps me on my toes. I have to change out activities at least every two to three weeks.
One last point to notice with activity one, I placed the crayons for each student in small pencil boxes that snap. It's great fine motor practice for them and a great way to support structure as when the student is finished the crayons must be put away. You may have also noticed in the video, I have all my materials at my fingertips by placing them on the floor beside me. By having them there rather than on the table, the kids know what they need to focus on in each moment. One way you can keep all your materials close to eliminate wait time but also help students know what they need to be working on when is by using a plastic drawer system with wheels from Wal-Mart.
.jpg)
This system also provides a visual for the students so they know how much work they have to do. You can actually number the drawers and add an "all done" icon to the front after completing each one to support understanding of how much work.
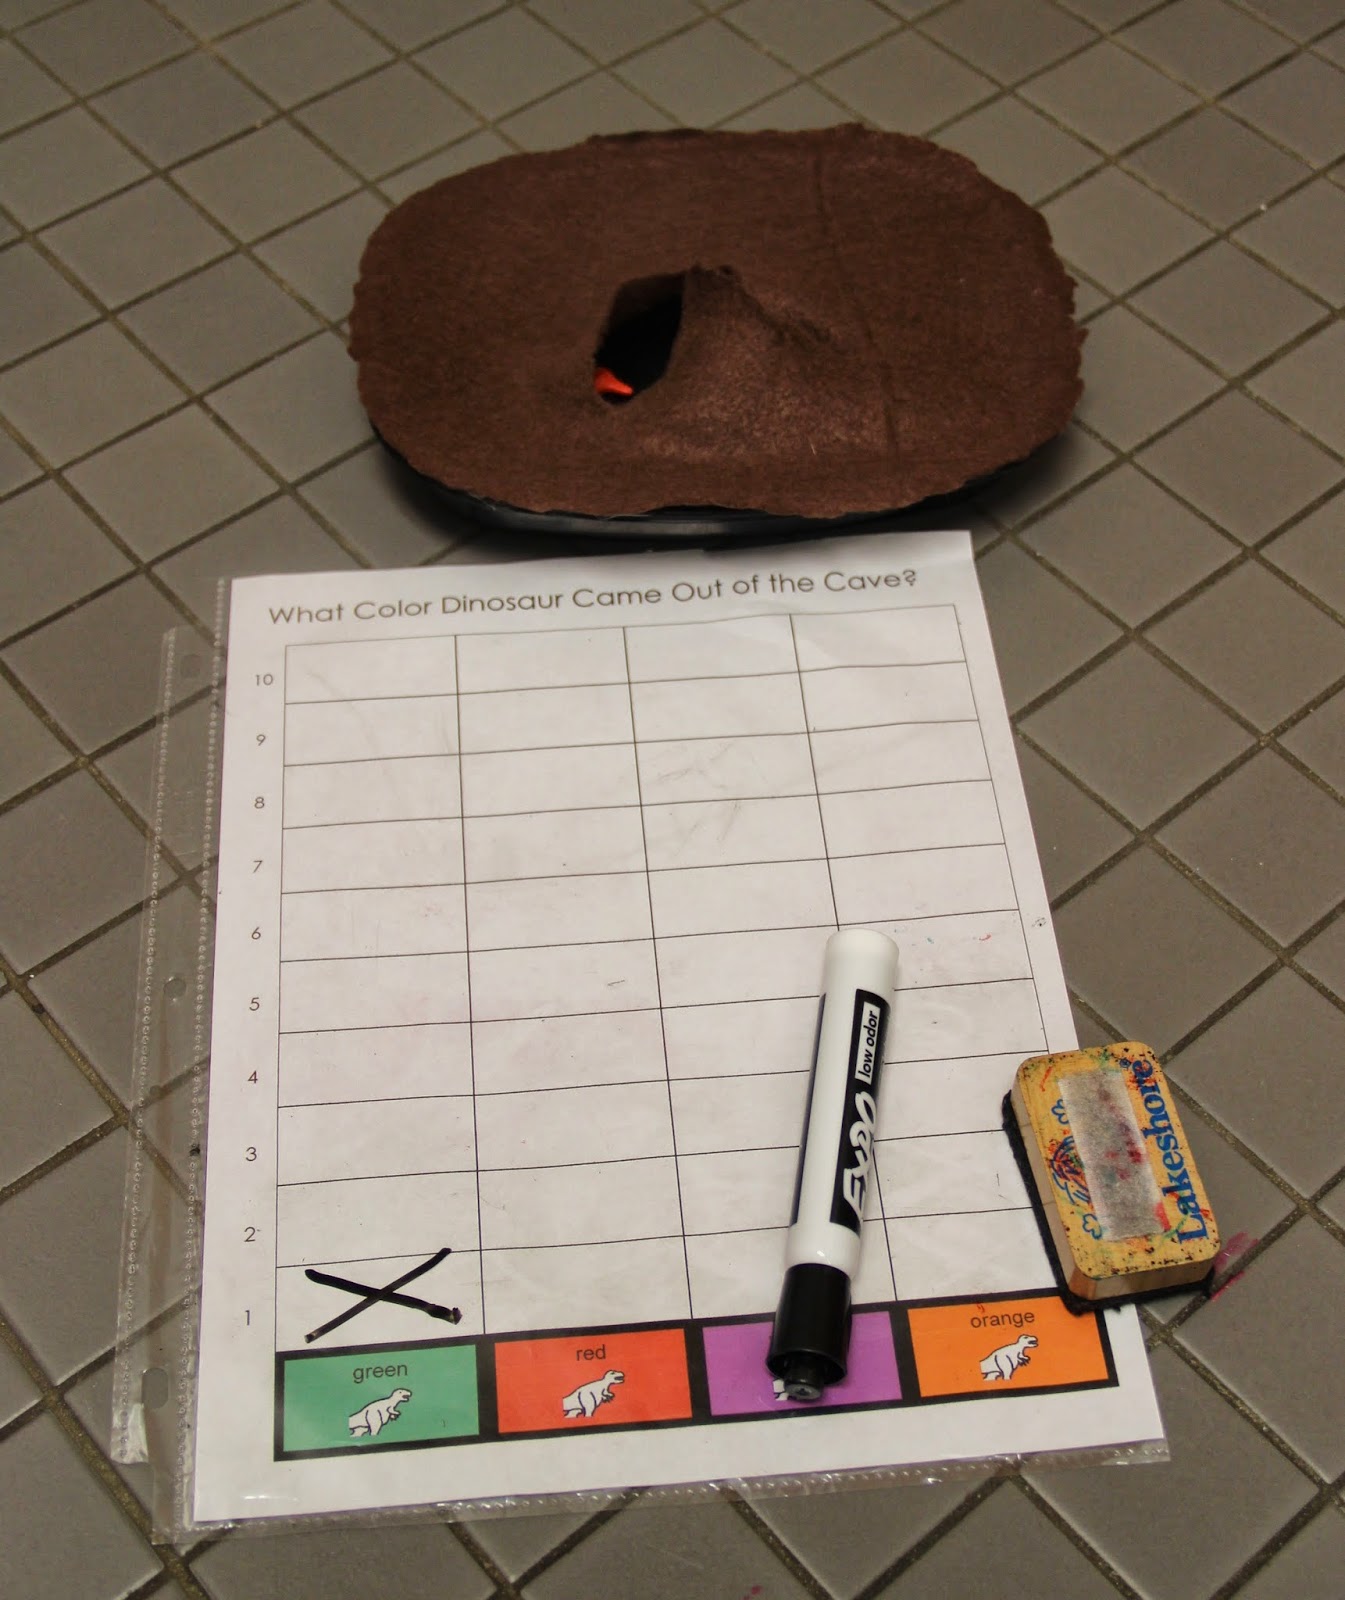
Which leads me to Activity #2, it also has two levels. Payton was simply sorting while EJ was graphing. (Its worksheet appearance makes it a great precursor to kindergarten!) Note: We put the graph in a page protector to save on copying as it is used several times throughout our dinosaur unit.
.JPG)
.jpg)
Notice that the boys could understand how many they had to graph or sort by feeling inside the cave. This helps them understand how much work they have to do and ultimately decreases anxiety and unwanted behavior. If needed, I also have the ability to change the amount of work that needs to be done by adding or removing a few dinosaurs from the cave.
Moving on to Activity #3, it is not leveled by work but rather by the questions I asked. For example, I instructed Payton to find the purple dinosaurs and EJ to determine which color had the most dinosaurs. The great thing about Activity #3 is that it incorporates working together as a team. As much as my boys didn’t love giving each other a high five at the end, the activity lent itself to a “Good job, WE did it!”
.jpg)
So there you have it, one day in the life of kids at small group math! Leading me to a good point....to encourage consistency but also spruce routines up with a little novelty, I plan different math games for each day of the week and then we rotate through them throughout each unit.
Above you saw activities for Mondays during our dinosaur unit. Below you will see a few other examples from the rest of the week. Each one leveled for student success. Keep in mind each day during our dinosaur unit, we color a page in our dinosaur big and small book so that the book is complete by the end of the unit. We then followed coloring up with these activities specific to the day of the week.
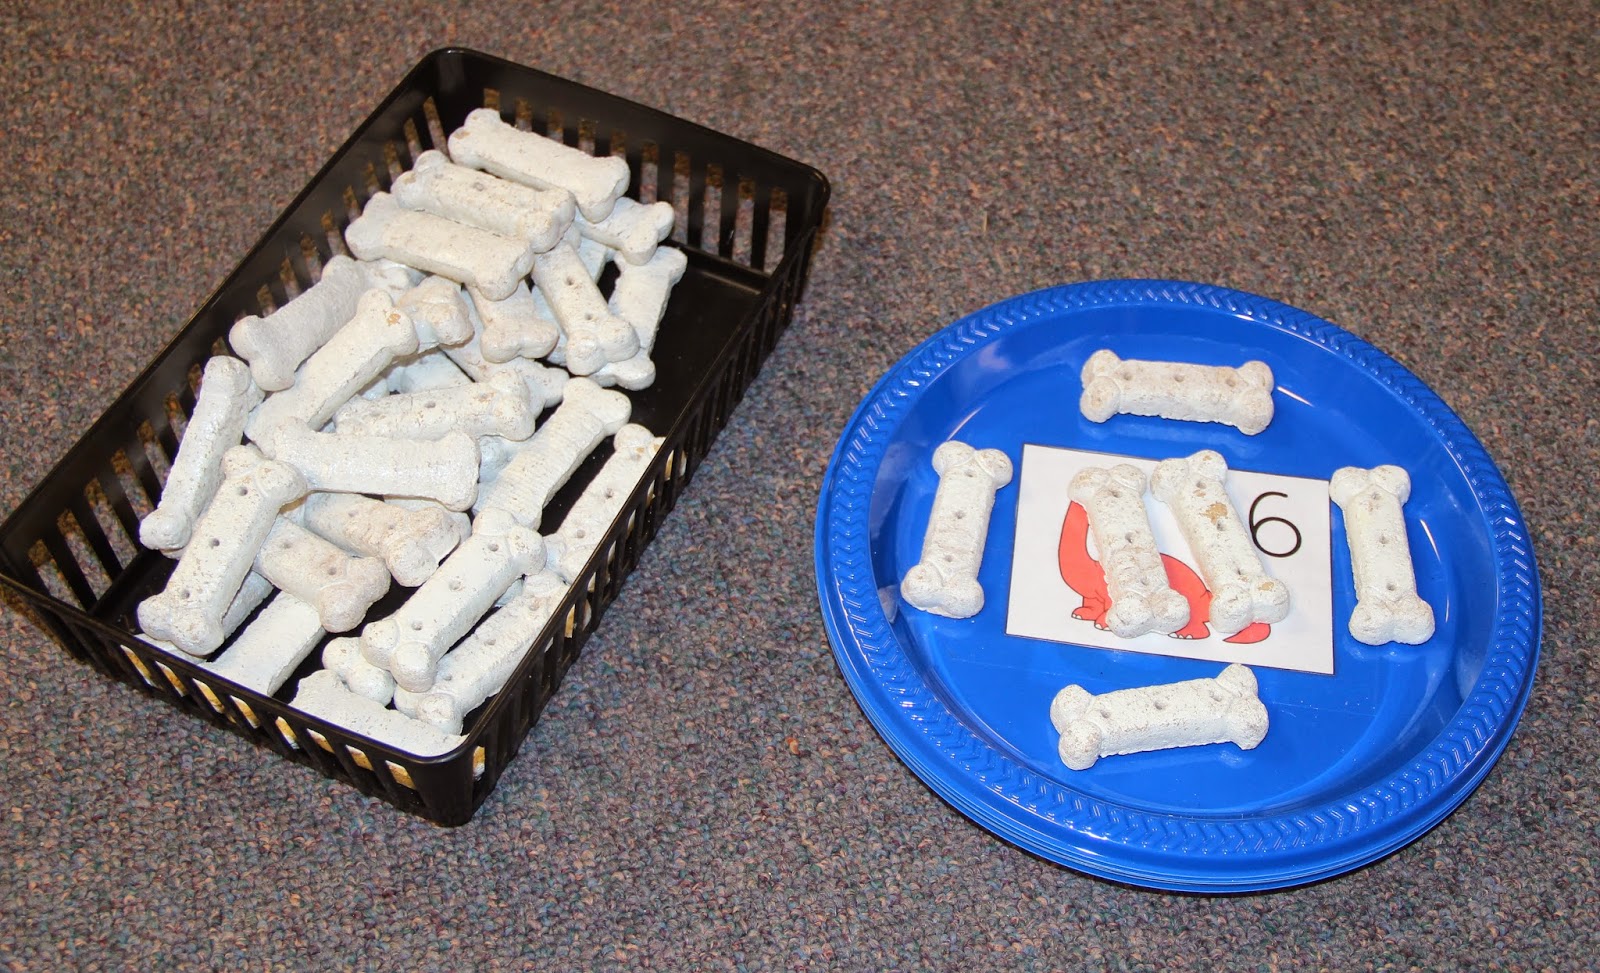
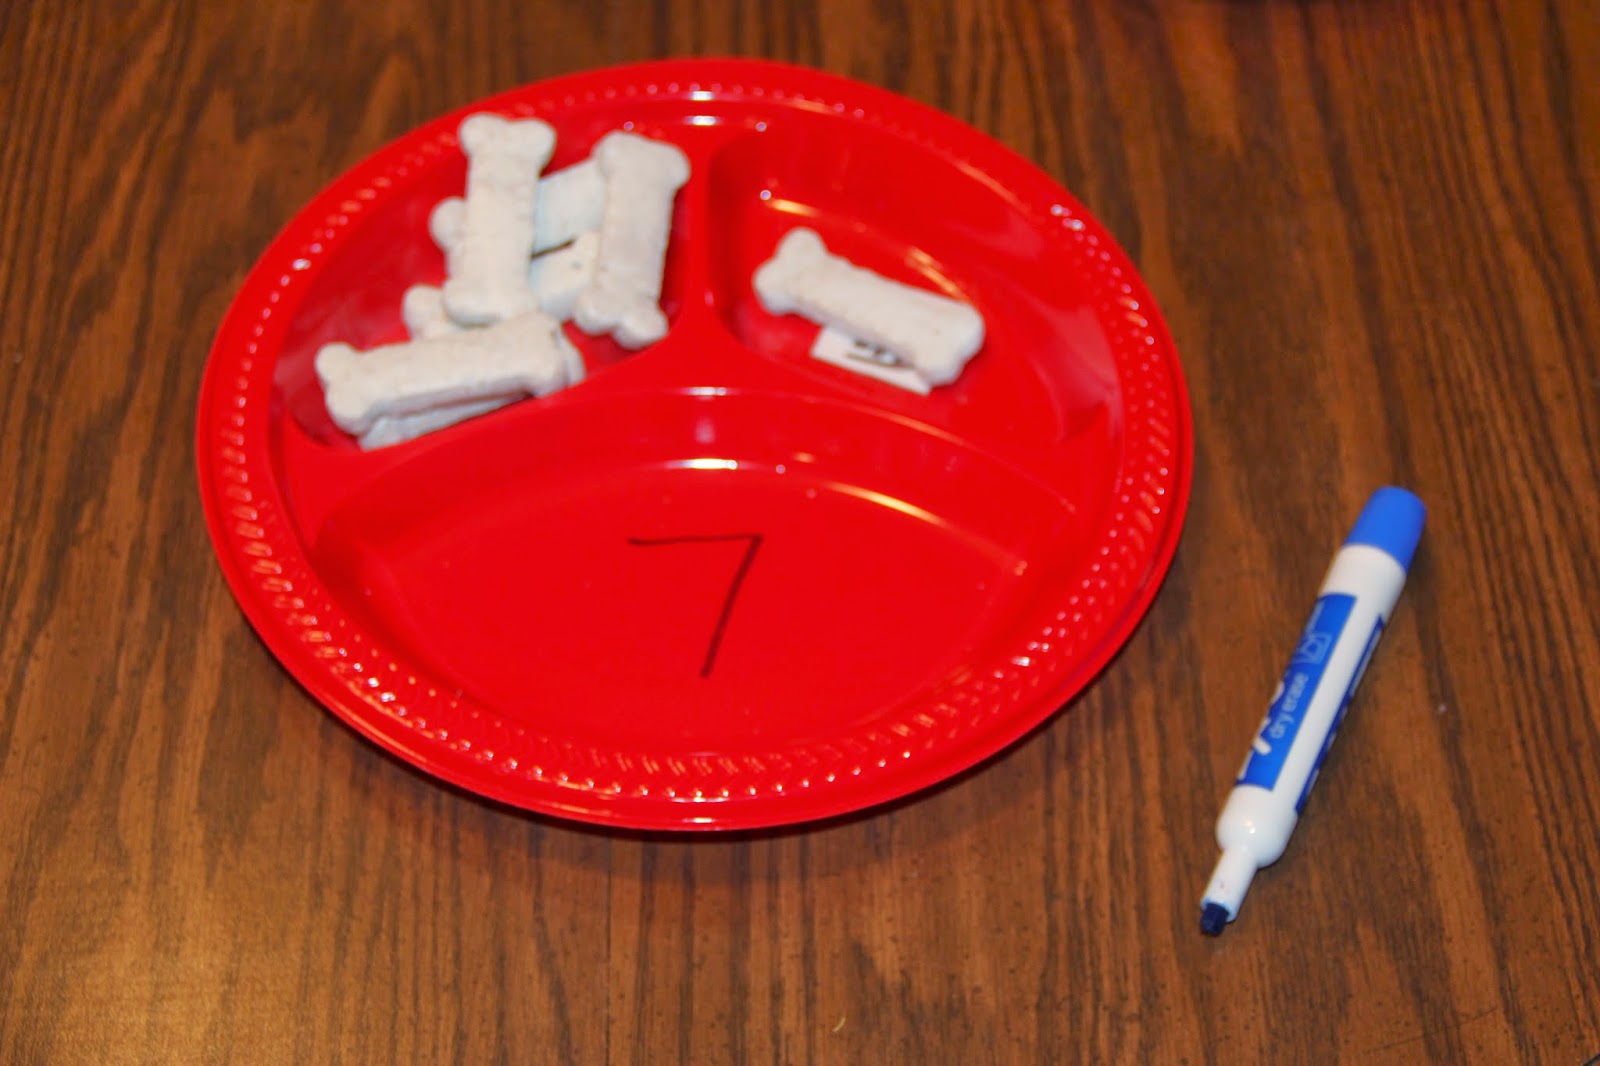
Dinosaur Bone Count & Addition
.jpg)
.jpg)
.jpg)
The kids count out dinosaur bones (spray-painted dog treats) for each plate. Note the plate is a plastic plate allowing us to add dry erase marker marks to support one-to-one correspondence. Also, I incorporated the plastic plates with three divisions for kiddos that are ready for simple addition with objects. This idea was another great one provided by KidsSoup!
Dinosaur Listening

Triceratops Play


This game was printed from Mailbox Magazine. Students roll a color die and a number die. Depending on the student's level, either the color word or color and number die or dot die to see what part of triceratops to color each body part.
Hopefully, these activities got your wheels turning! The whole idea is that kids learn best with hands-on activities. It is important to change it up for them but still provide the structure and visuals needed for success. It is important to instruct all children at a level that is just above their mastery level so they stay challenged and engaged without frustration or distraction.
That is the tricky part especially when we have a classroom with student's at all levels. There is definitely a science to it all! I am still working on perfecting it. However, I know I am getting closer. And WOW.... does it change how students participate, interact and learn when we use a balance of creativity and differentiated instruction to support active engagement by all students!!!
Recently, we added this visual to do just that.

It provides the students with three different activities and shows them exactly how much work they have to do before getting preferred time at sensory. (It should be shared that sensory is also math-based as the students have to dig for a center amount of items, numbers, or shapes for these wood puzzles.


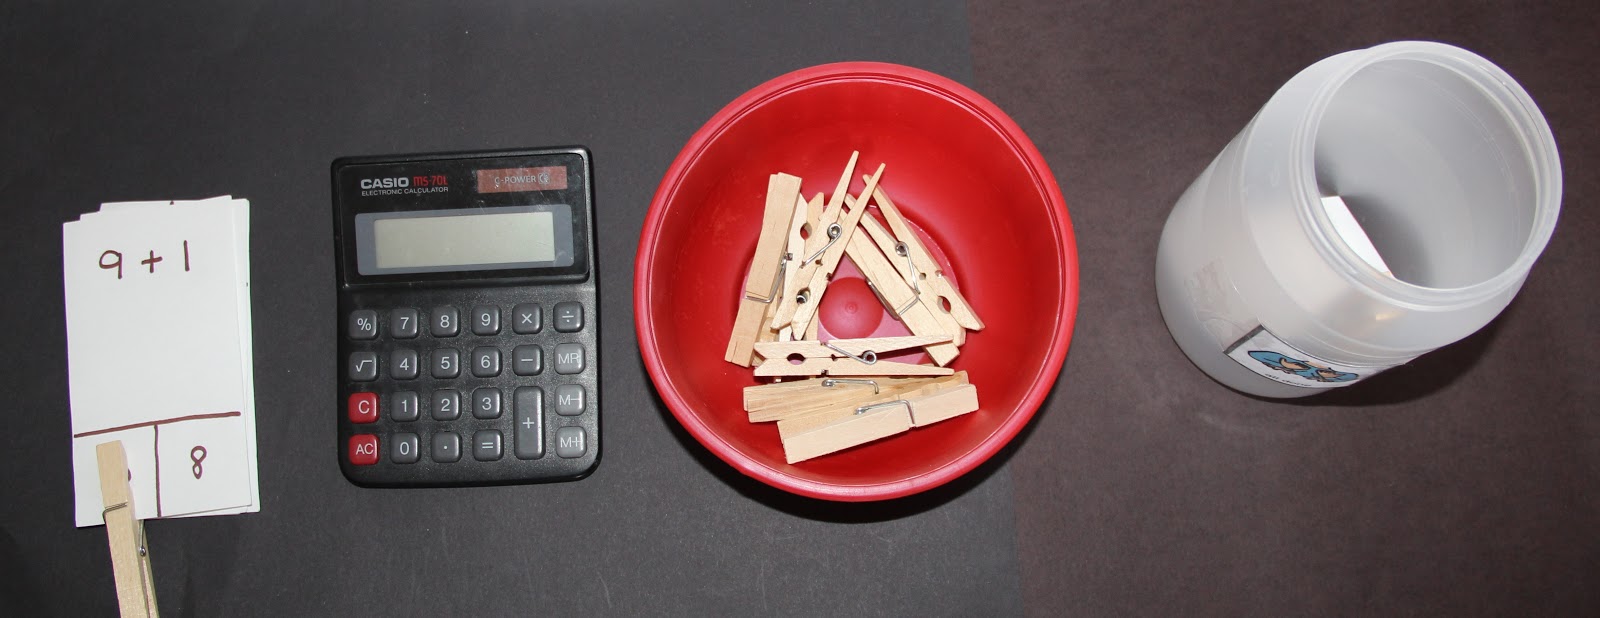
Notice the pieces to the puzzle all have Velcro to support a completed task and tell the kids how much time they get to spend at sensory. I will share more about that next week in my post about our sensory table but for now I do want to share a little bit about our "How Many?" jar!

Click the below video to see how the "How Many?" jar engages all learners every day at math.
Best wishes and Happy Math Planning until next time ...
Lindy :)